Step 1: Create Enterprise Application
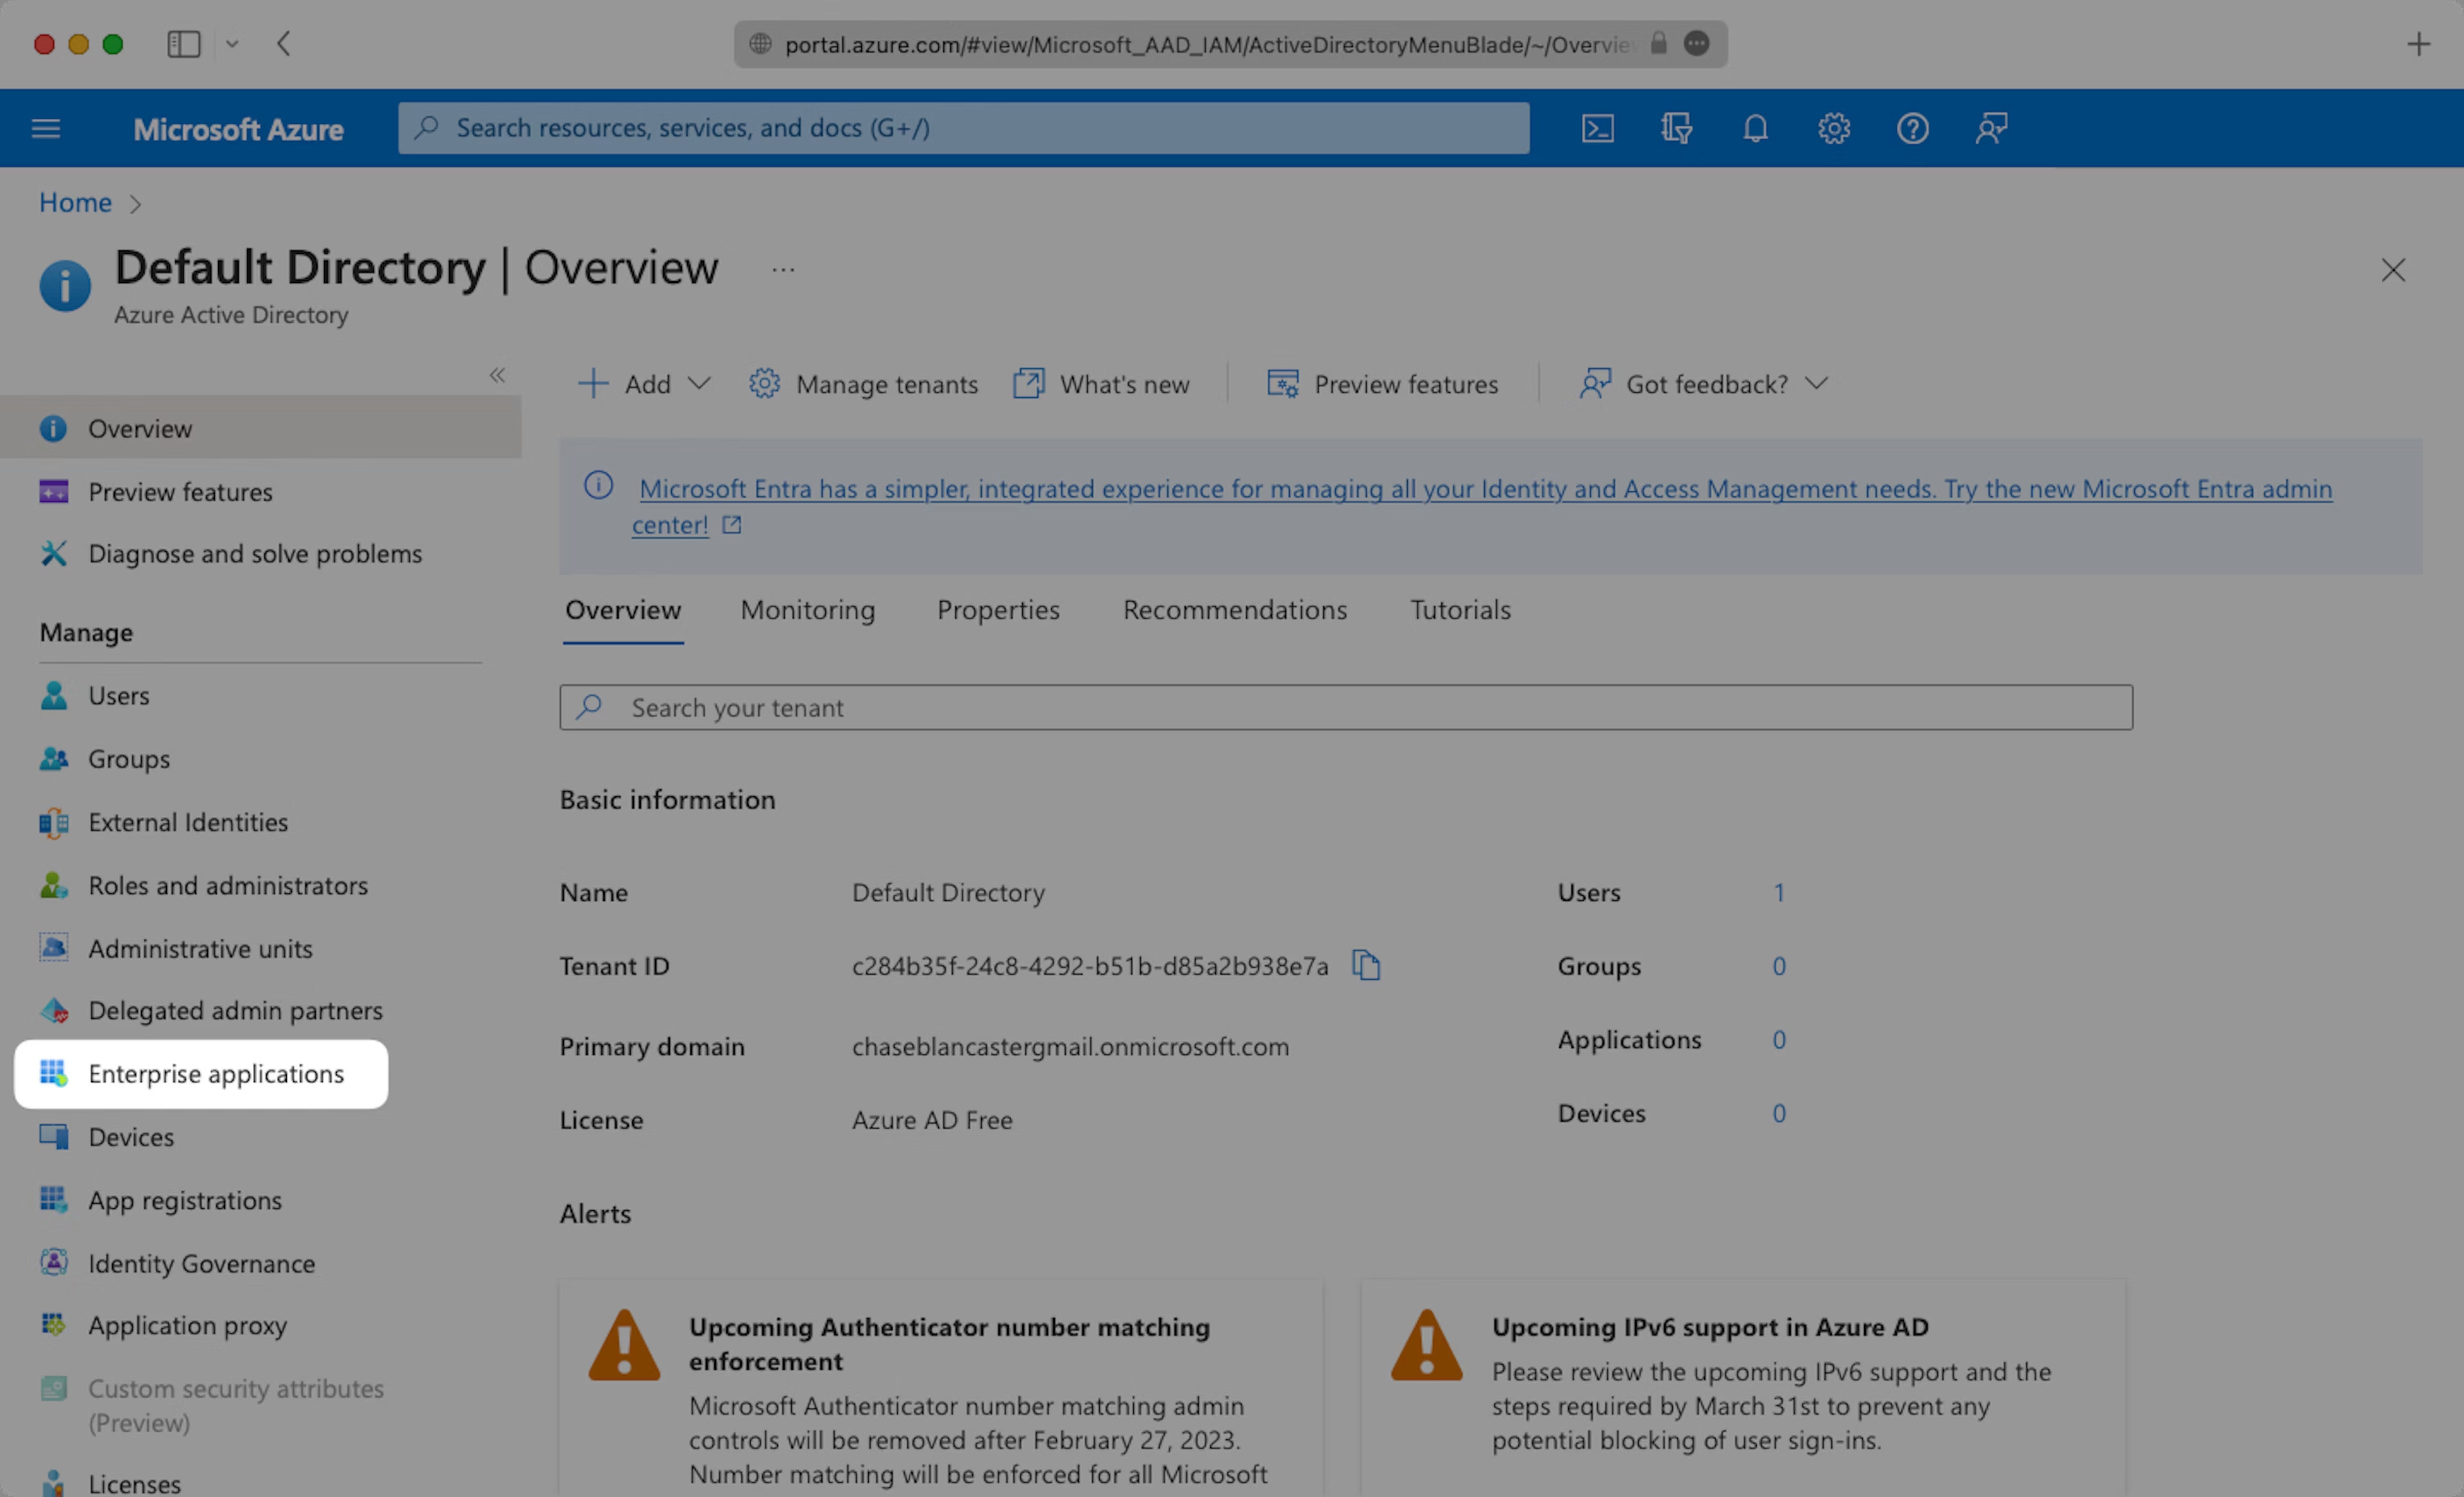
Select “Enterprise applications” from your Azure AD dashboard.
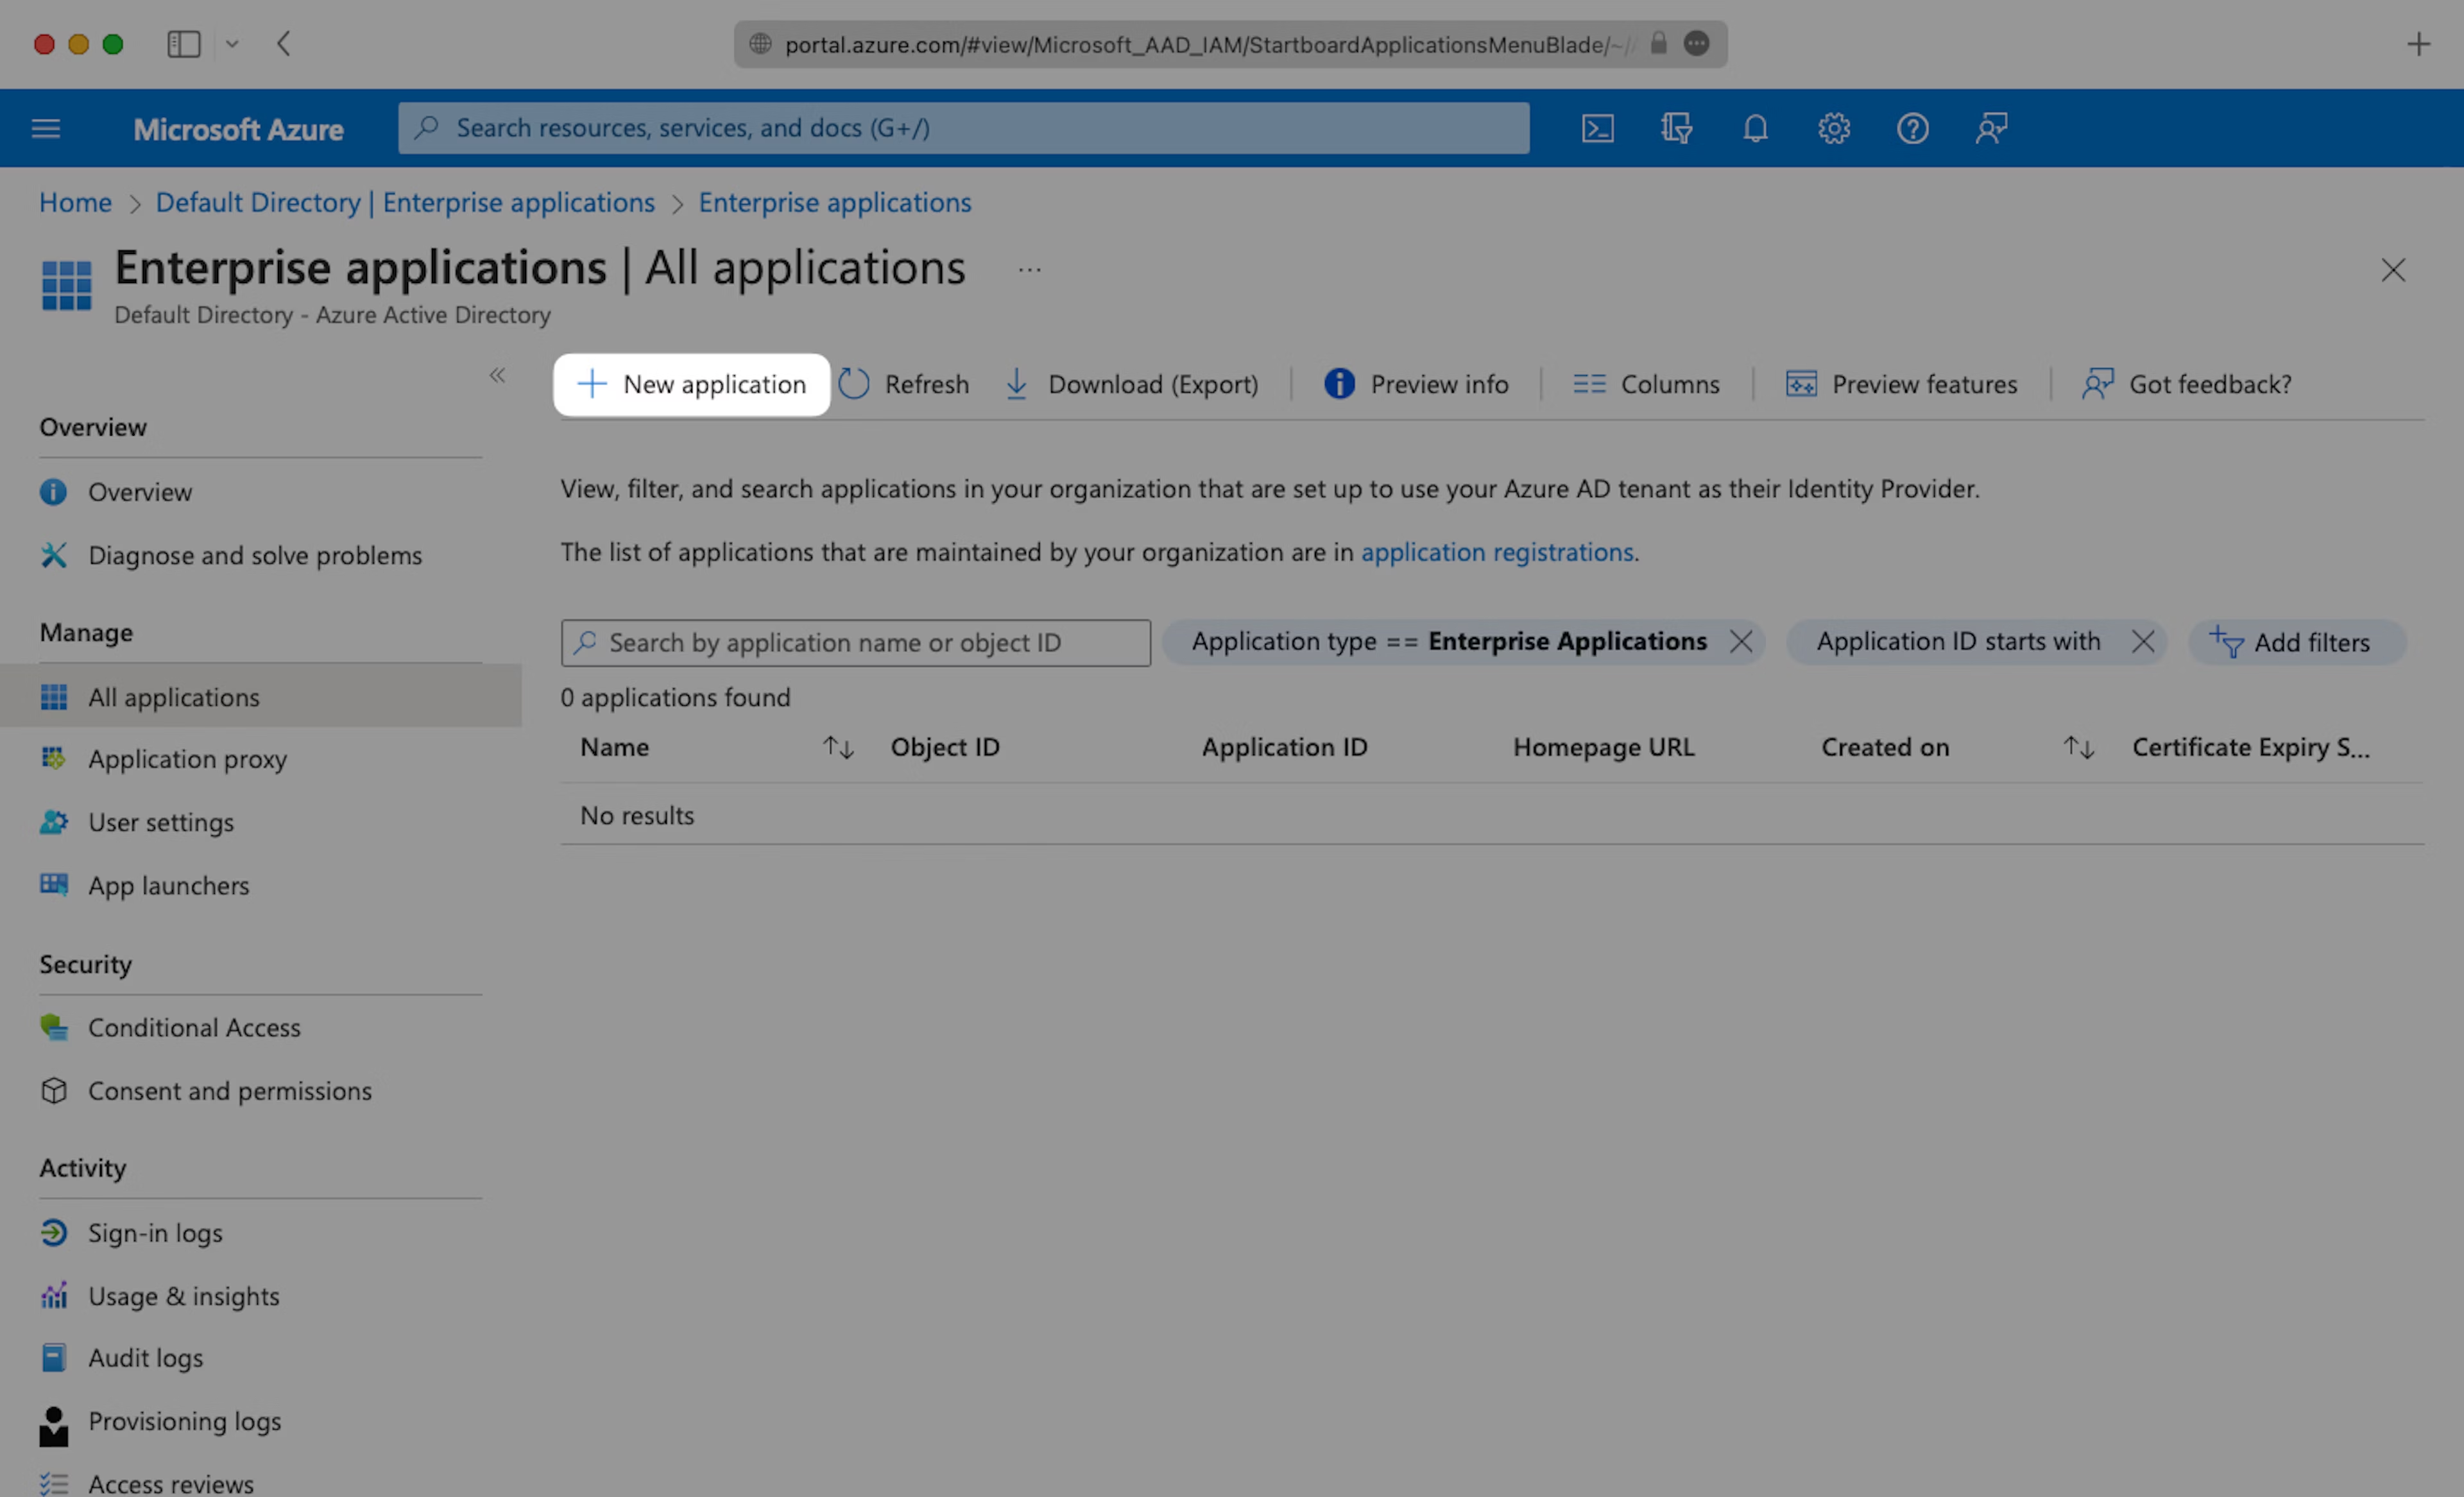
Click “New application” and continue.
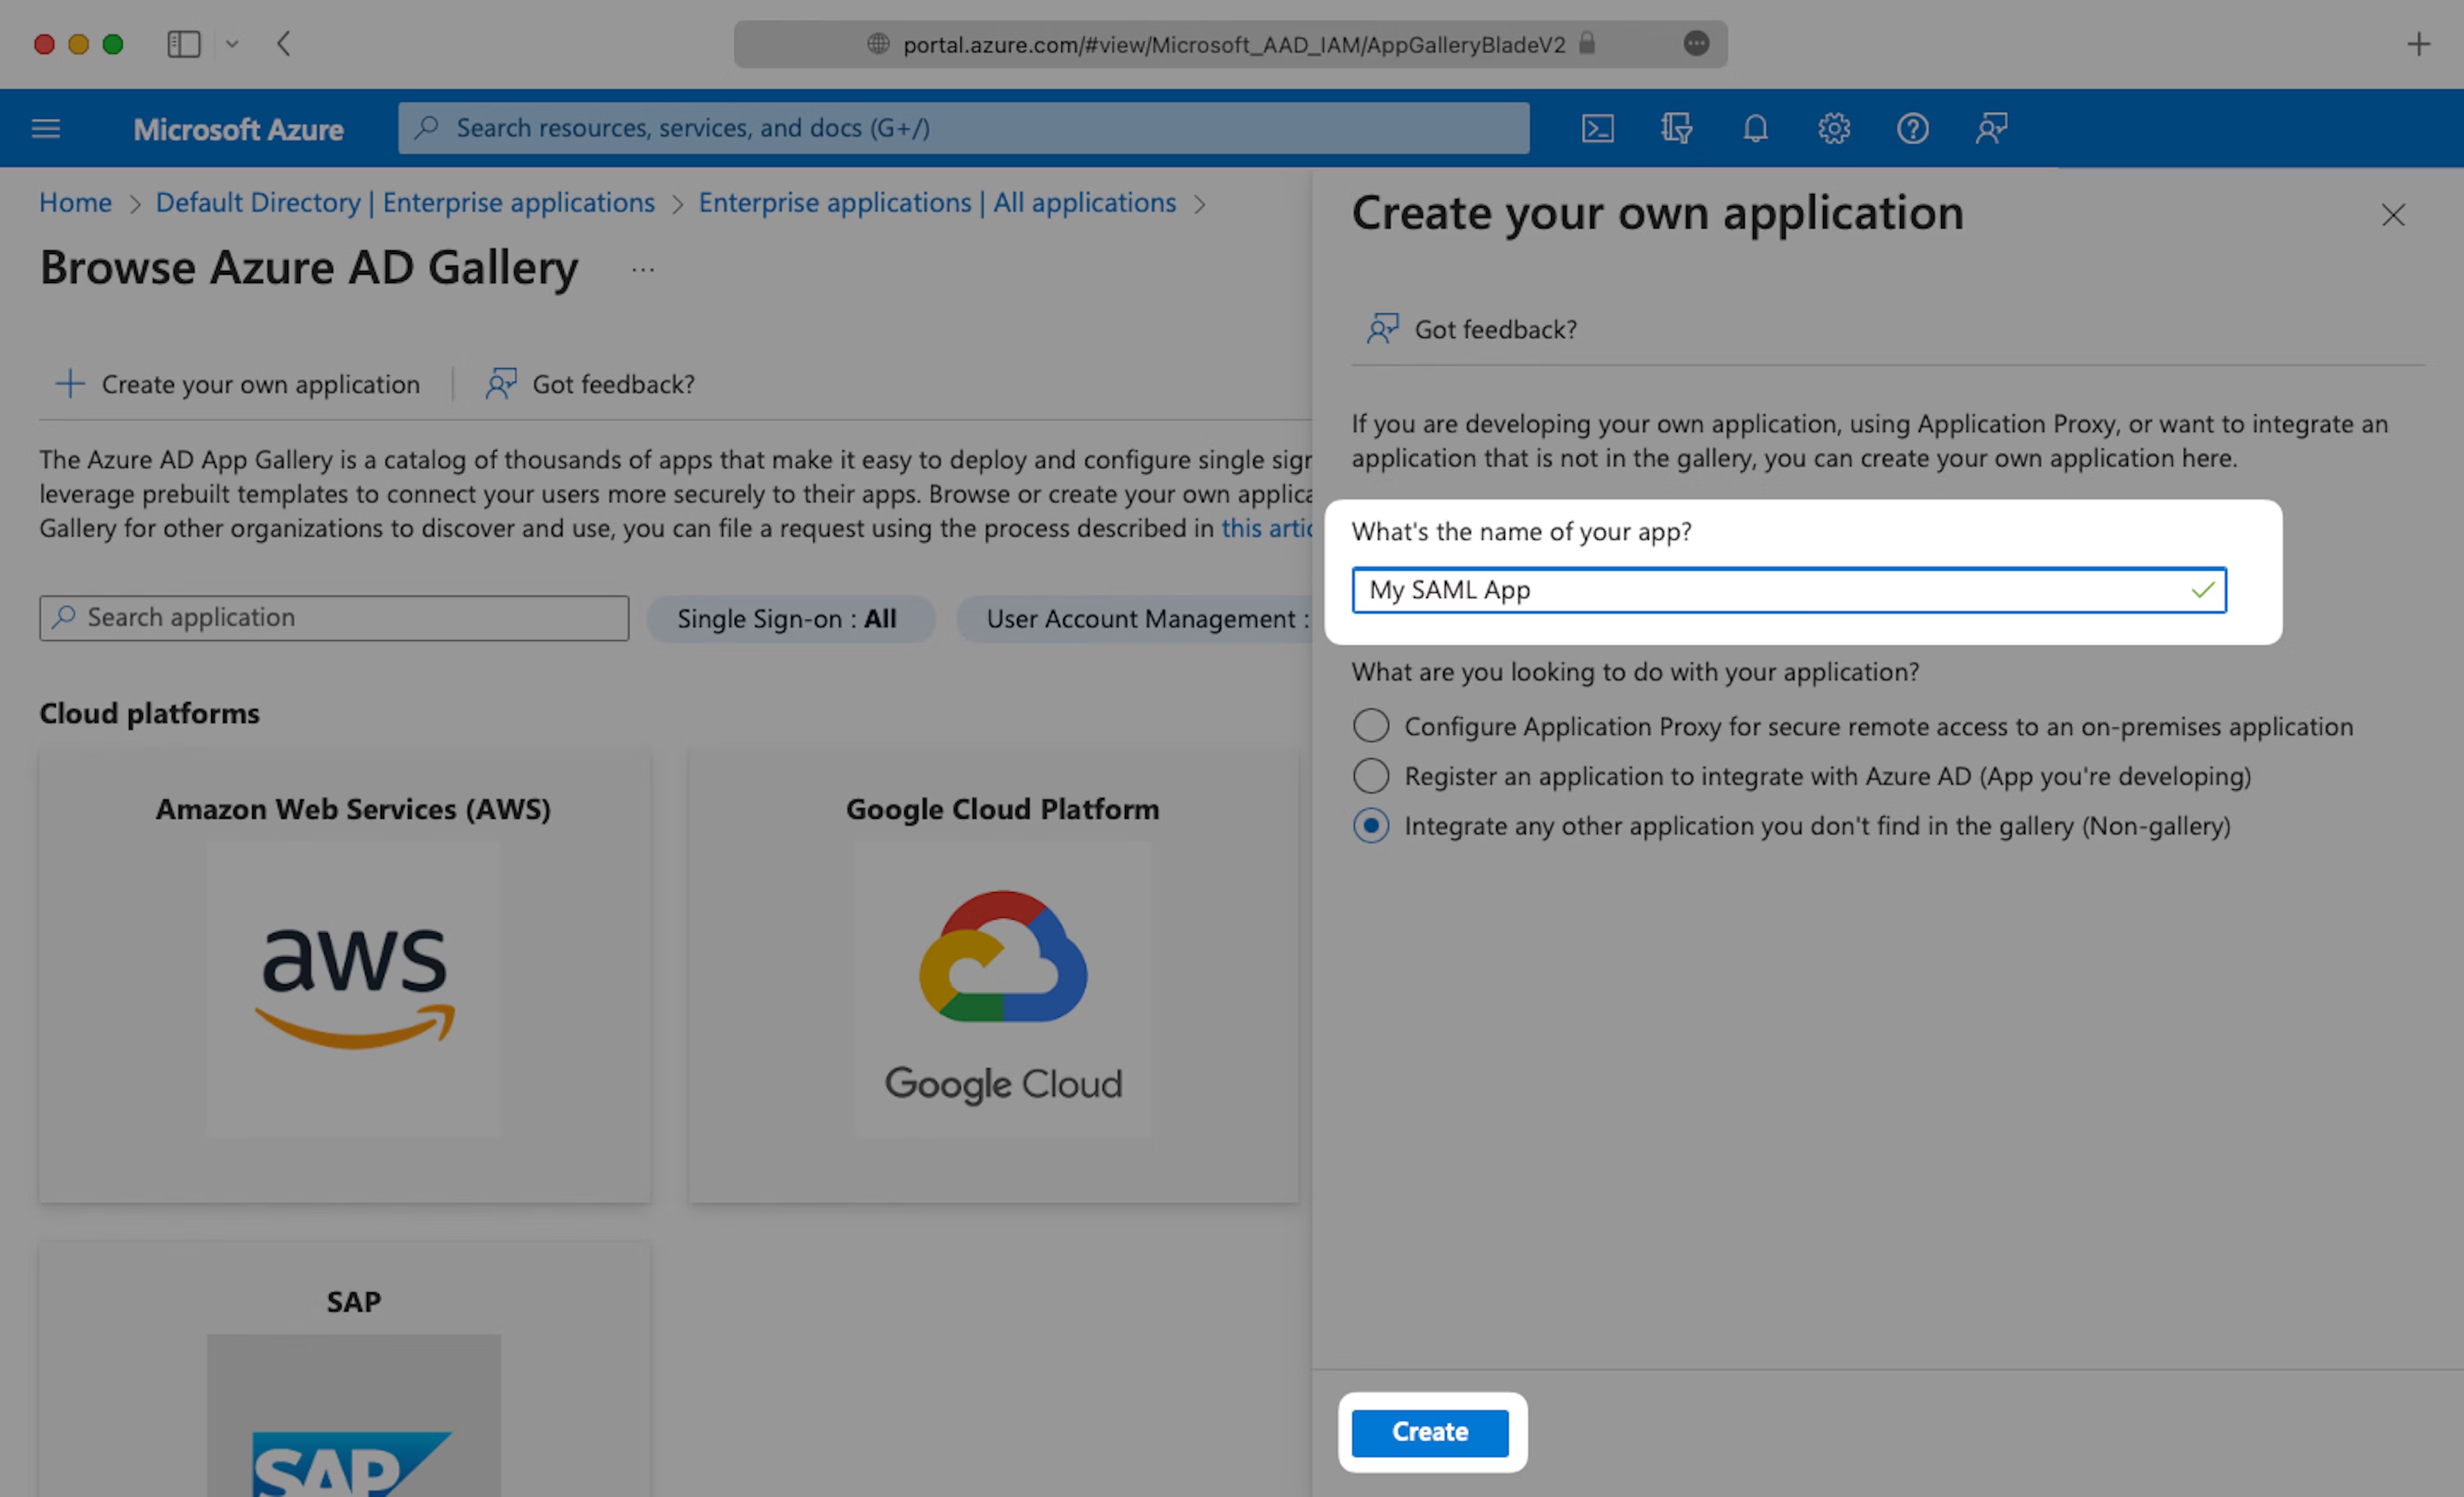
Select “Create your own application”, then enter an App name that describes Teaminal. Under “What are you looking to do with your application?”, select “Integrate any other application you don’t find in the gallery (Non-gallery)”, then select “Create”.
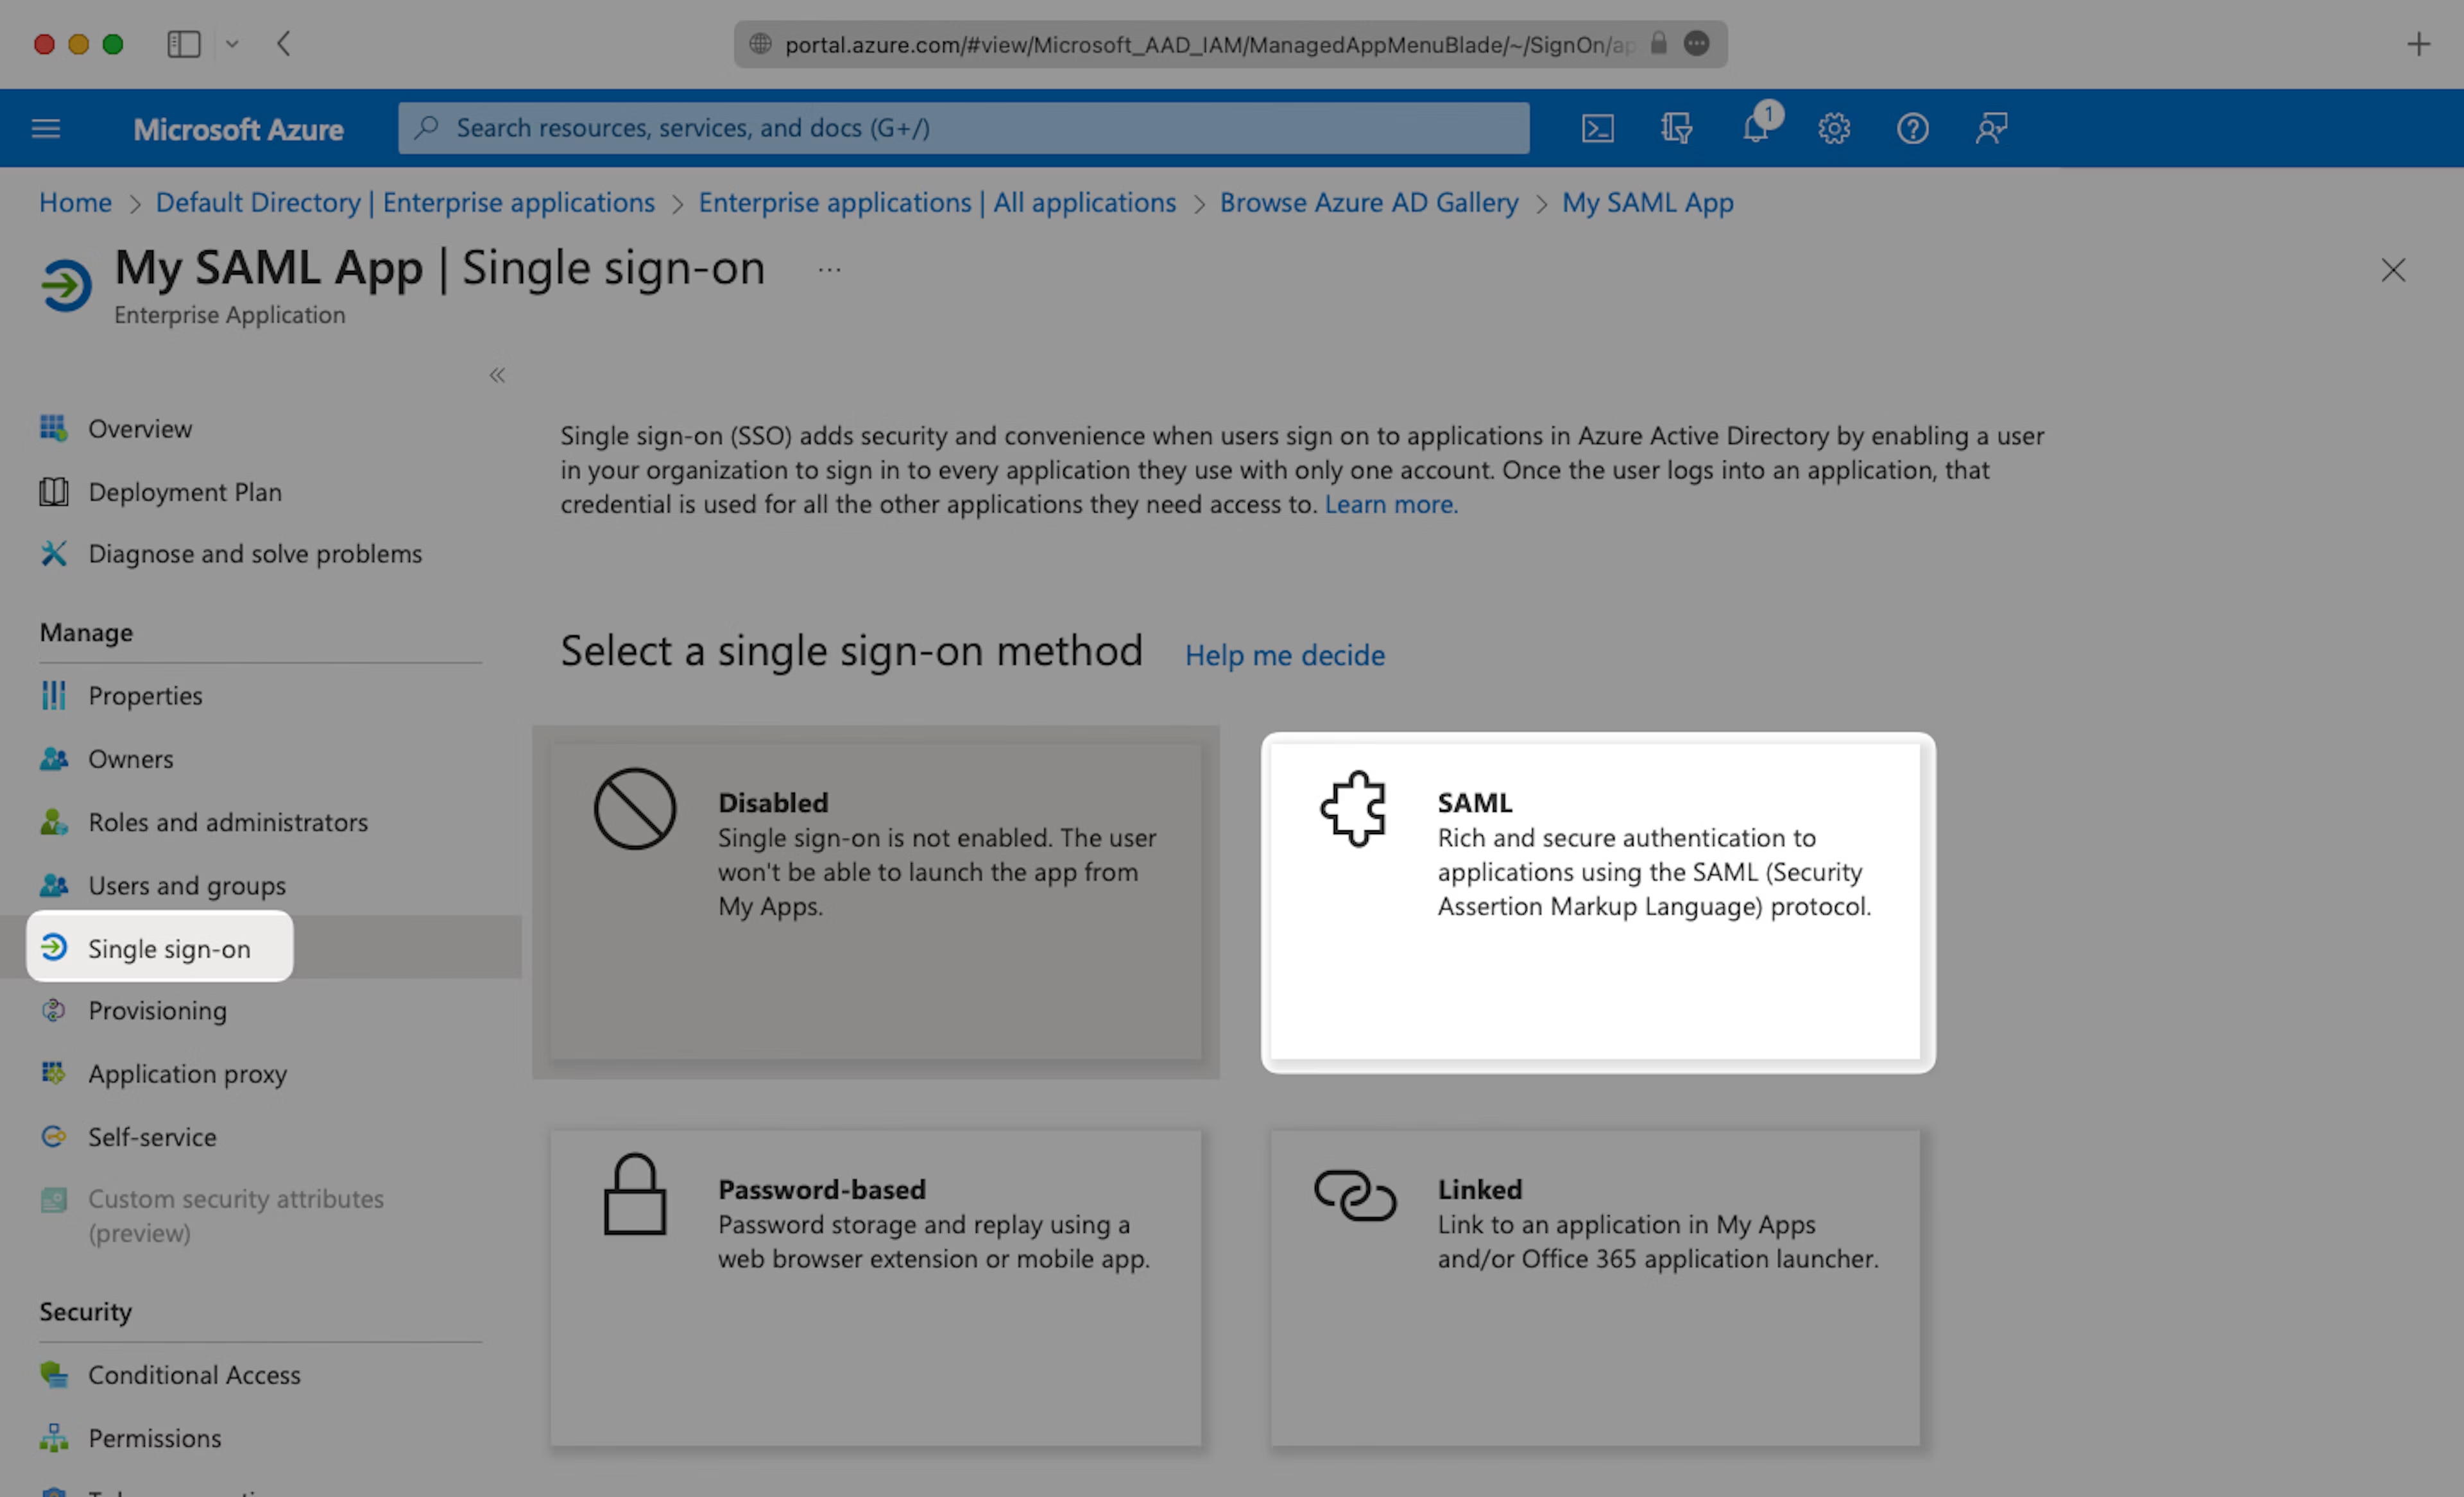
Next, select “Single Sign-On” from the “Manage” section in the left sidebar navigation menu, and then “SAML”.
Step 2: Basic SAML Configuration
Click the Edit icon in the top right of the first step.
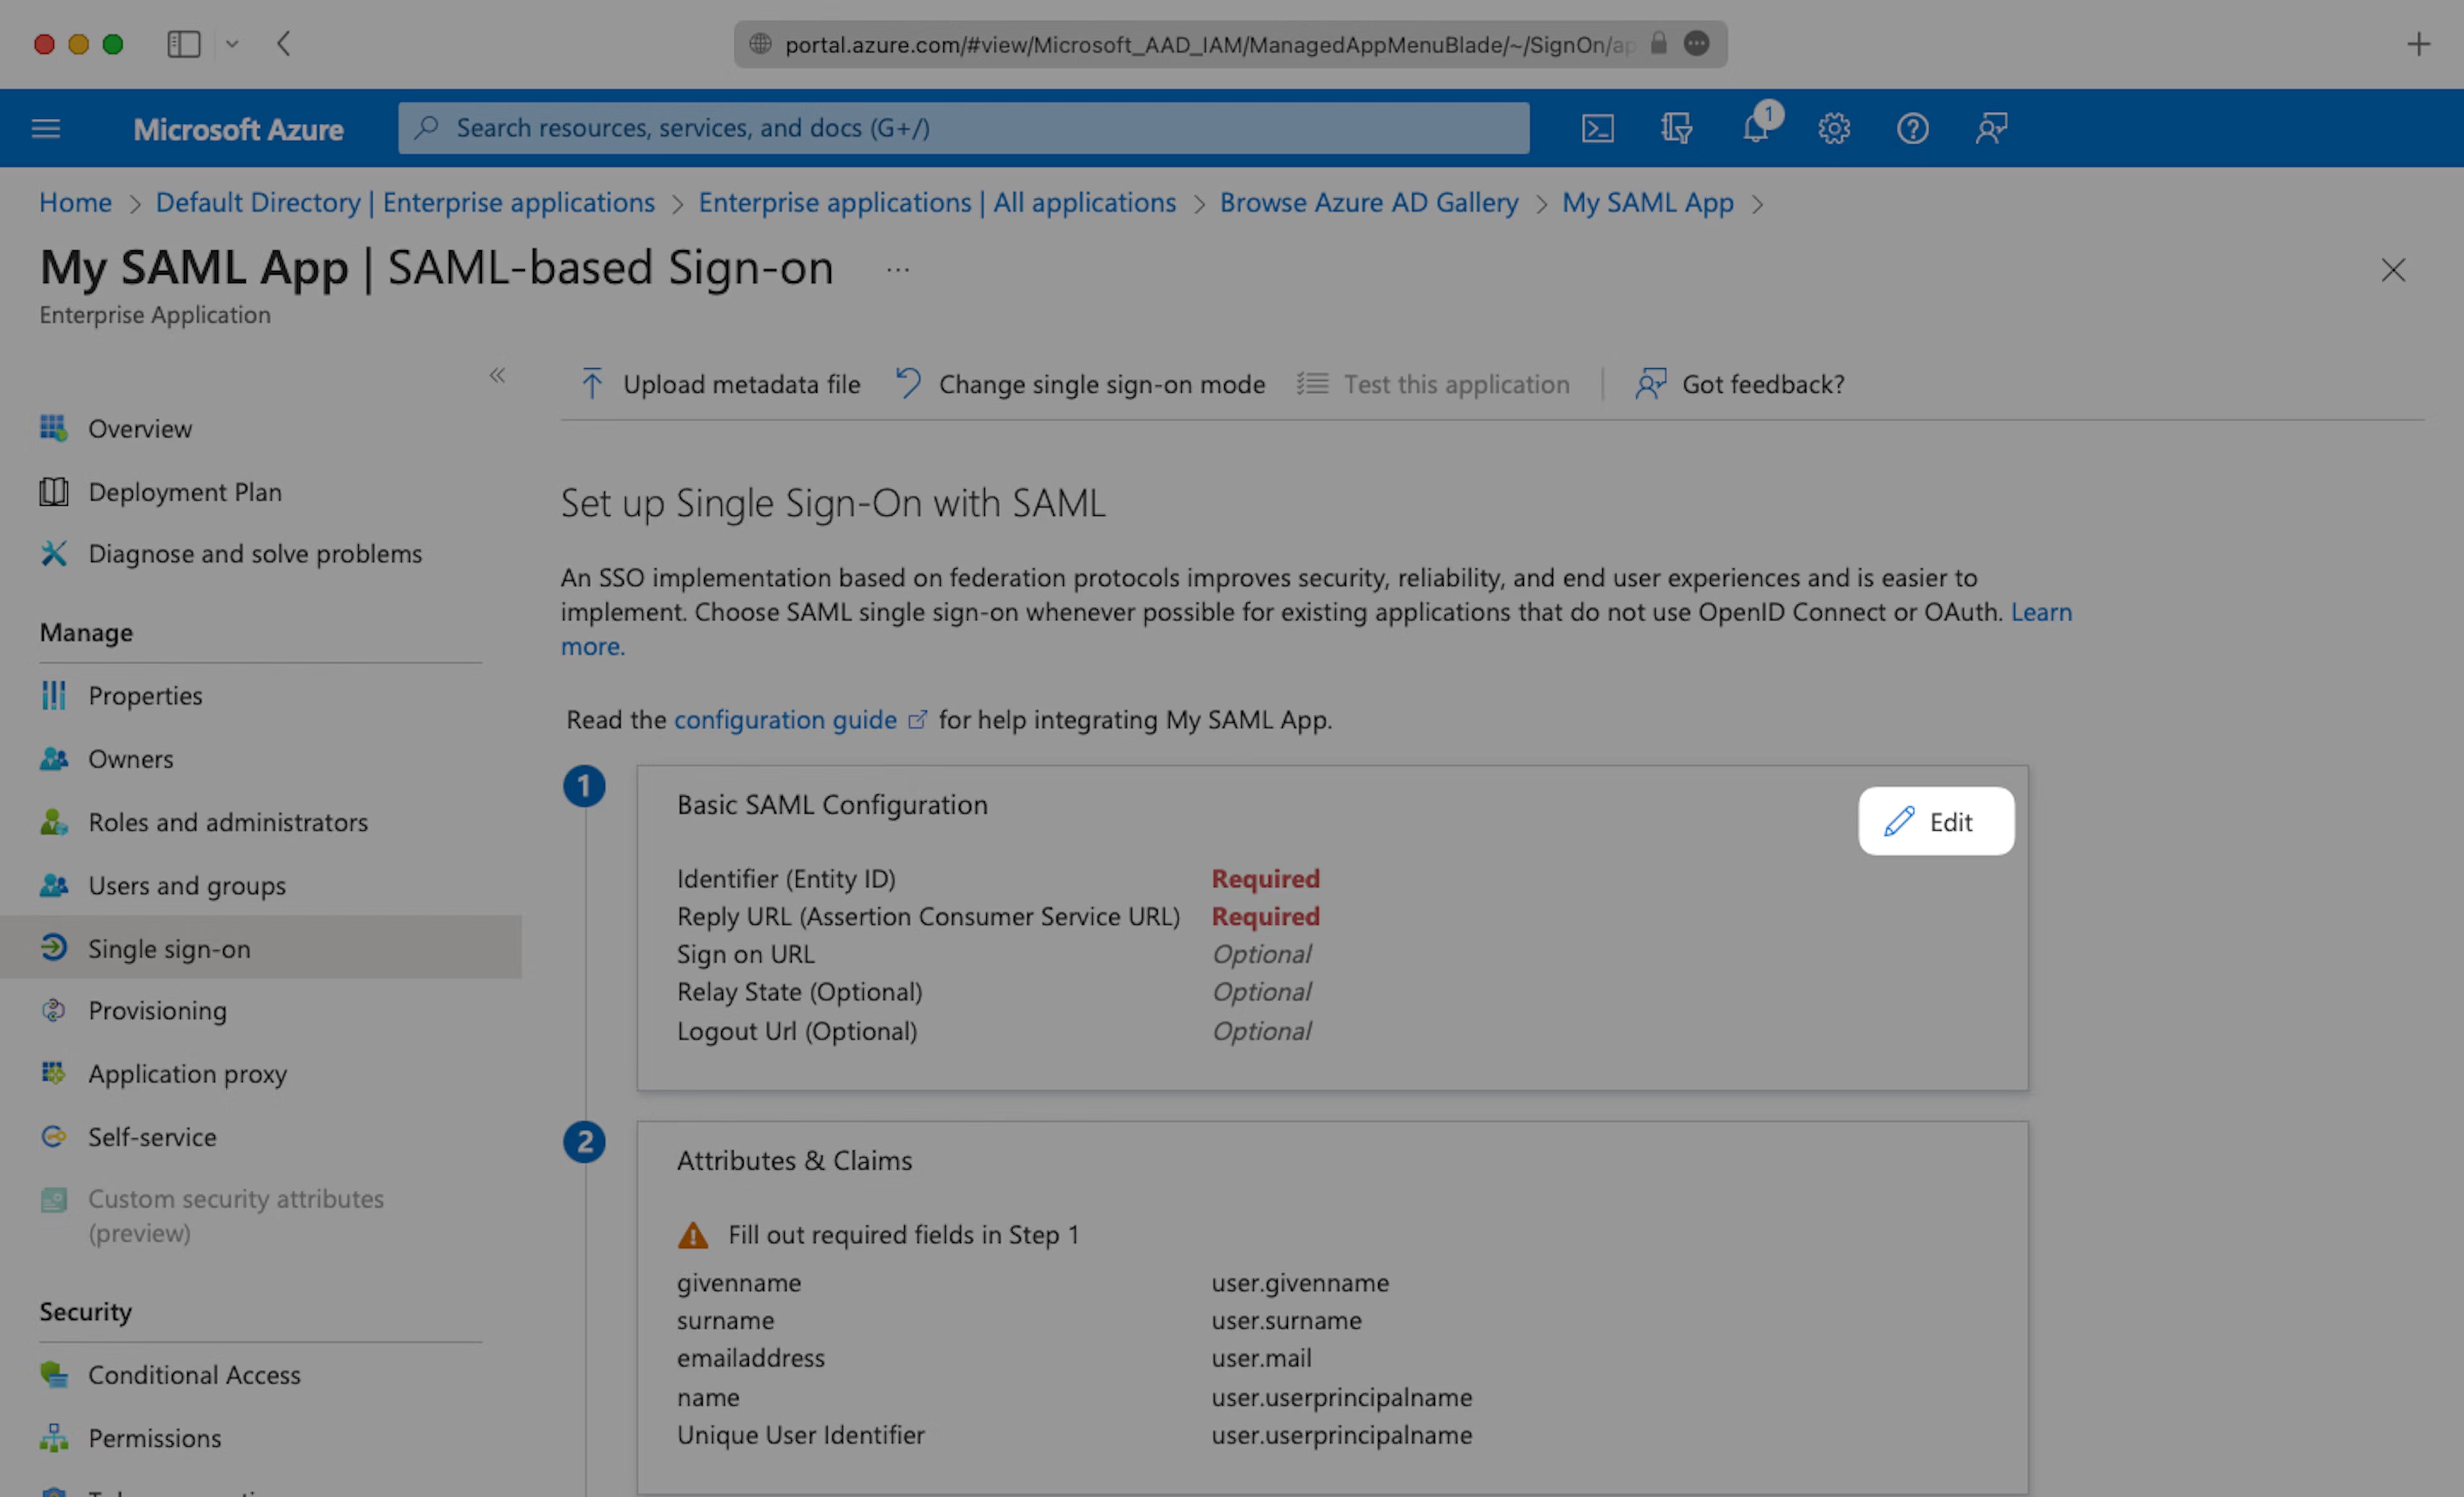
Copy the “Metadata URL” field from Teaminal’s SSO settings page into the “Identifier (Entity ID)” field.
Next, copy the “Assertion Consumer URL” from Teaminal’s SSO settings page and paste into the “Reply URL (Assertion Consumer Service URL)” field.

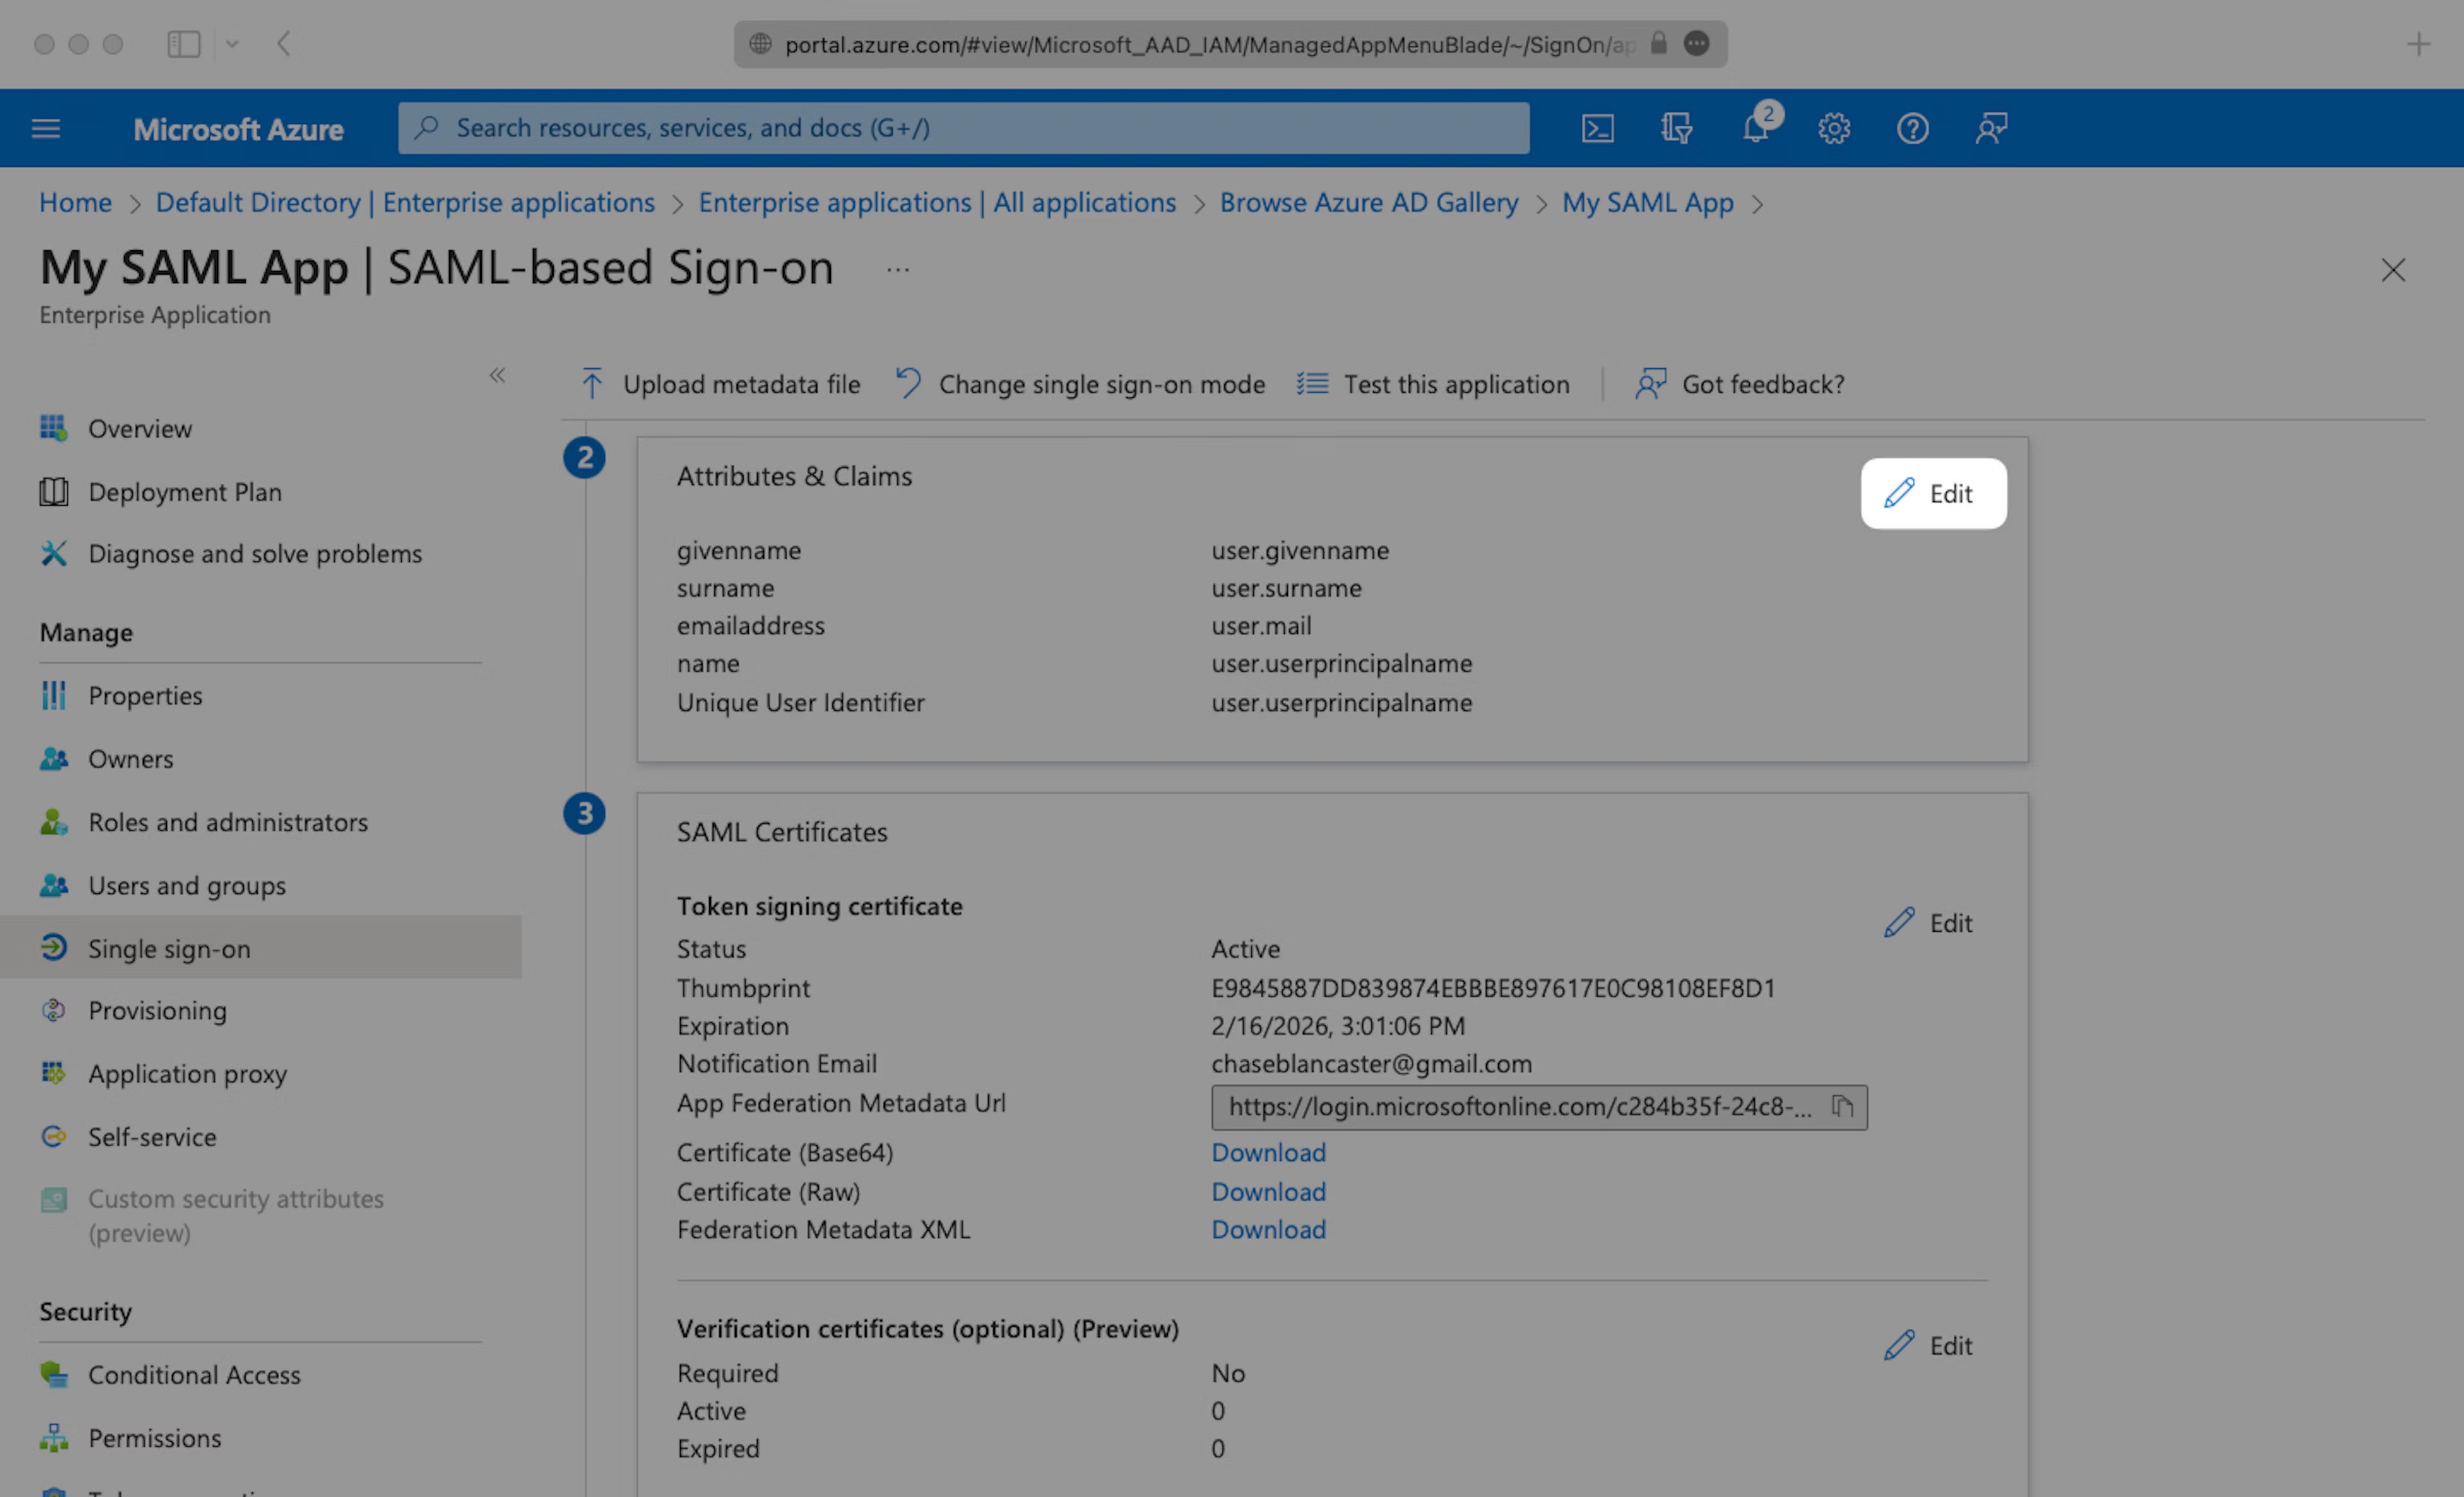
Step 3: User Attributes & Claims
Click the Edit icon in the top right of the second step.
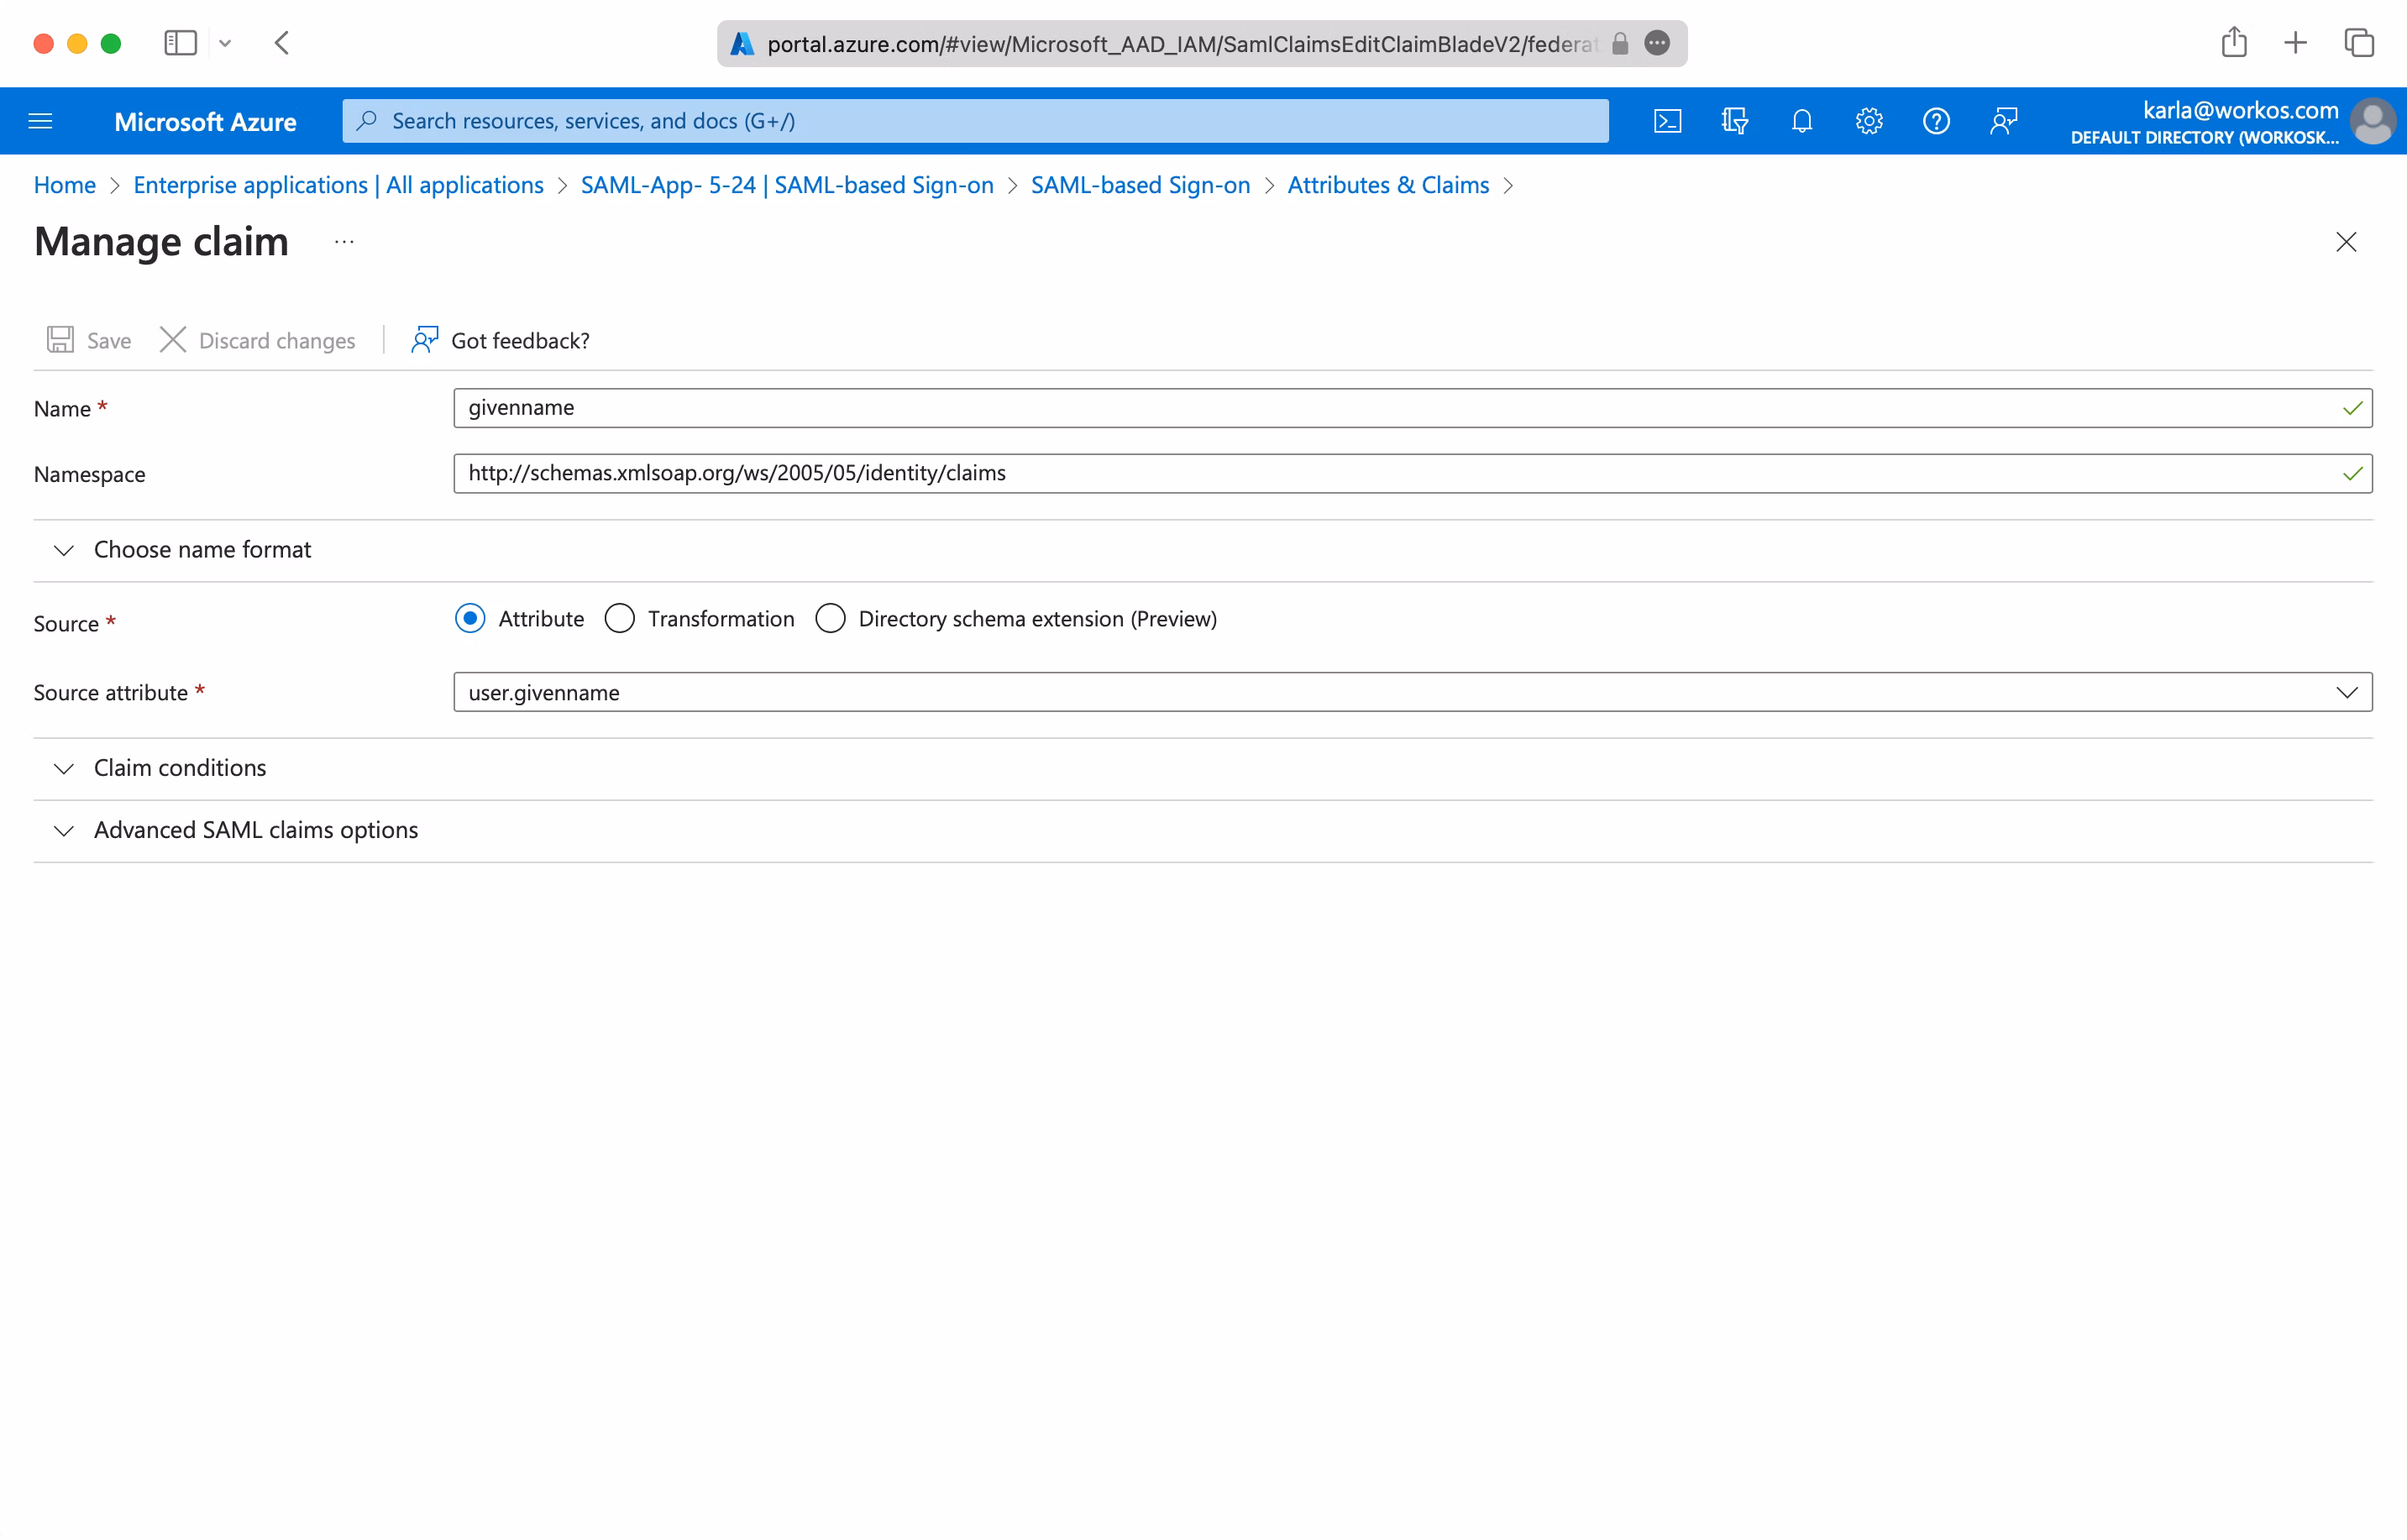
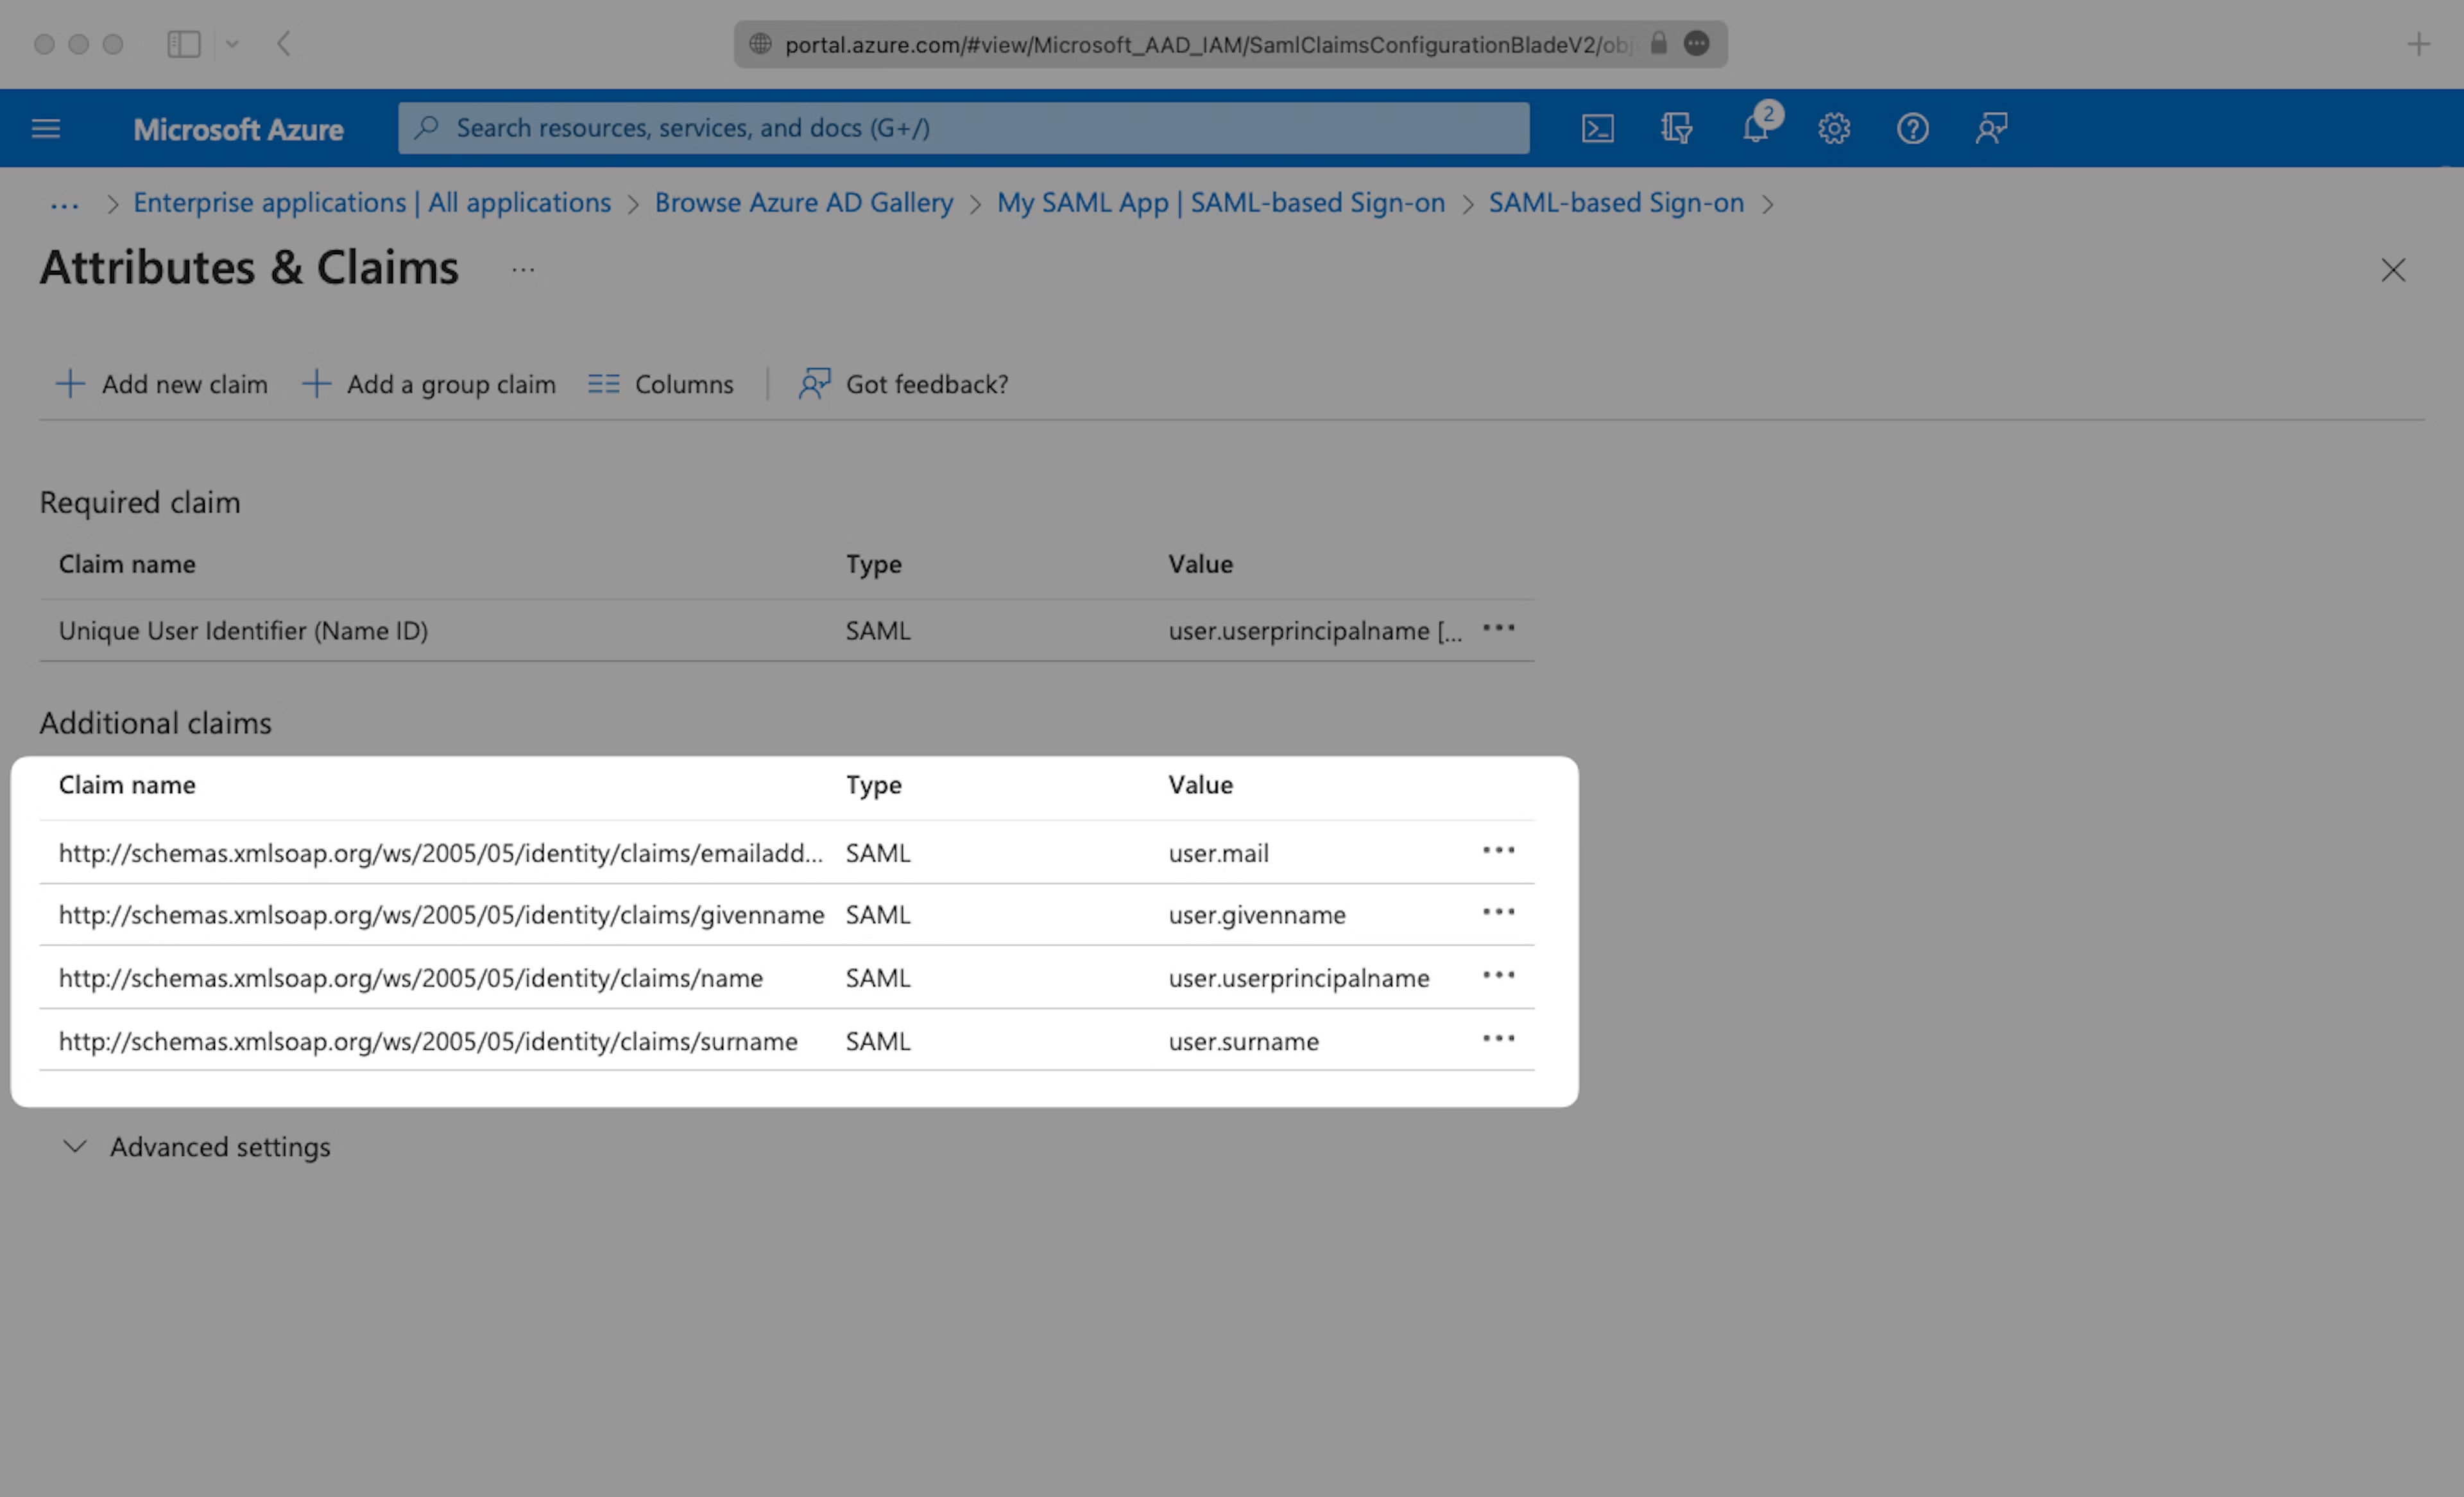
Fill in the following Attribute Statements by entering the claim name in the “Name” field and the value in the “Source attribute” field. Select “Next”:
emailaddressasuser.mailgivennameasuser.givennamenameasuser.userprincipalnamesurnameasuser.surname
Below is an example of how to format your claim within the Azure claim editor. Make sure the “Namespace” value ends in /claims.
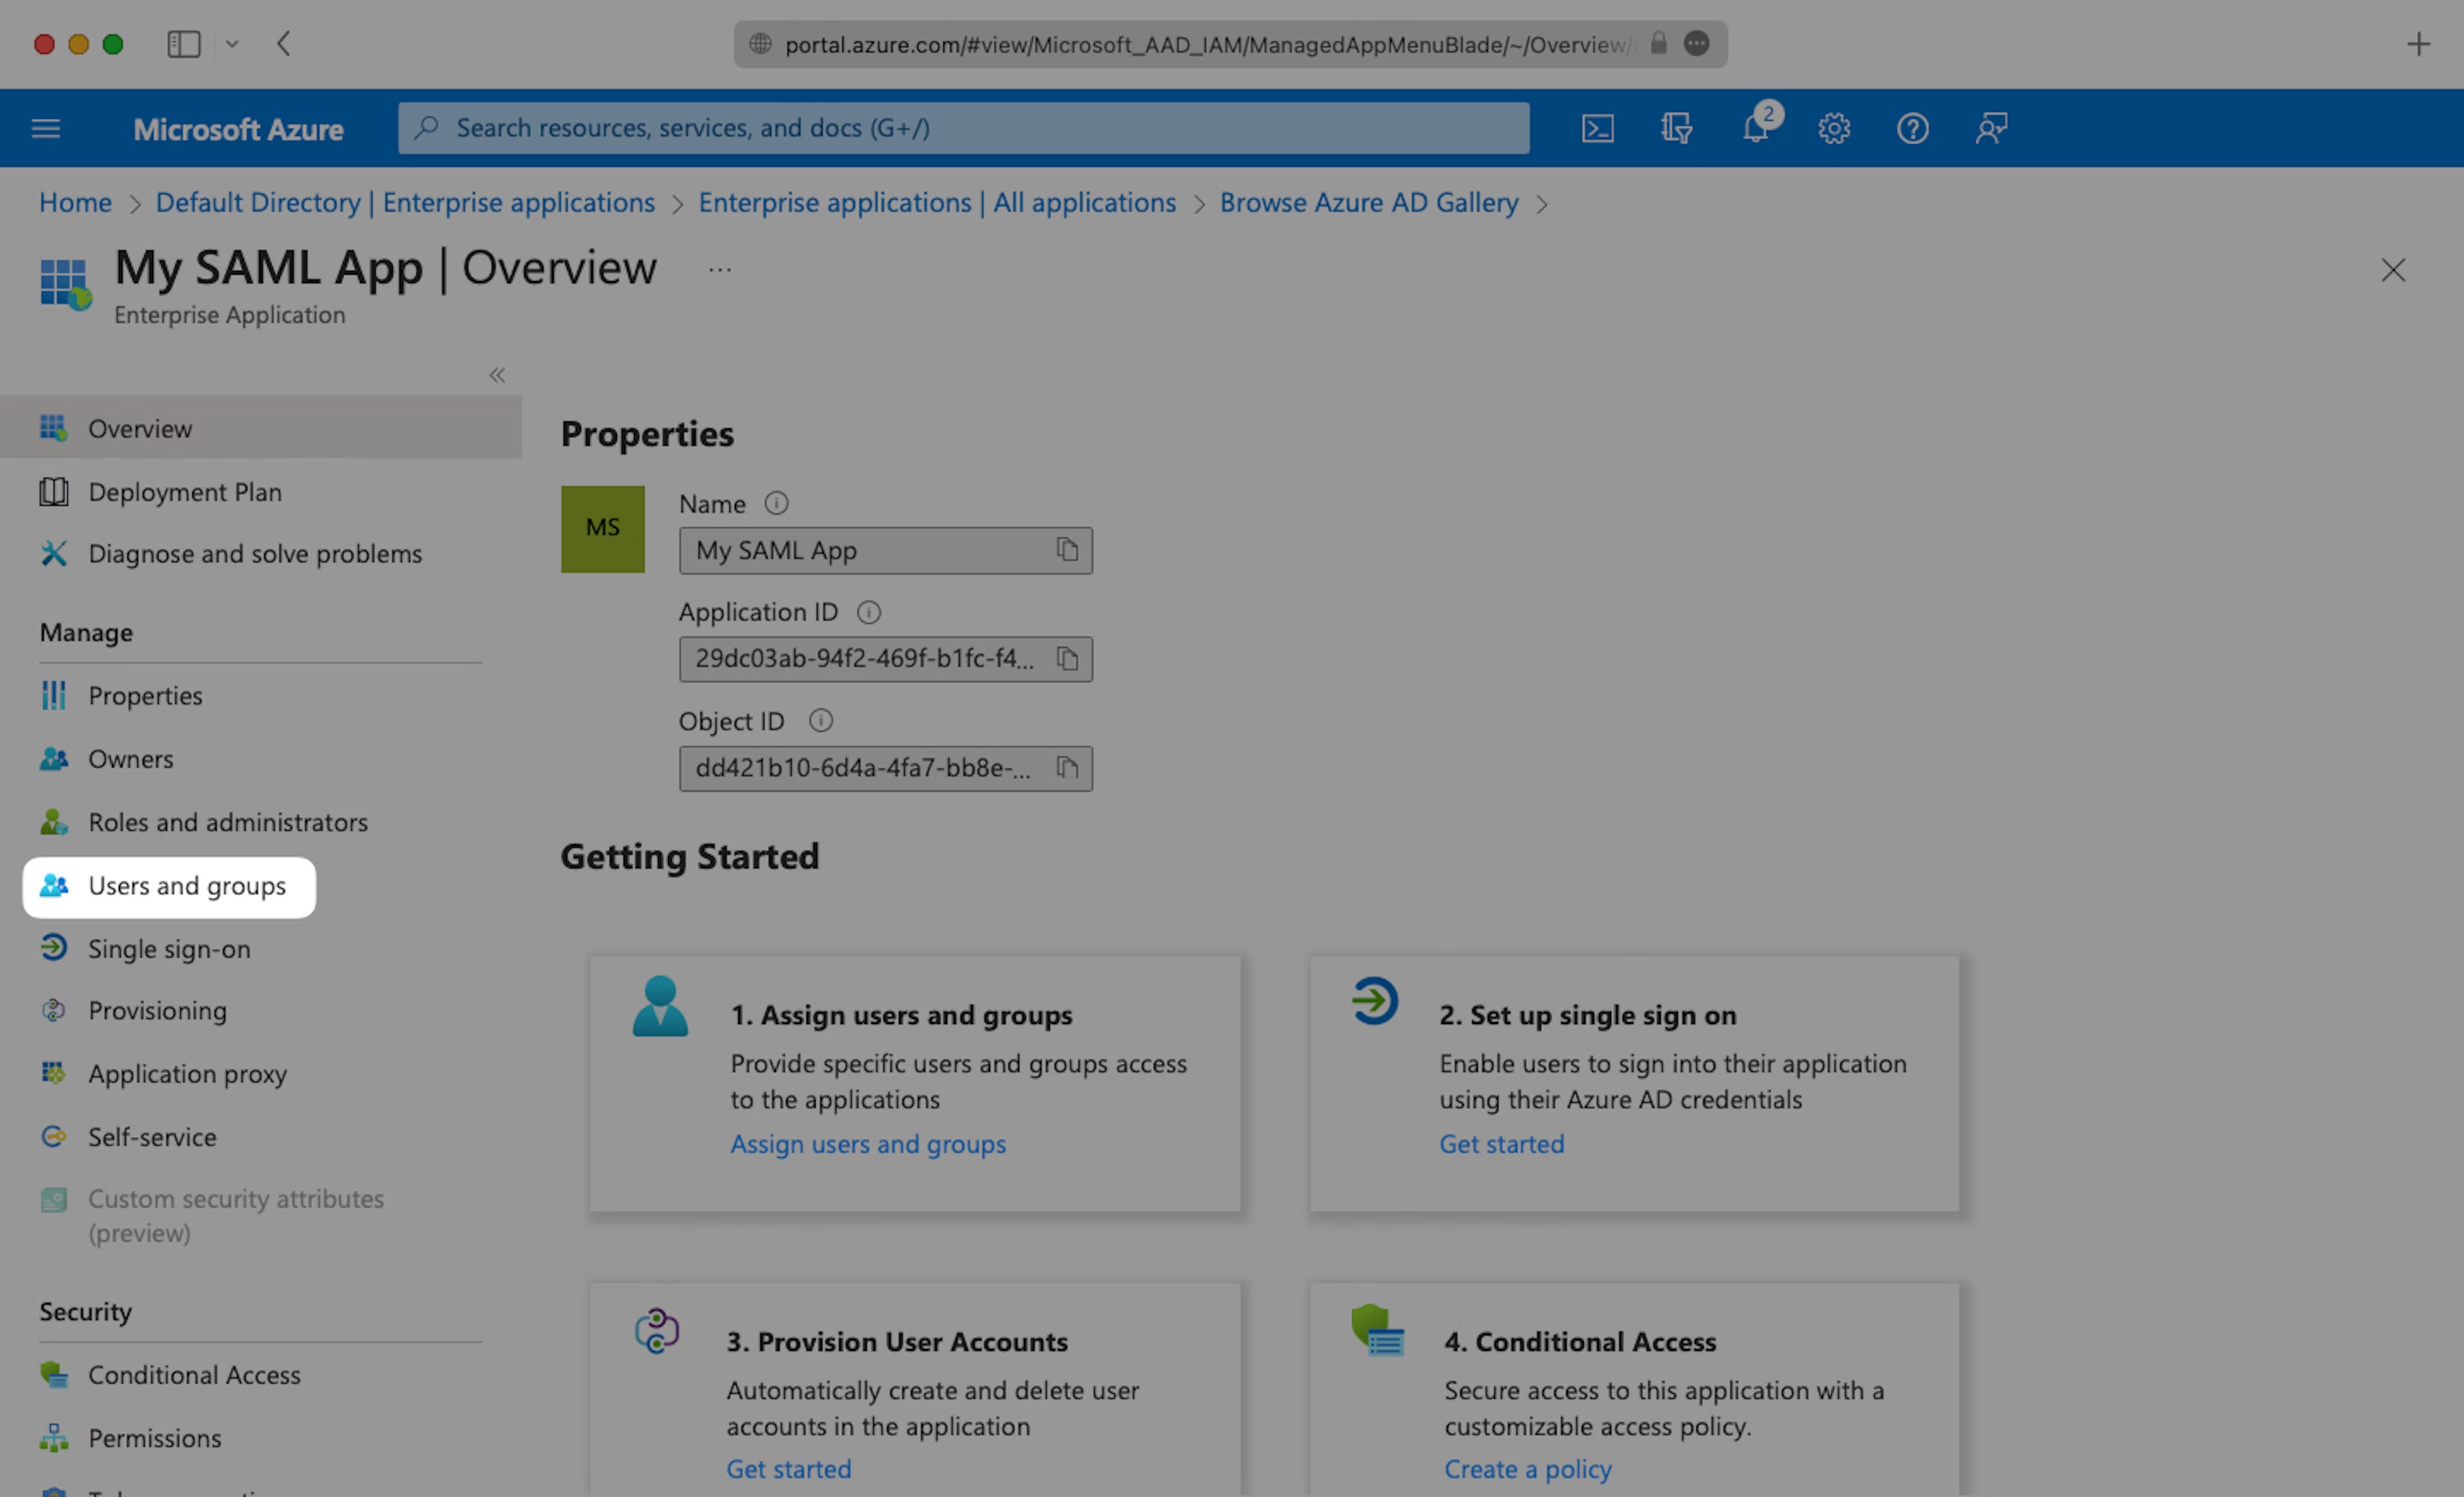
Step 4: Assign People & Groups
In order for your users and groups of users to be synced to Teaminal you will need to assign them to your Azure AD SAML Application. Select “Users and groups” from the “Manage” section of the navigation menu.
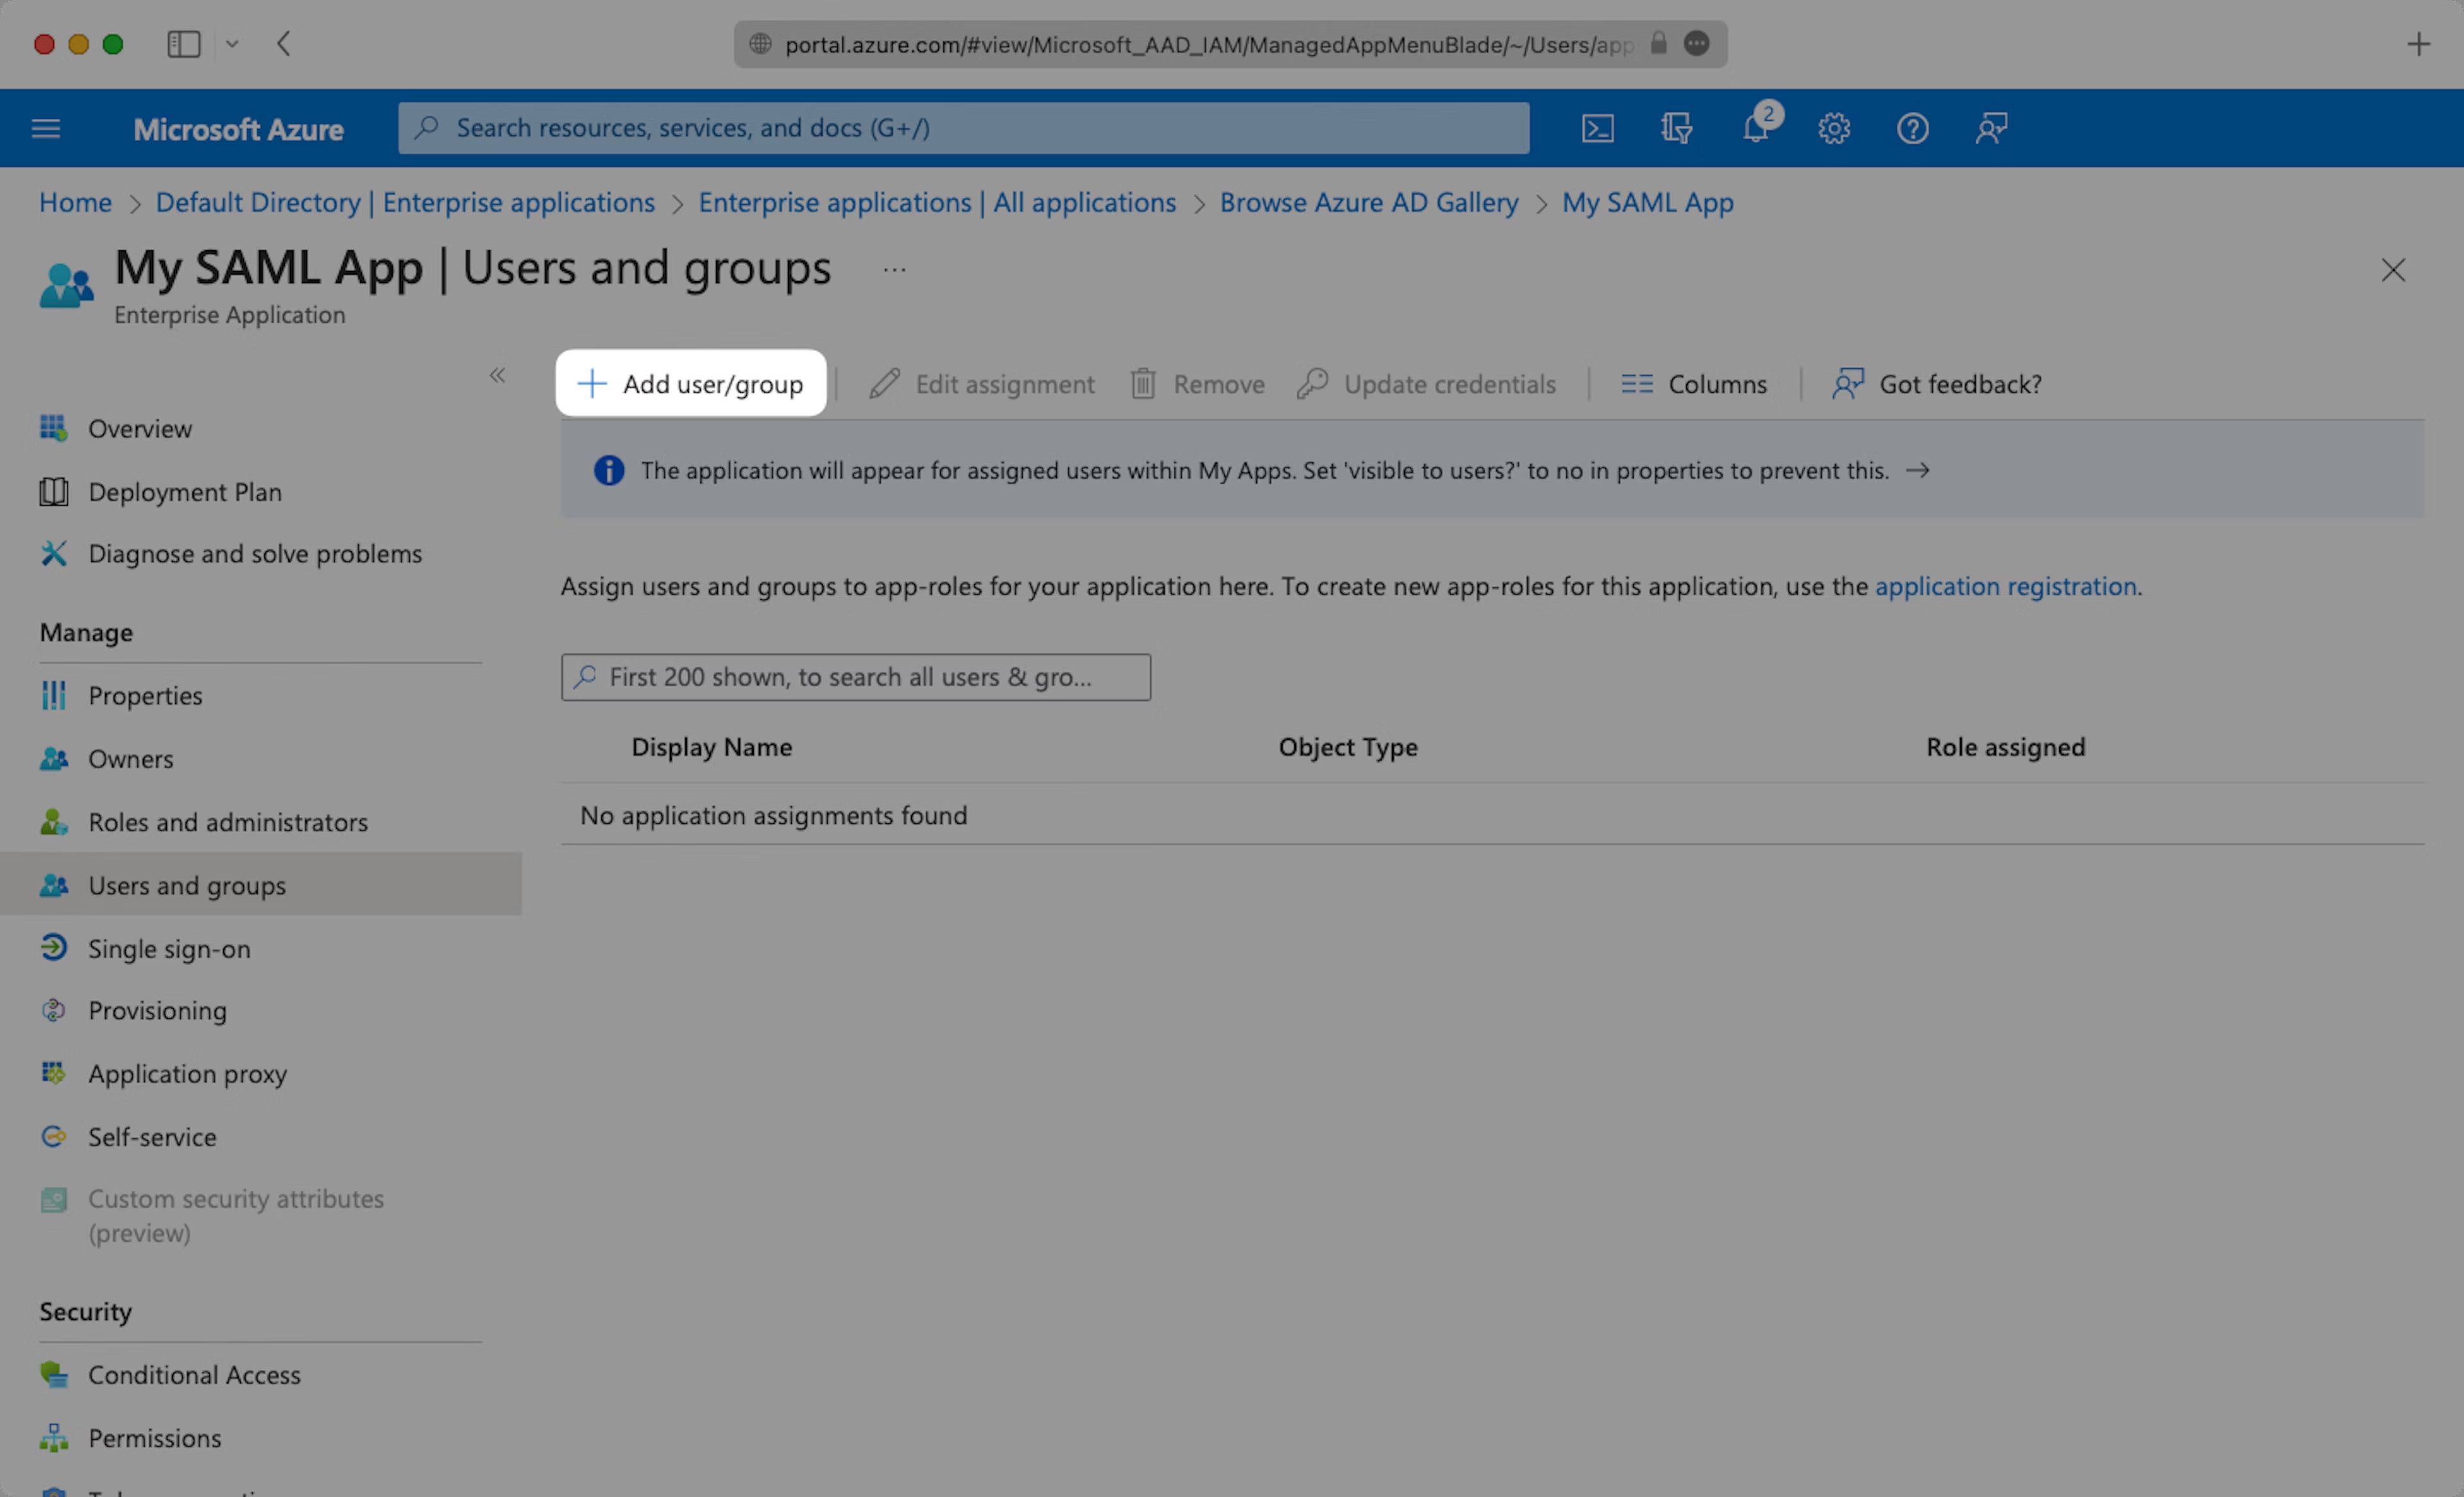
Select “Add user/group” from the top menu.
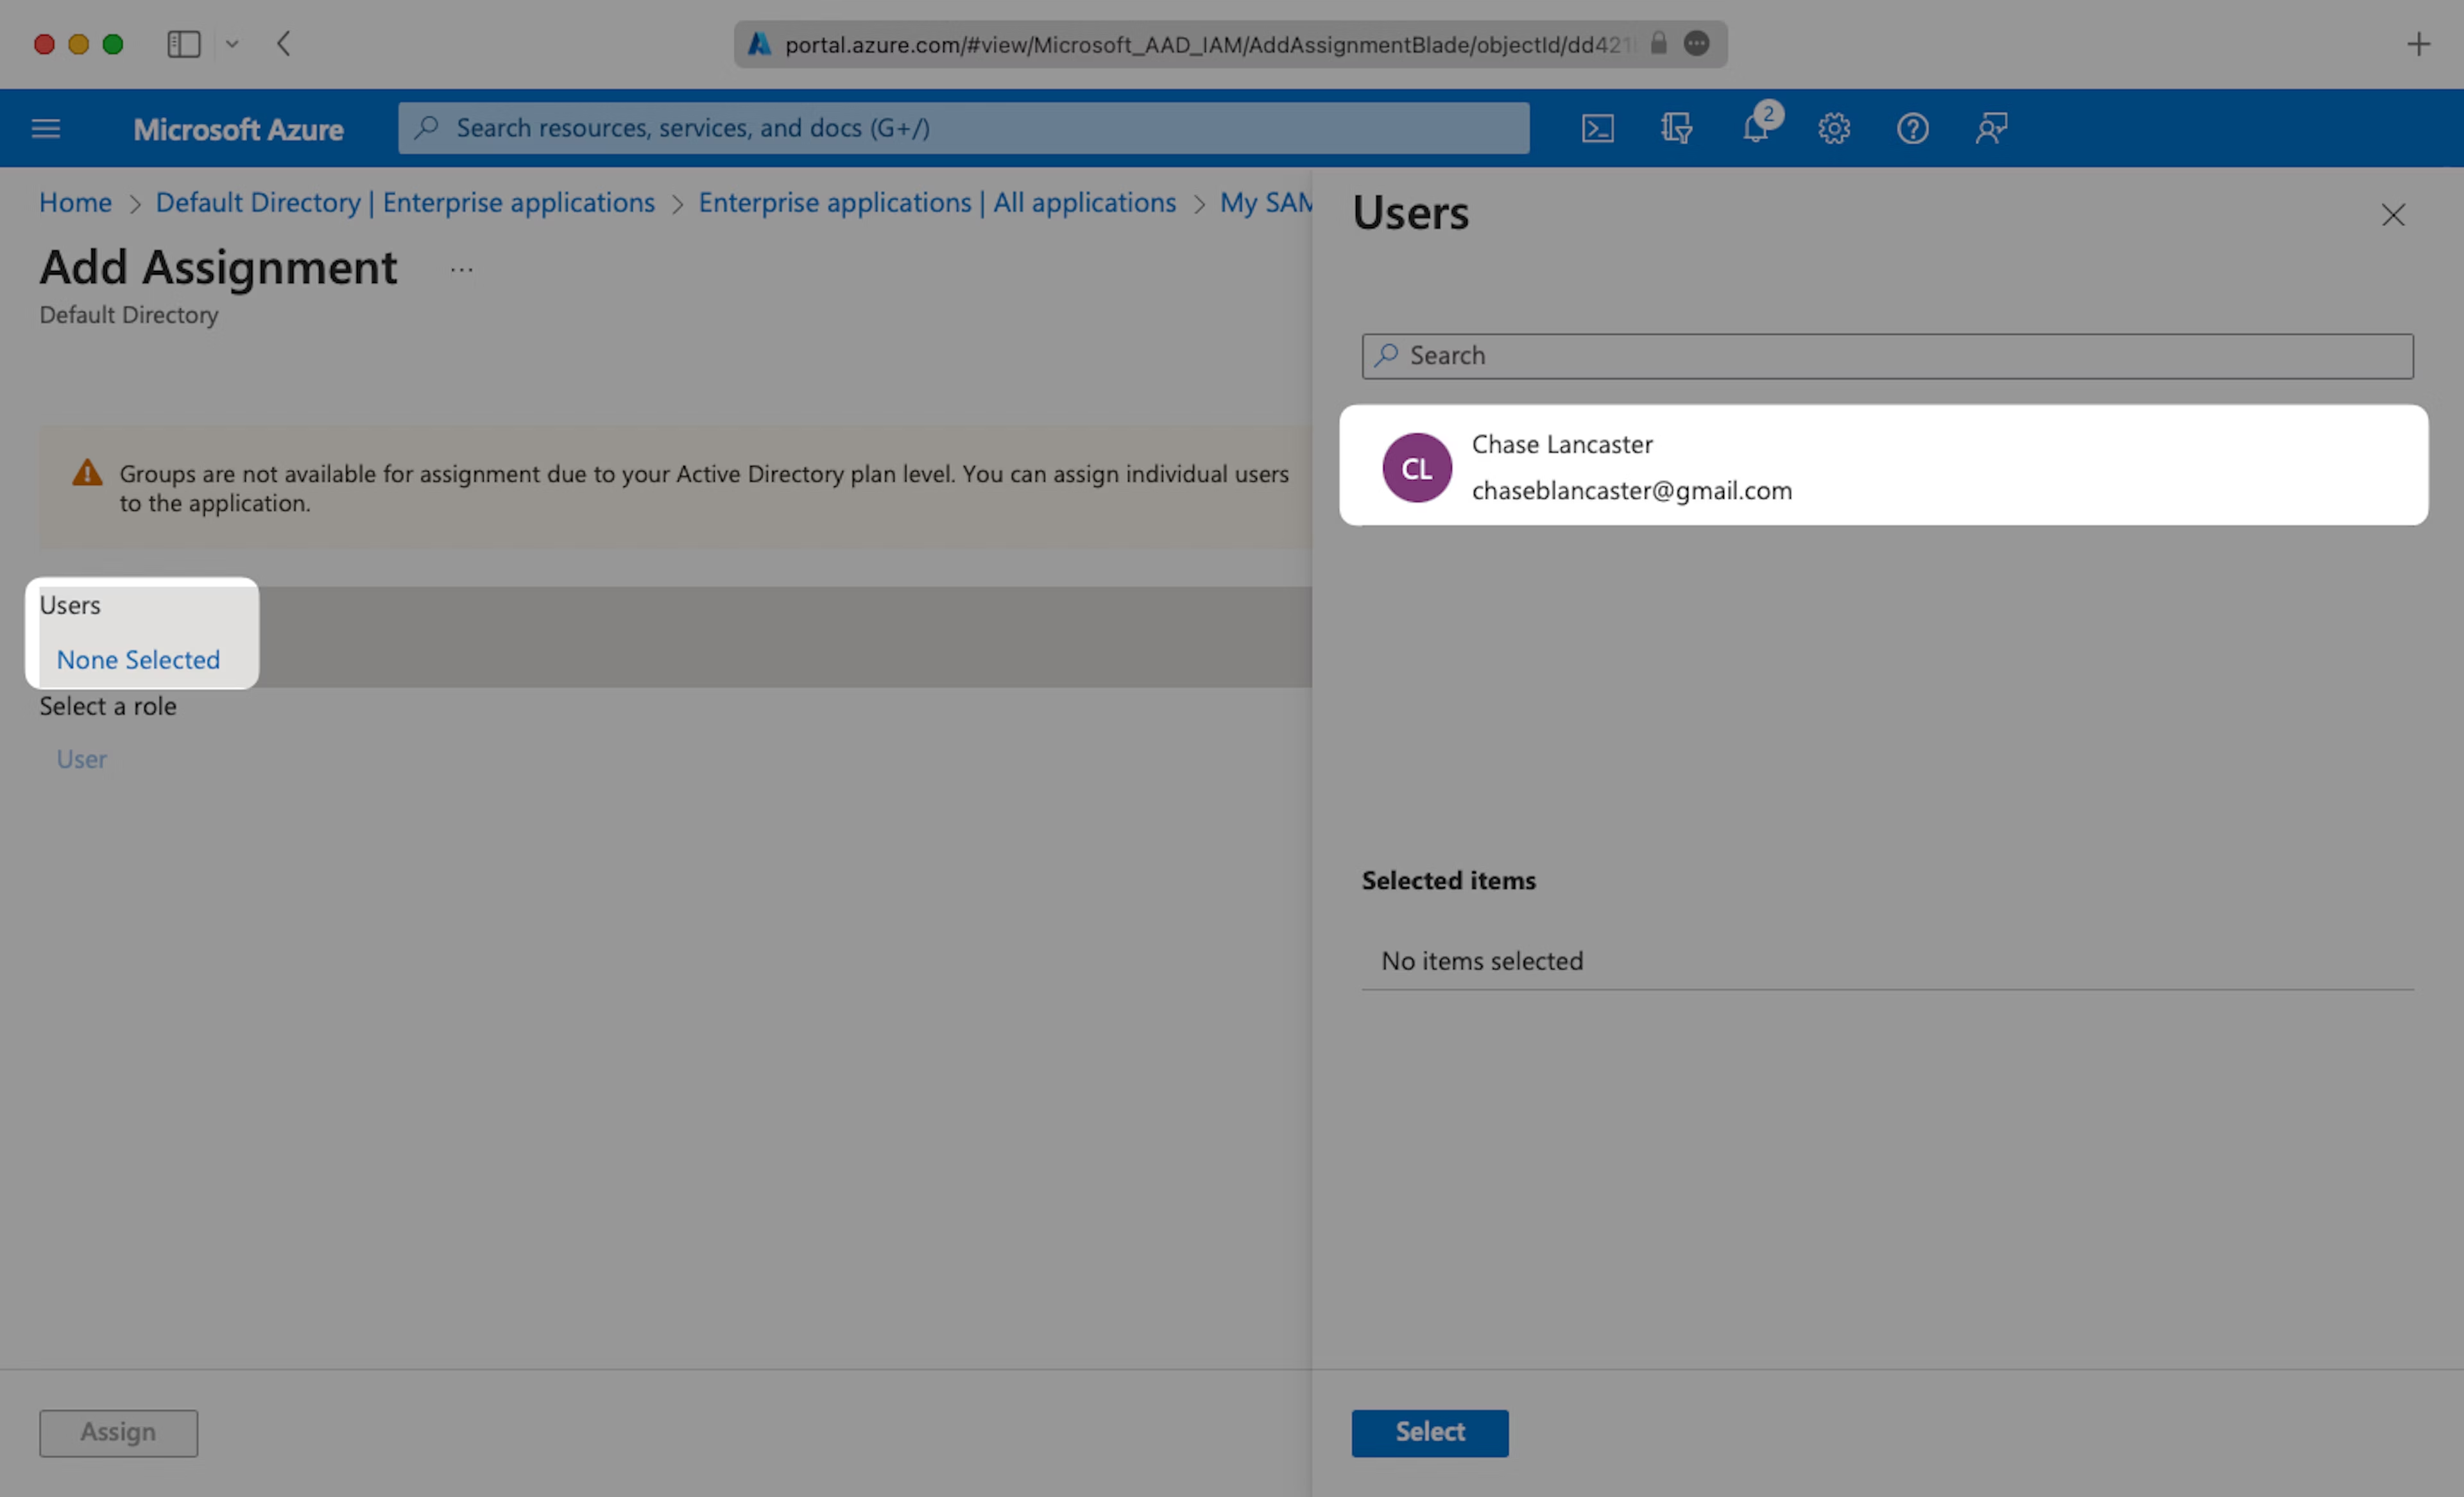
Select “None selected” under the “Users and Groups”. In the menu, select the users and groups of users that you want to add to the SAML application, and click “Select”.
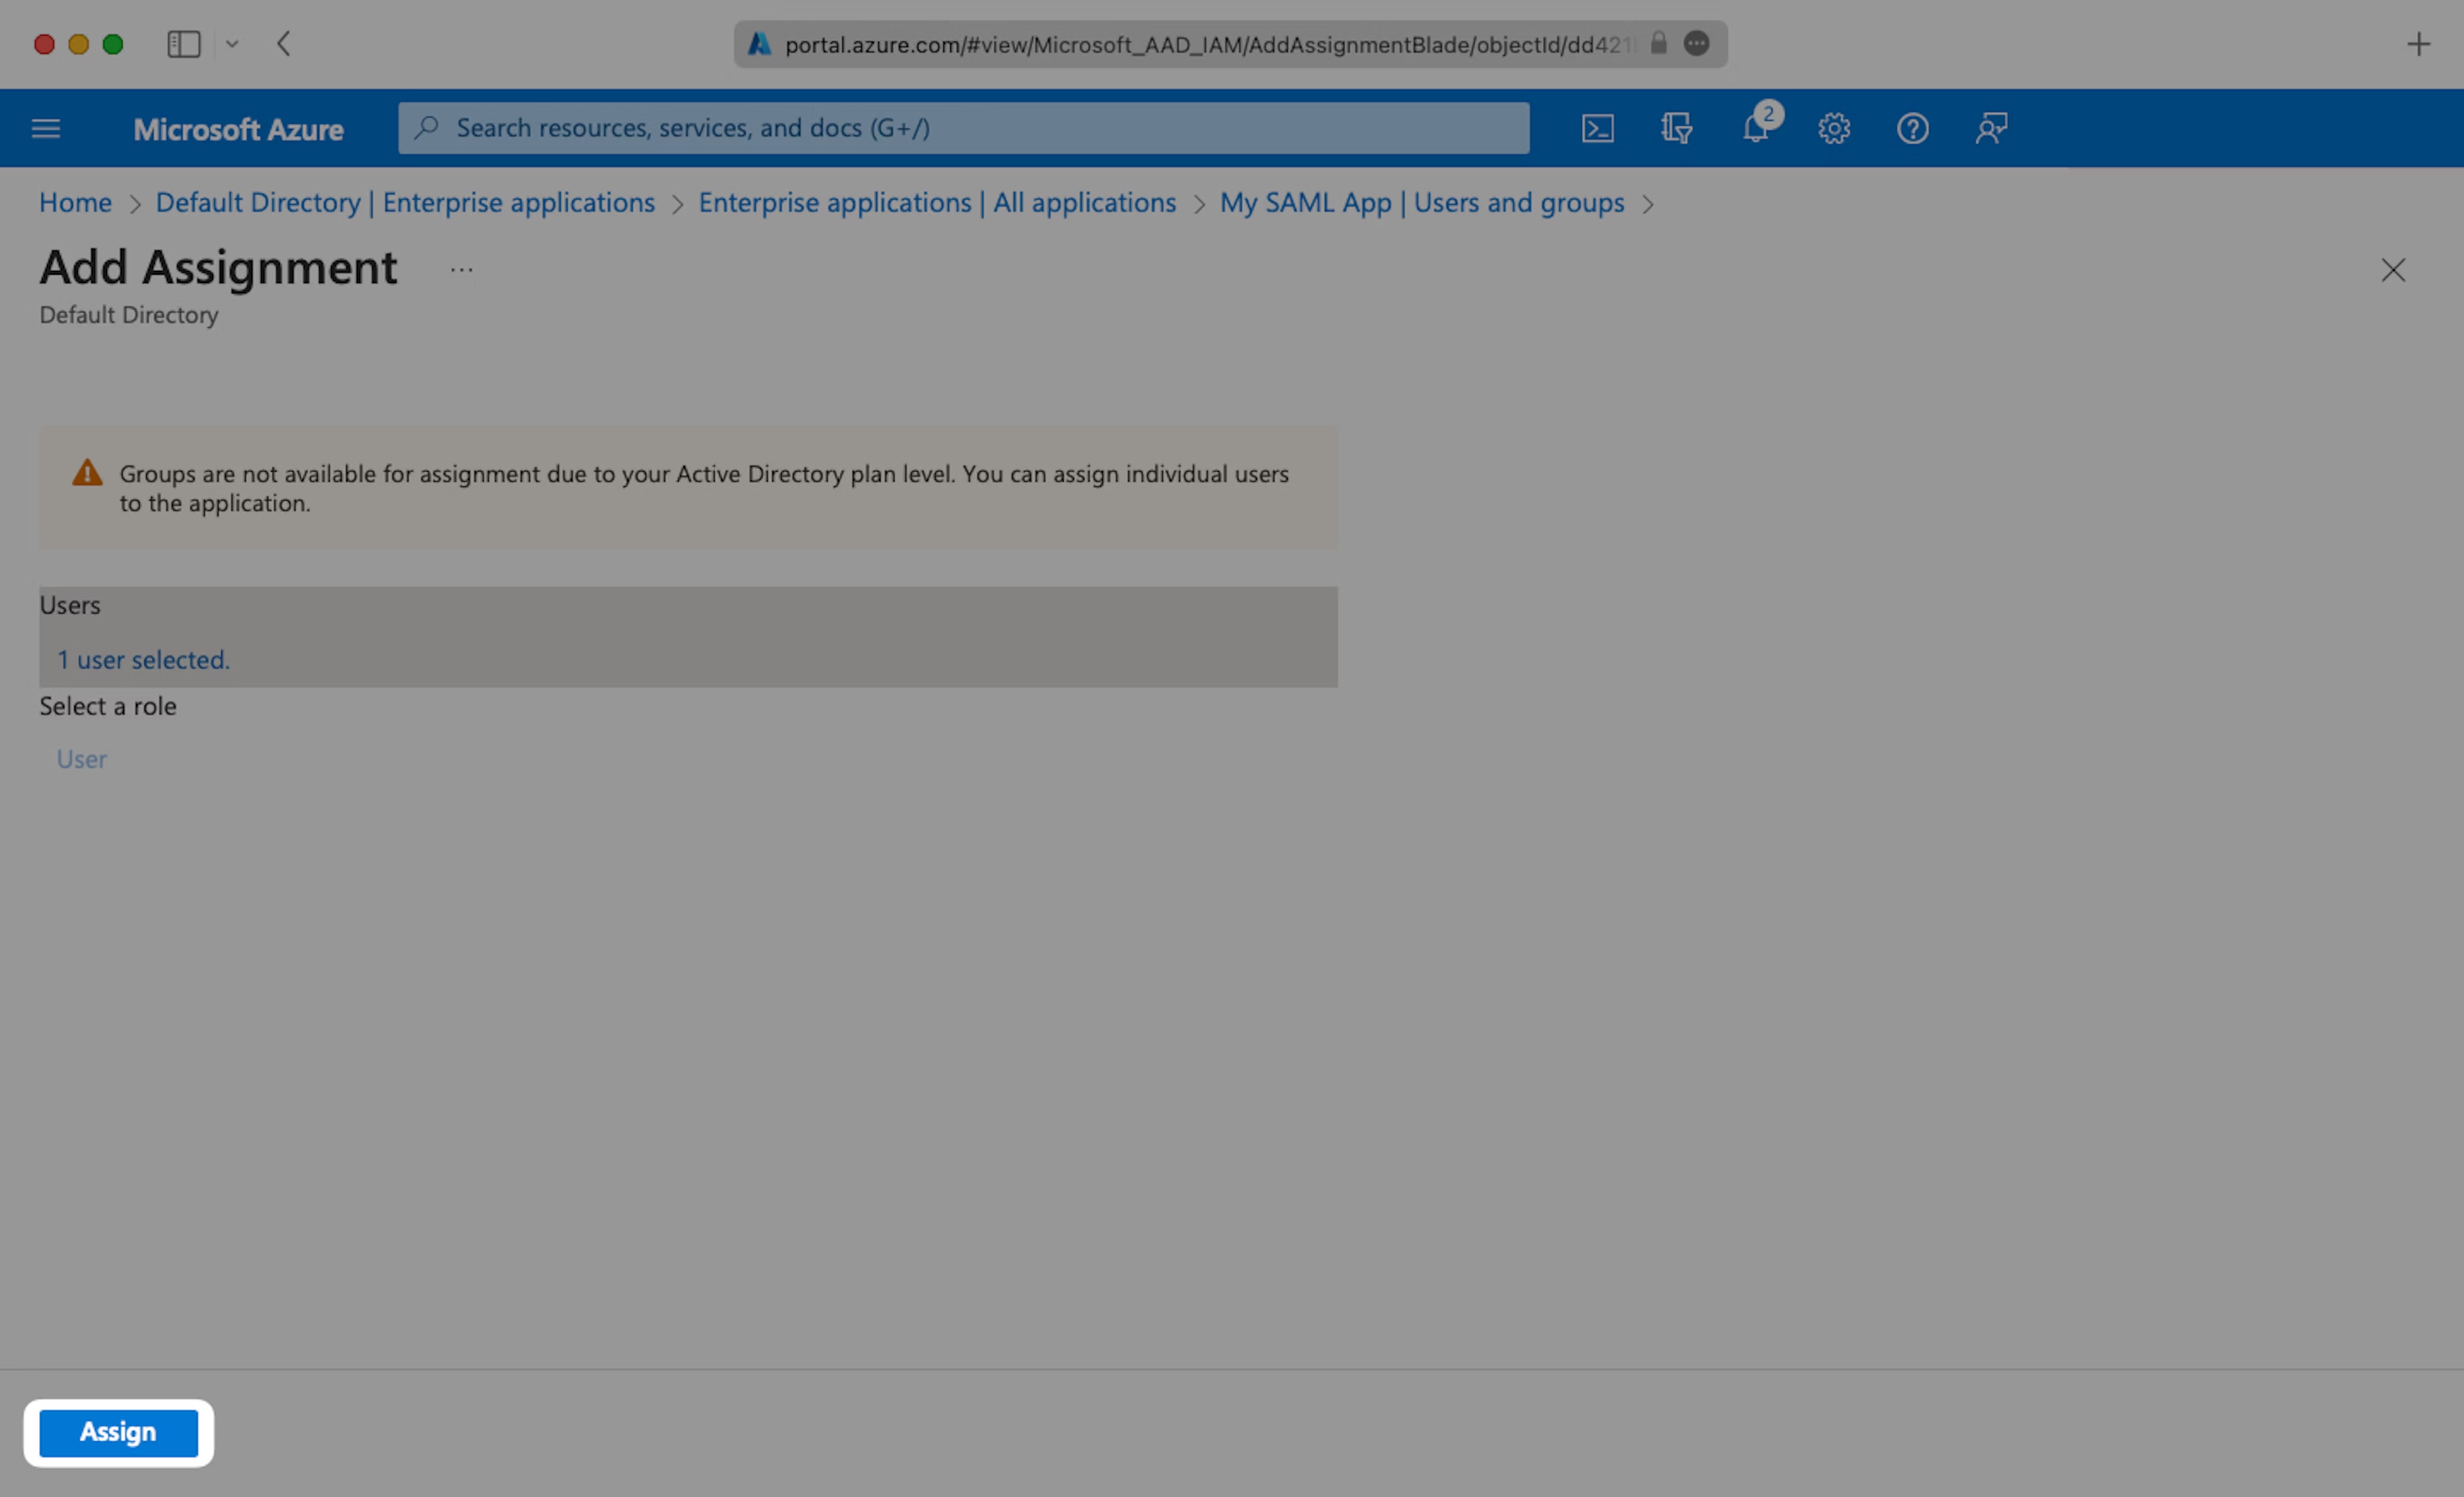
Select “Assign” to add the selected users and groups of users to your SAML application.
Step 5: Upload IdP Metadata
Navigate down to Section 3 of the “Single Sign-On” page, to “SAML Signing Certificate”. Copy the URL provided in “App Federation Metadata URL”.
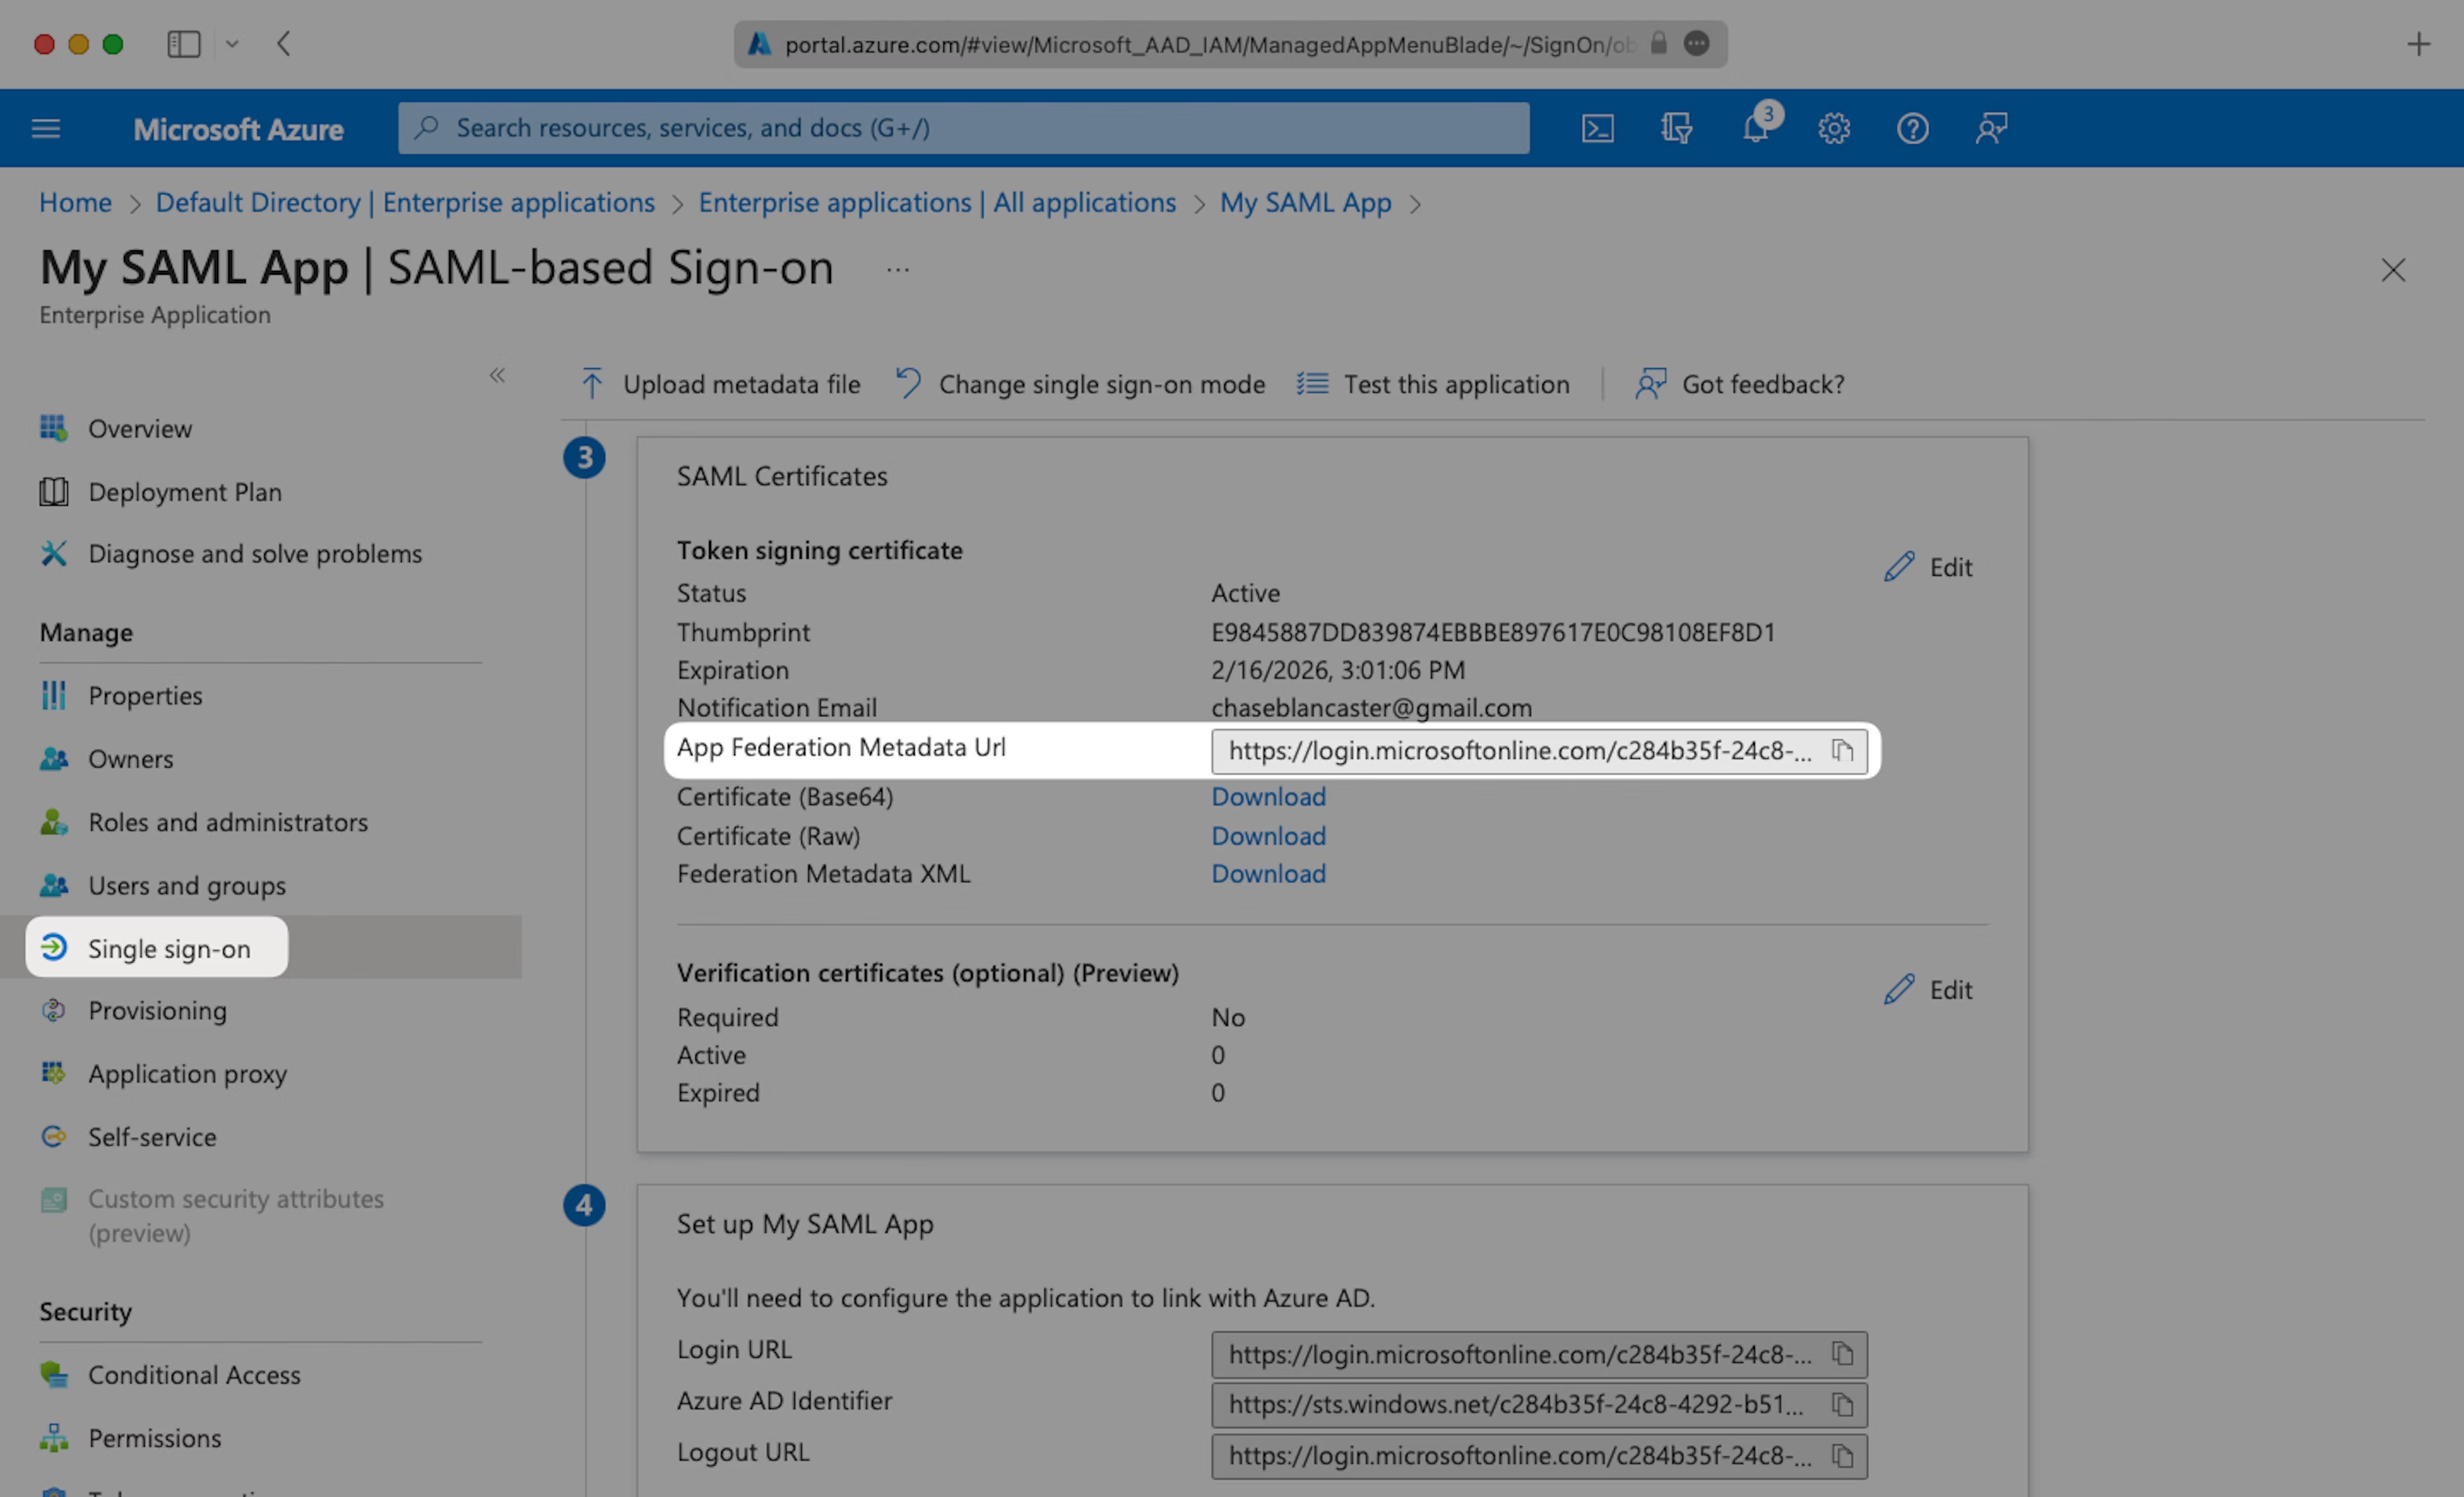
Navigate to the “SSO settings” page in Teaminal and paste the “App Federation Metadata URL” into the “Metadata URL” field.
Step 6: Test Single Sign-On
Navigate back to the “Single Sign-On” page in Azure AD and click “Test” to verify that the SAML SSO is working as expected. You should be redirected to Teaminal and automatically logged in.
If you encounter any issues, please reach out to [email protected] for support.
```