Step 1: Create SAML Integration
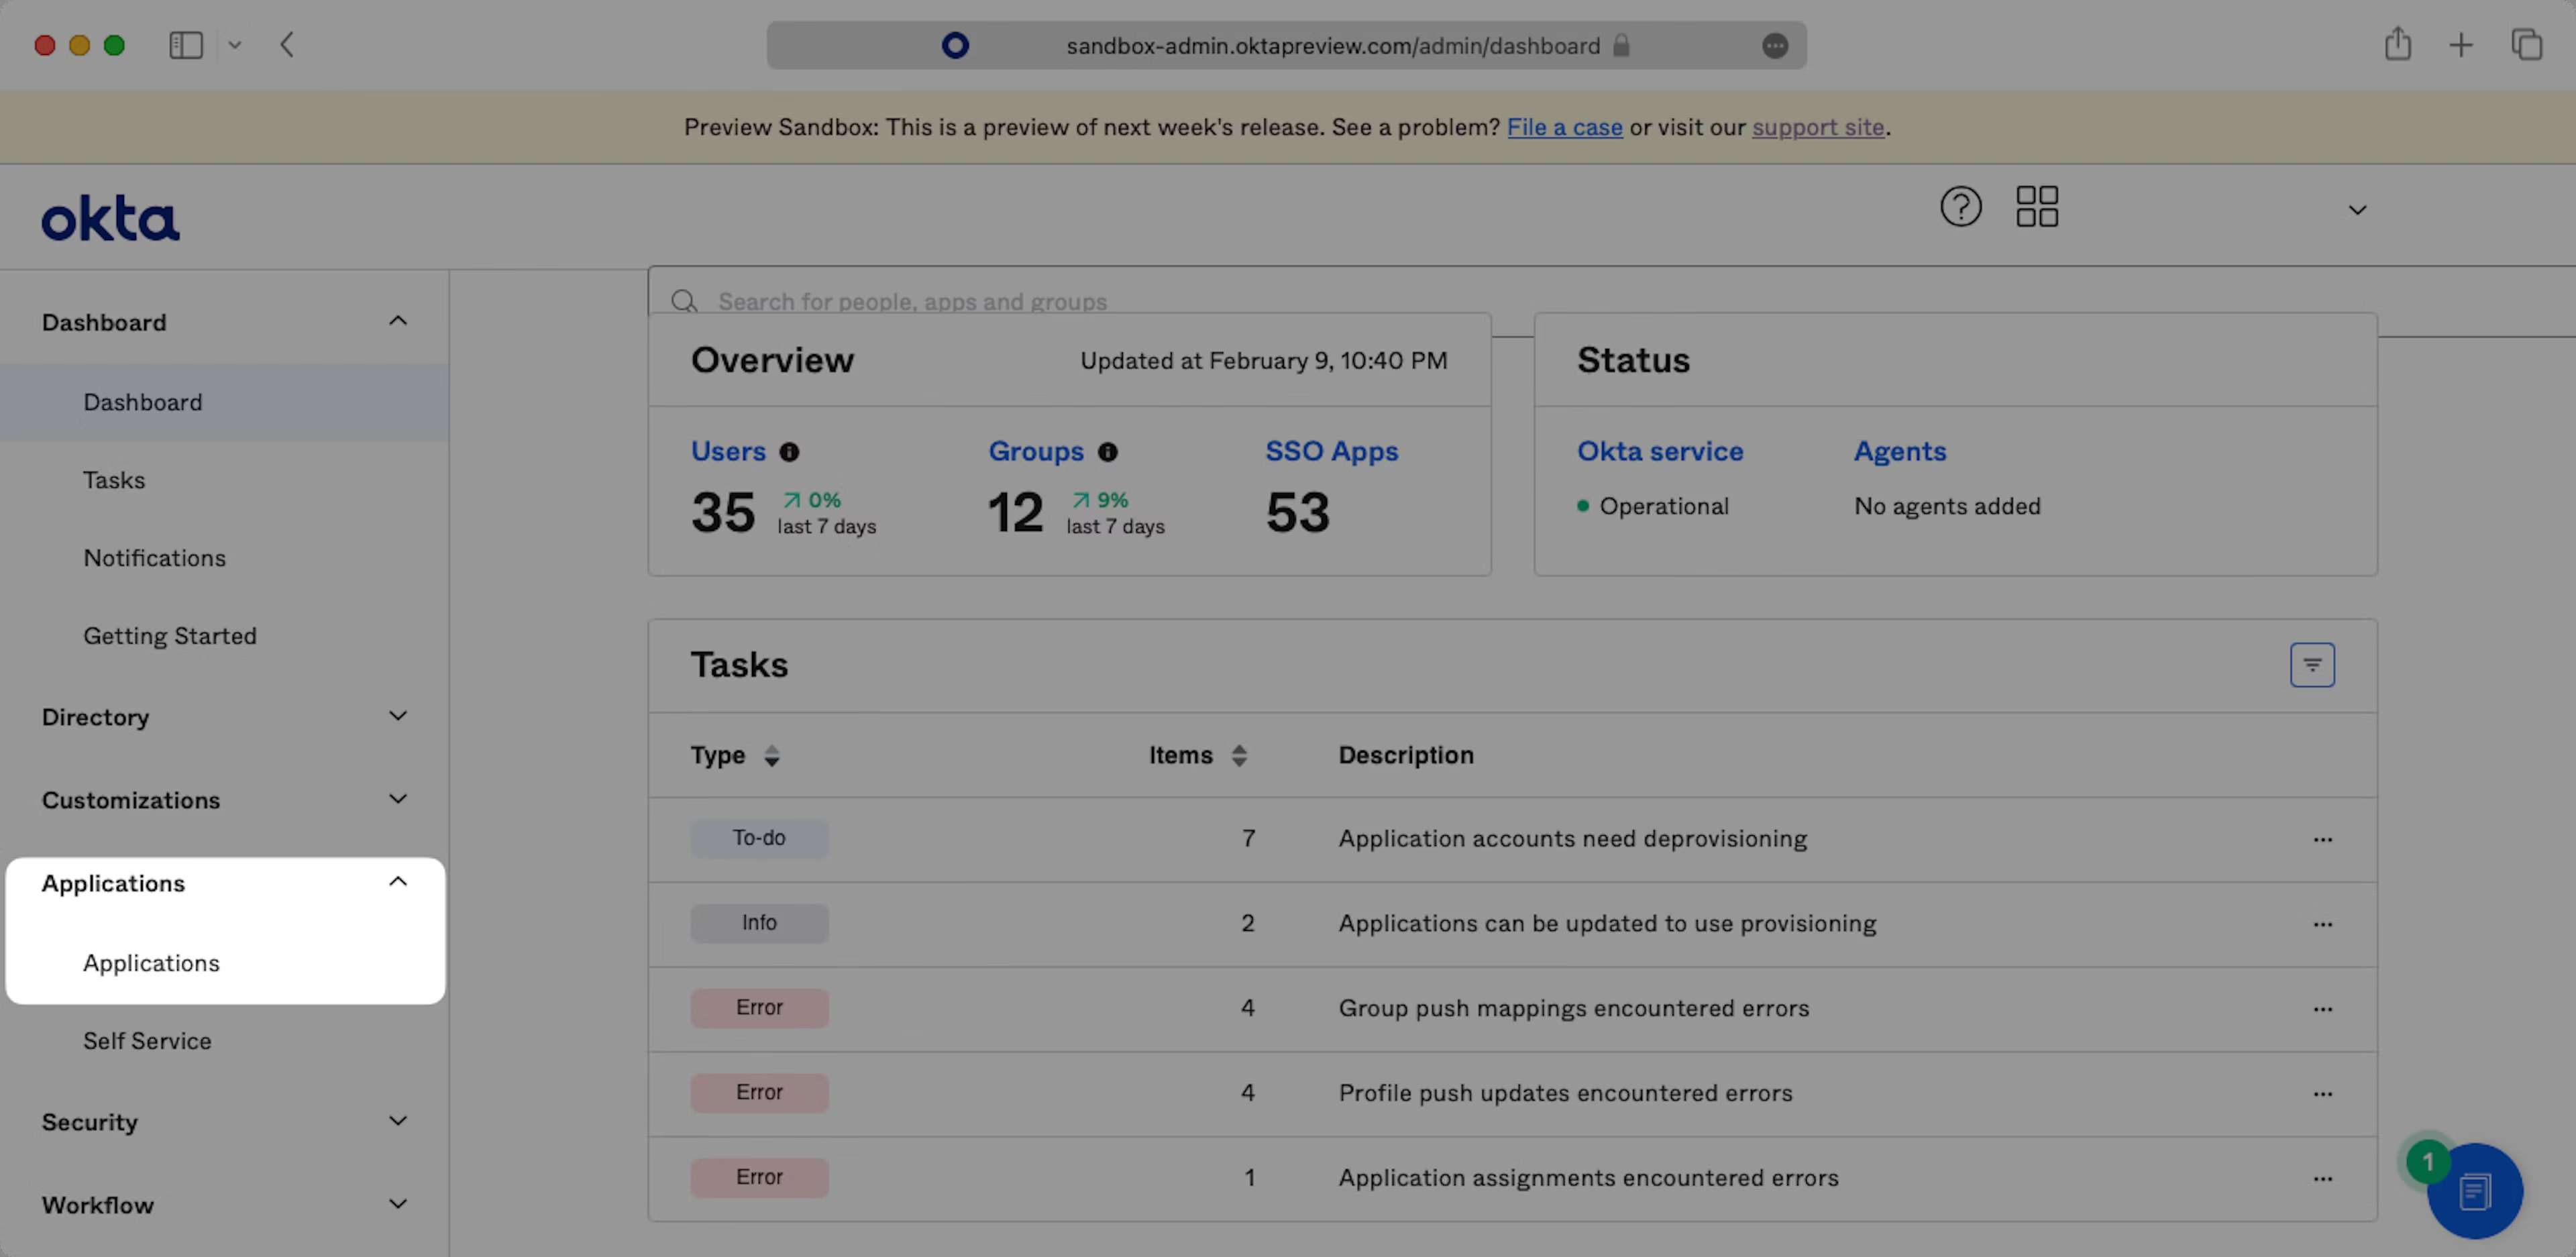
In your Okta Application Dashboard go to “Applications” in the sidebar.
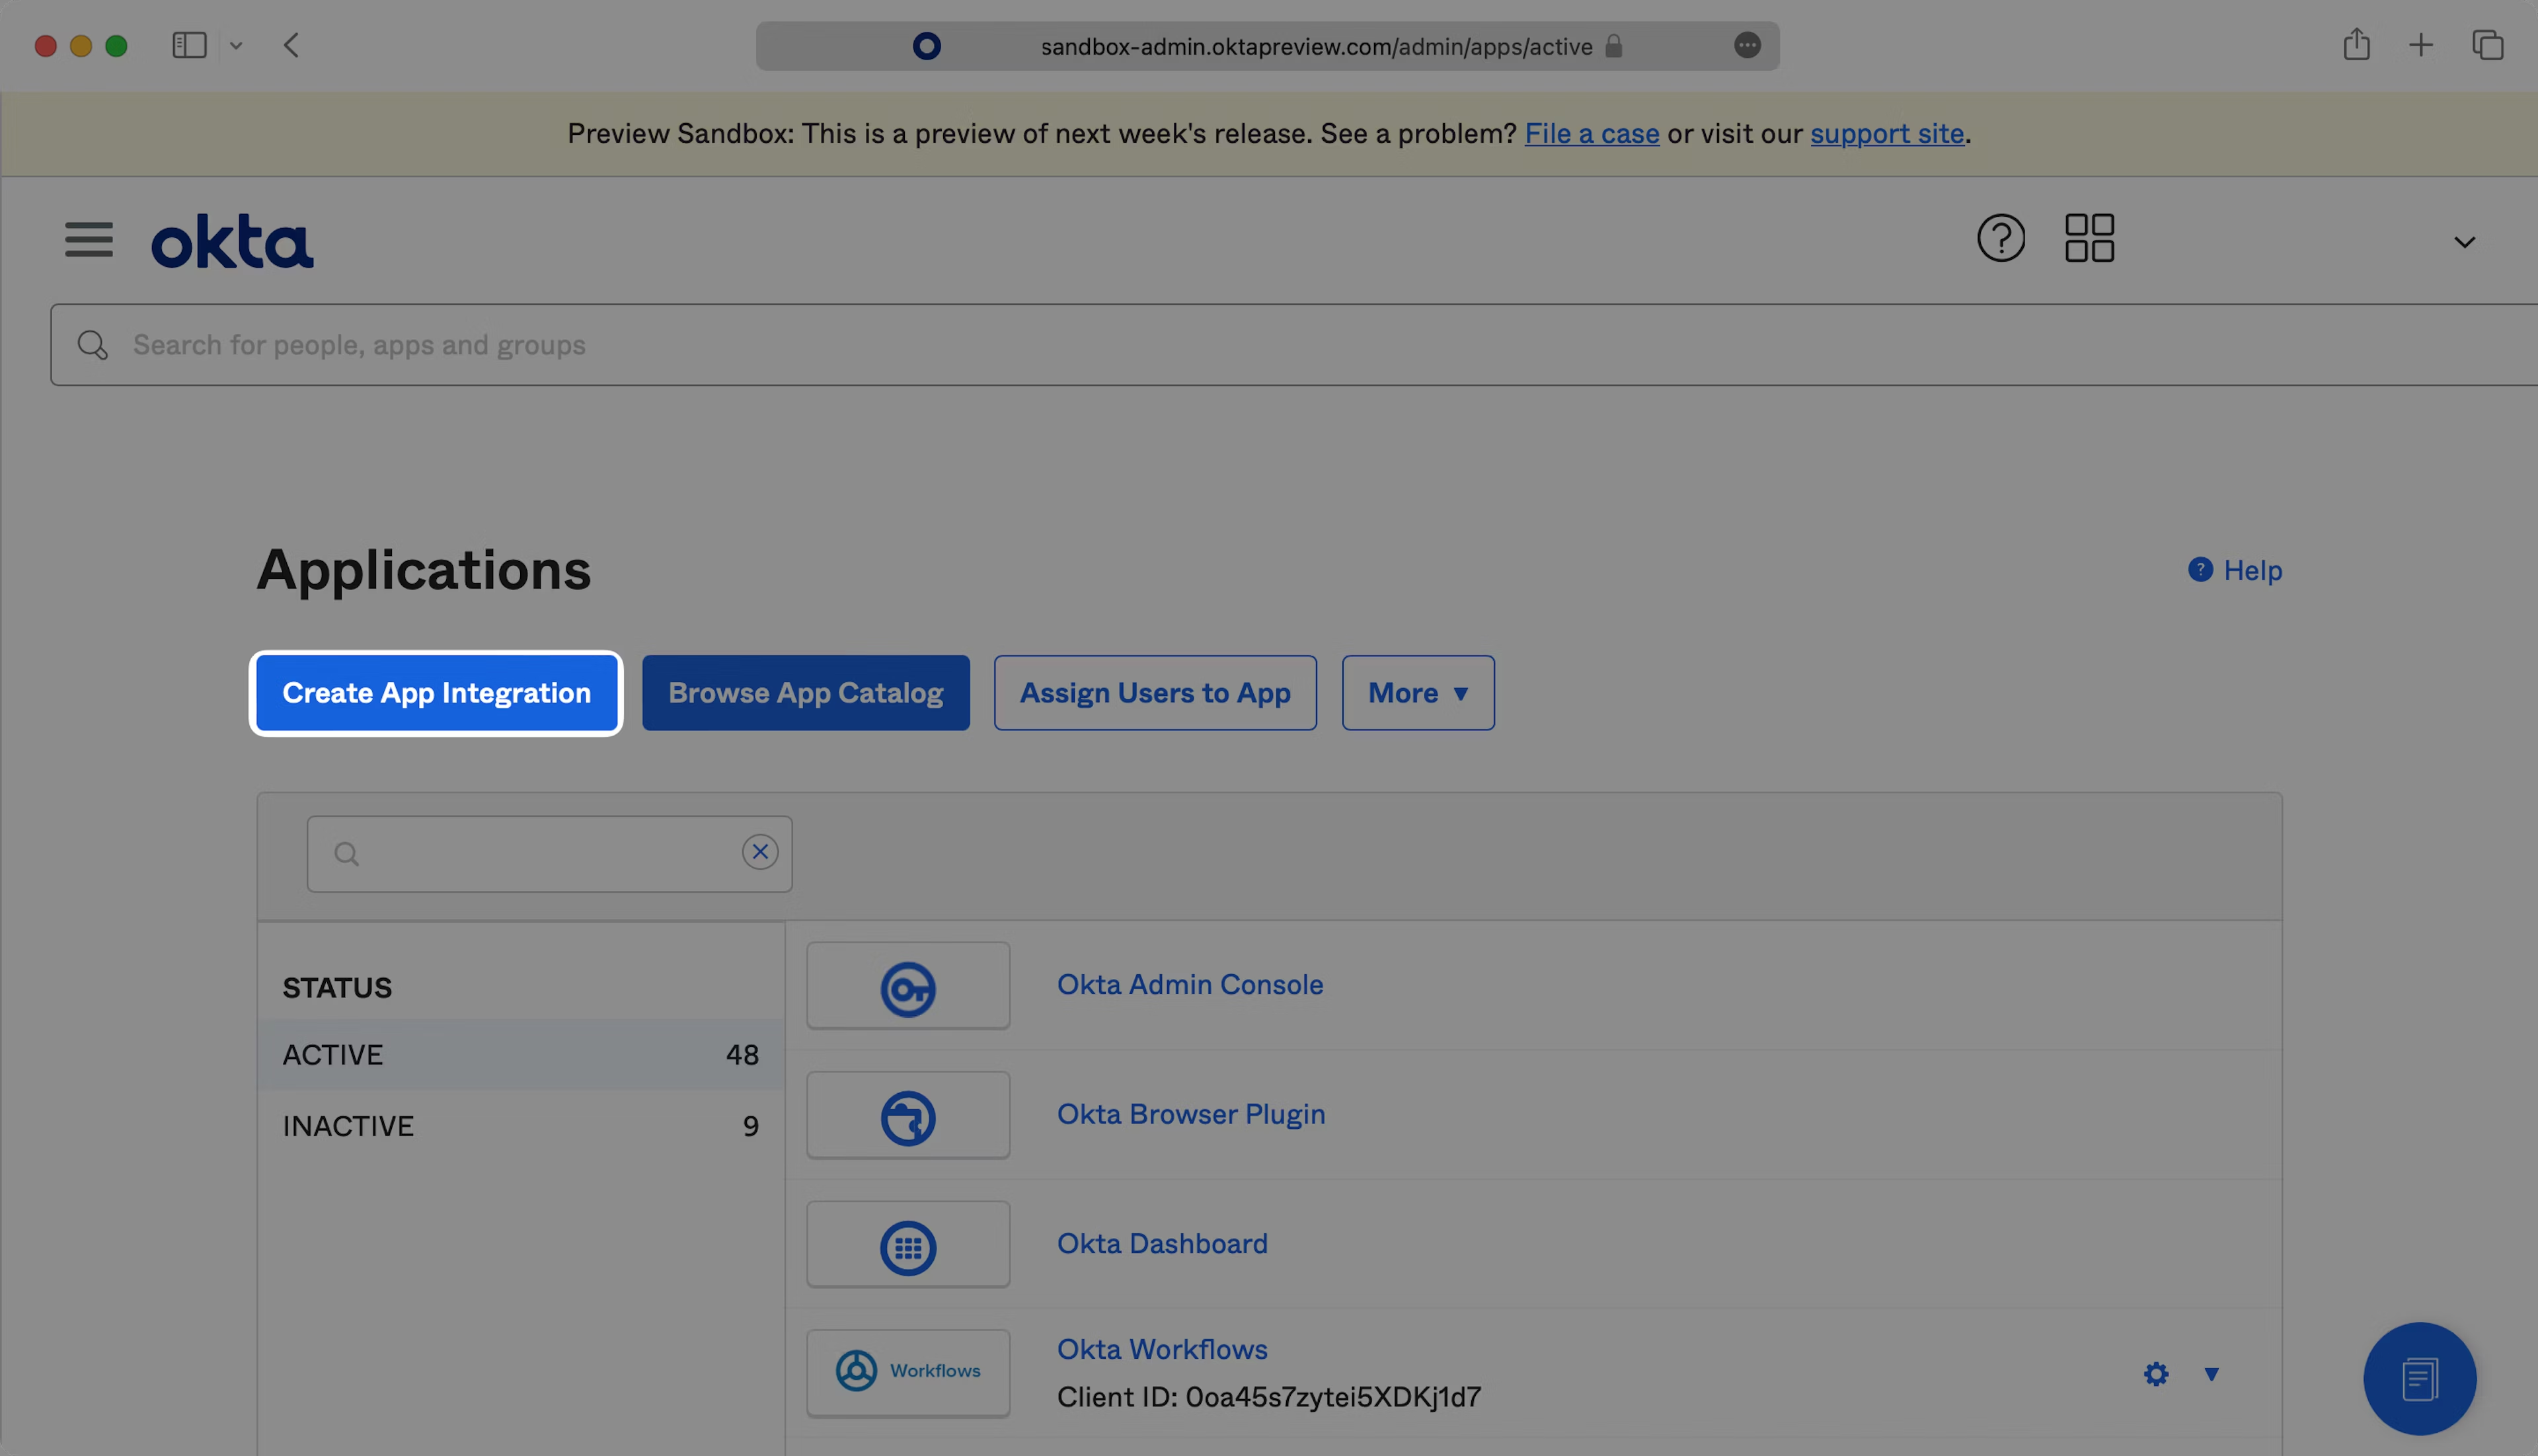
Click “Create App Integration”.
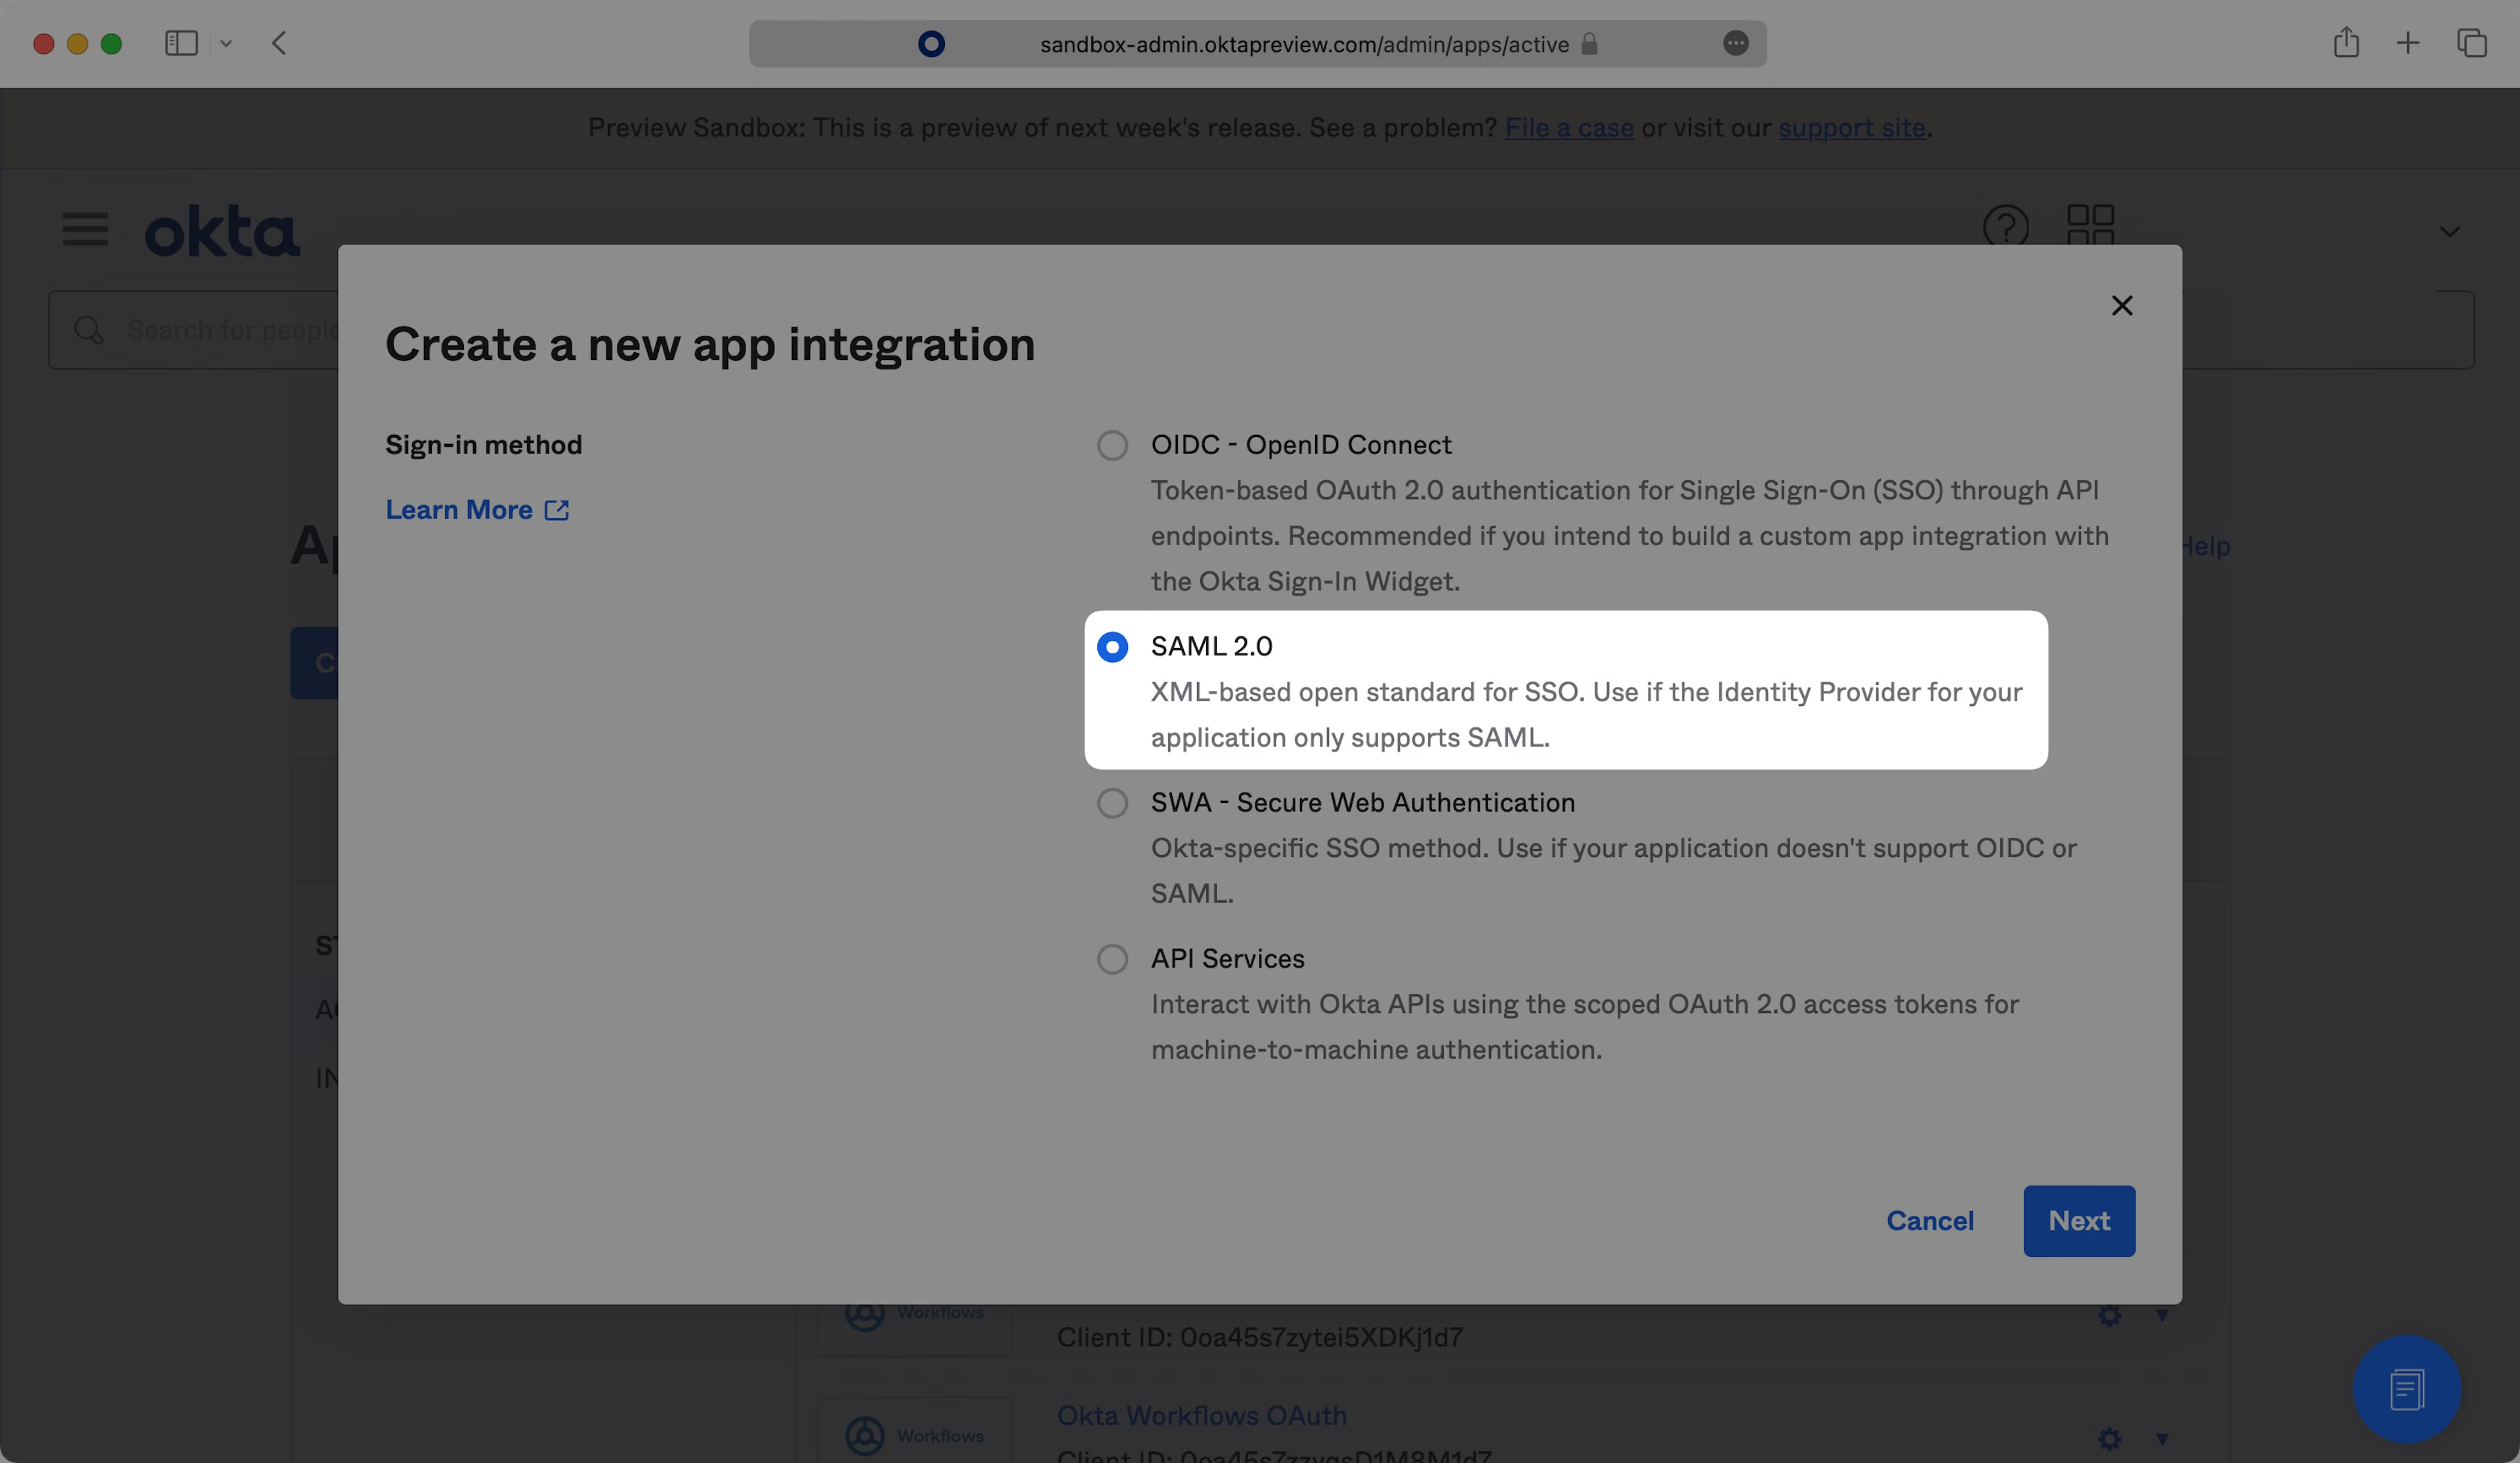
Select “Create New App”, then select “SAML 2.0” as a Sign on method, then click “Next”.
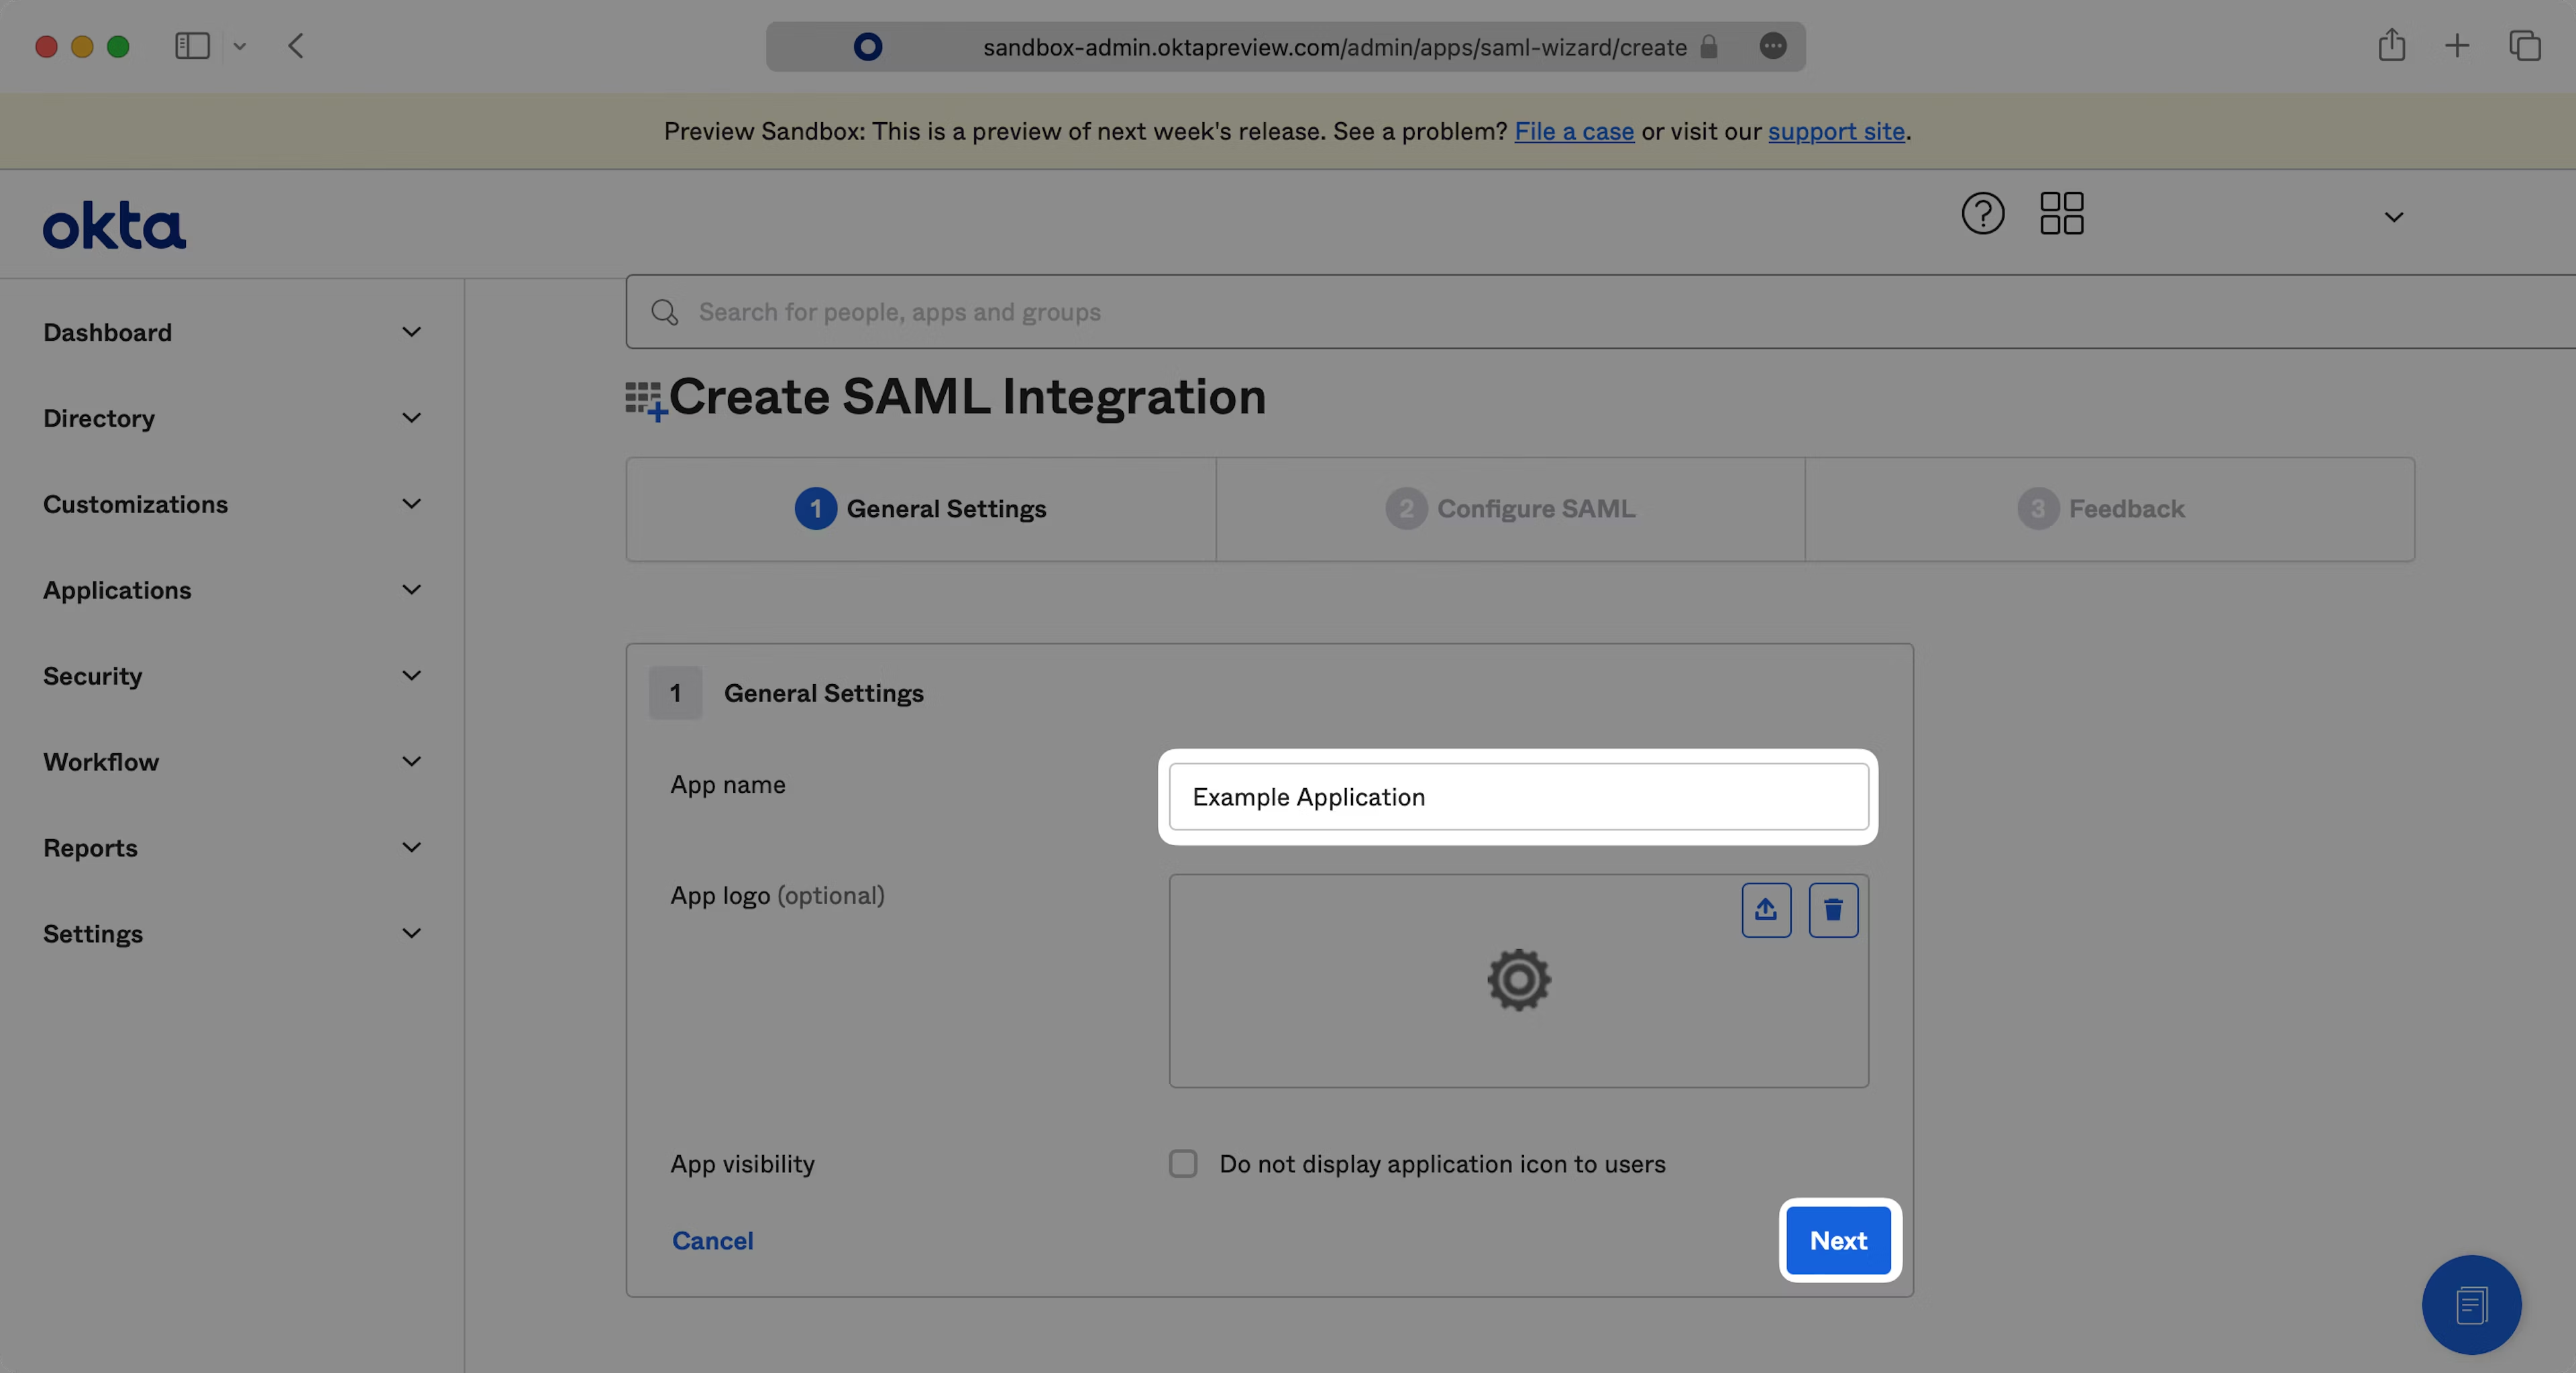
Enter an App name that describes Teaminal, then click “Next”.
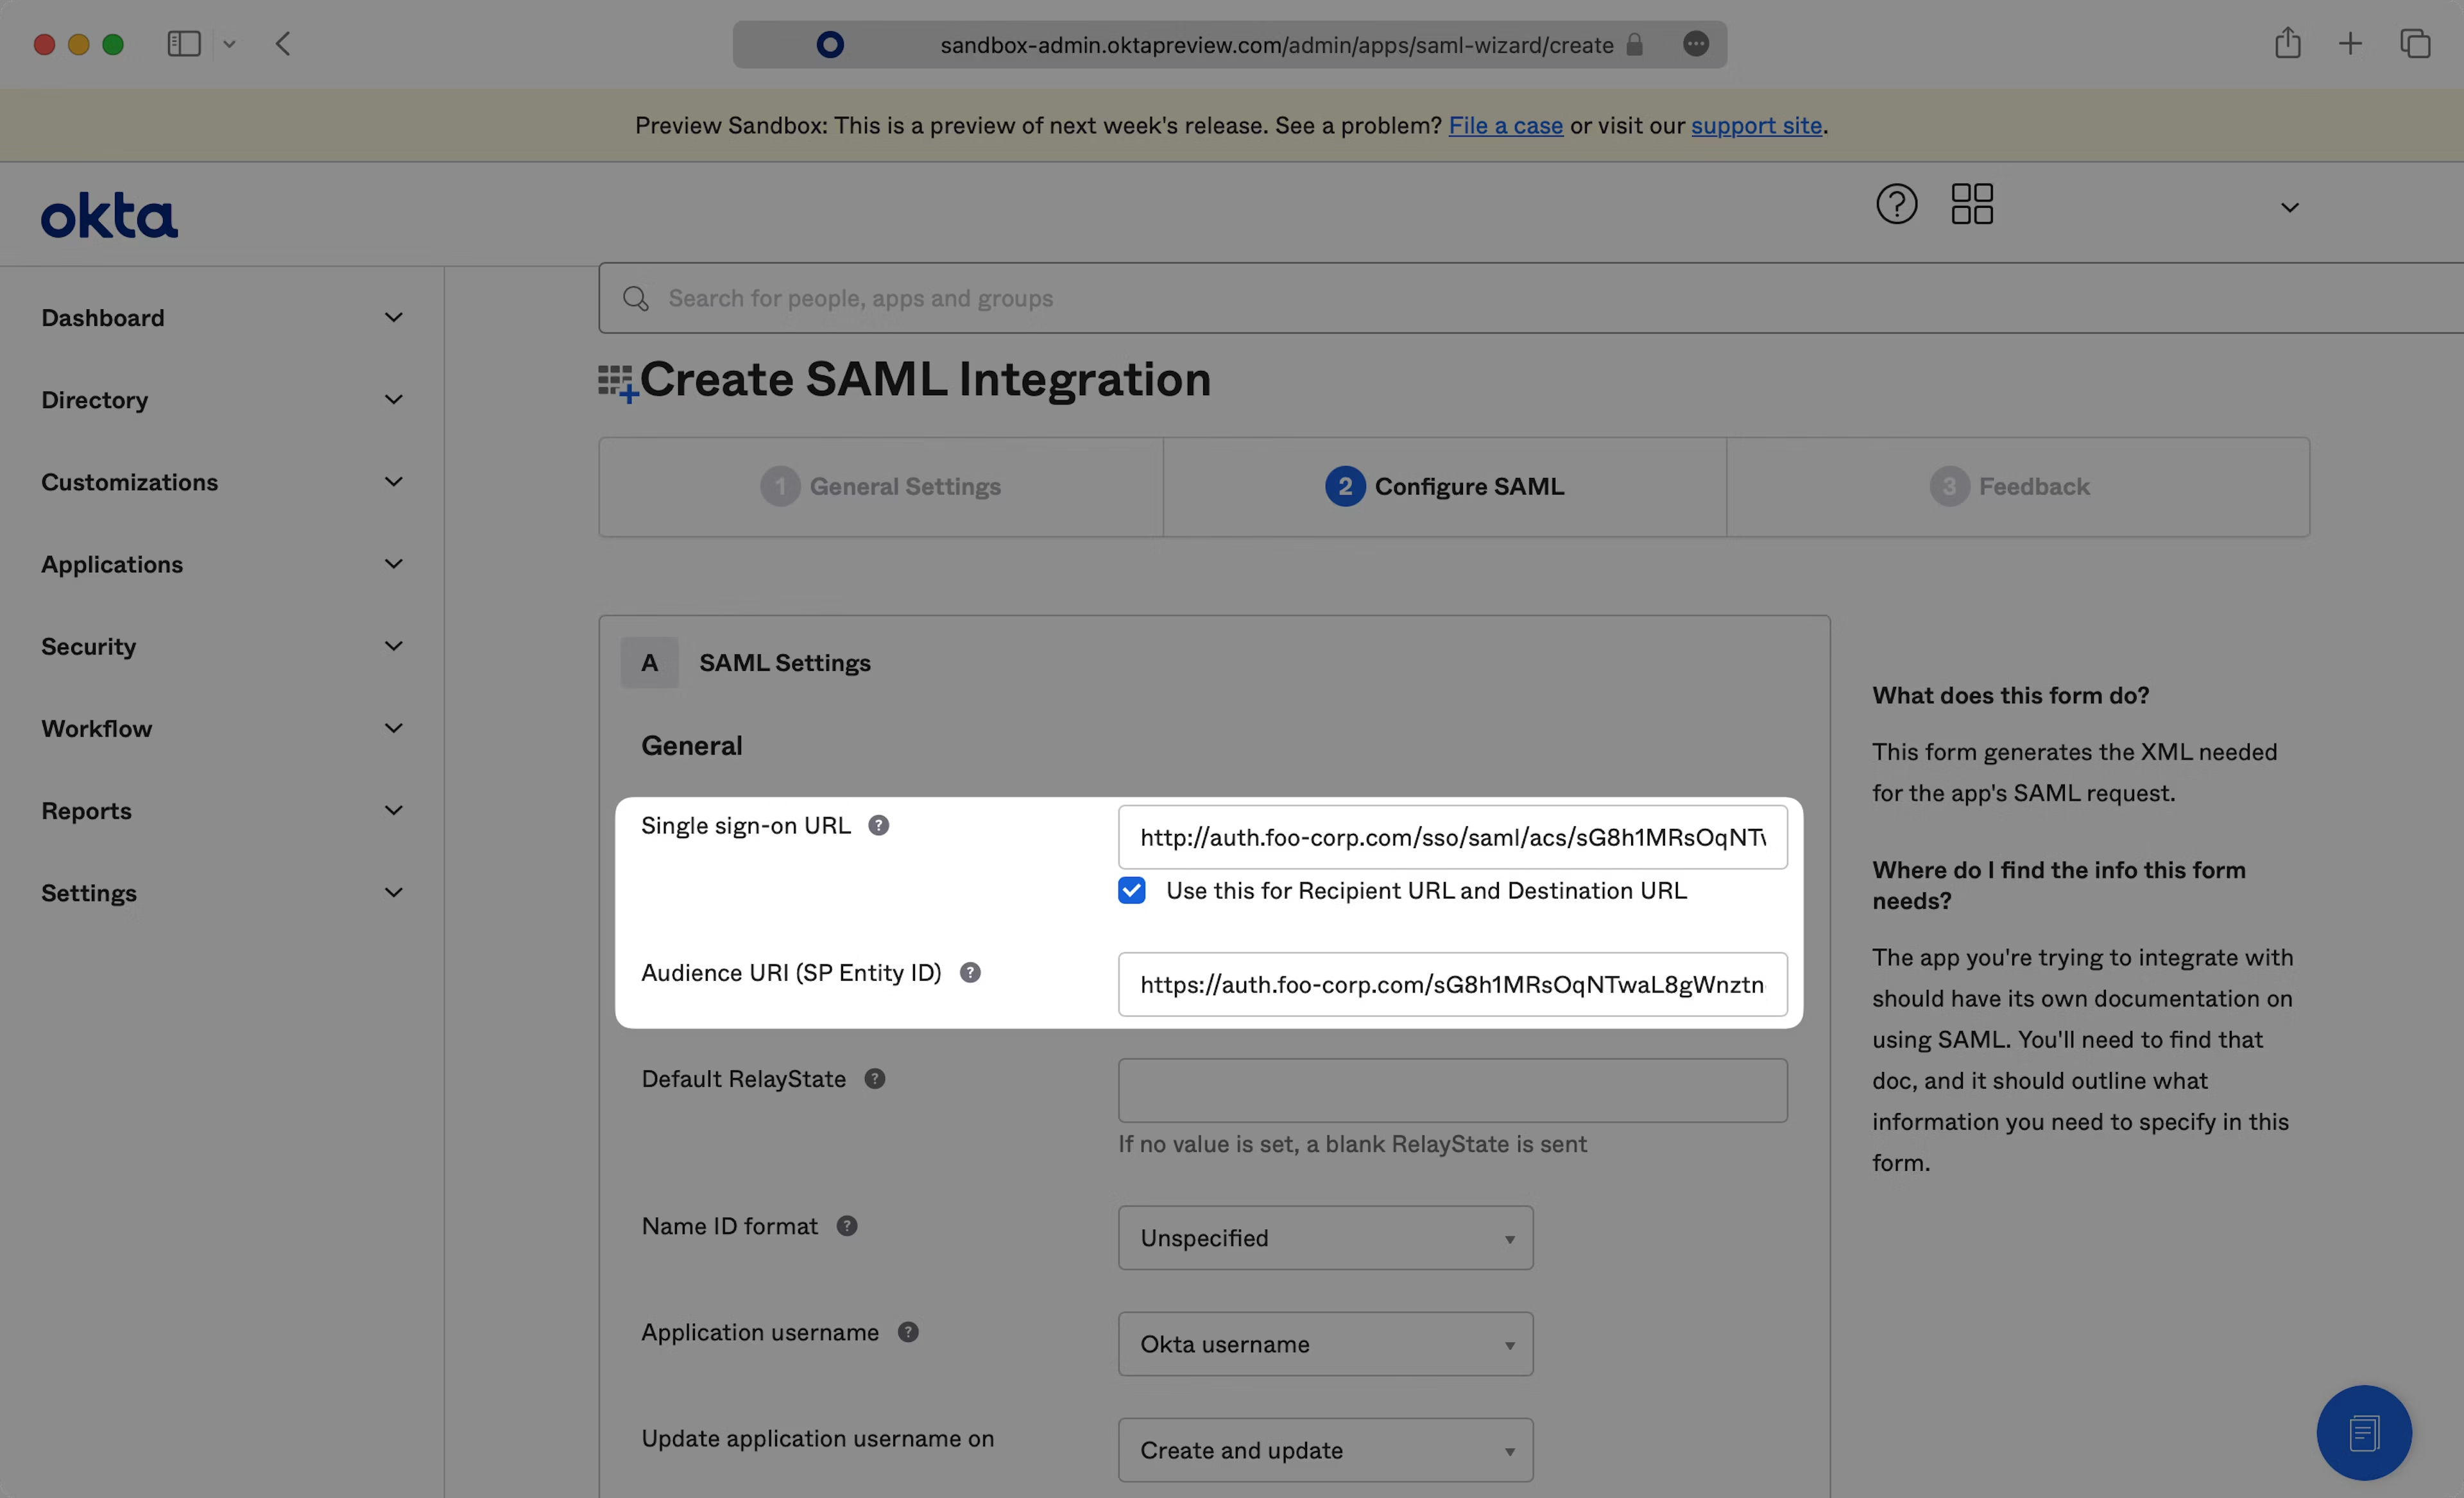
Copy the “Metadata URL” field from Teaminal’s SSO settings page into the “Single Sign-On URL” field in Okta.
Next, copy the “Assertion Consumer URL” from Teaminal’s SSO settings page and paste into the “Audience URI (SP Entity ID)” field.
Step 2: Configure Attribute Statements
Find Attribute Statements configuration in SAML Settings.
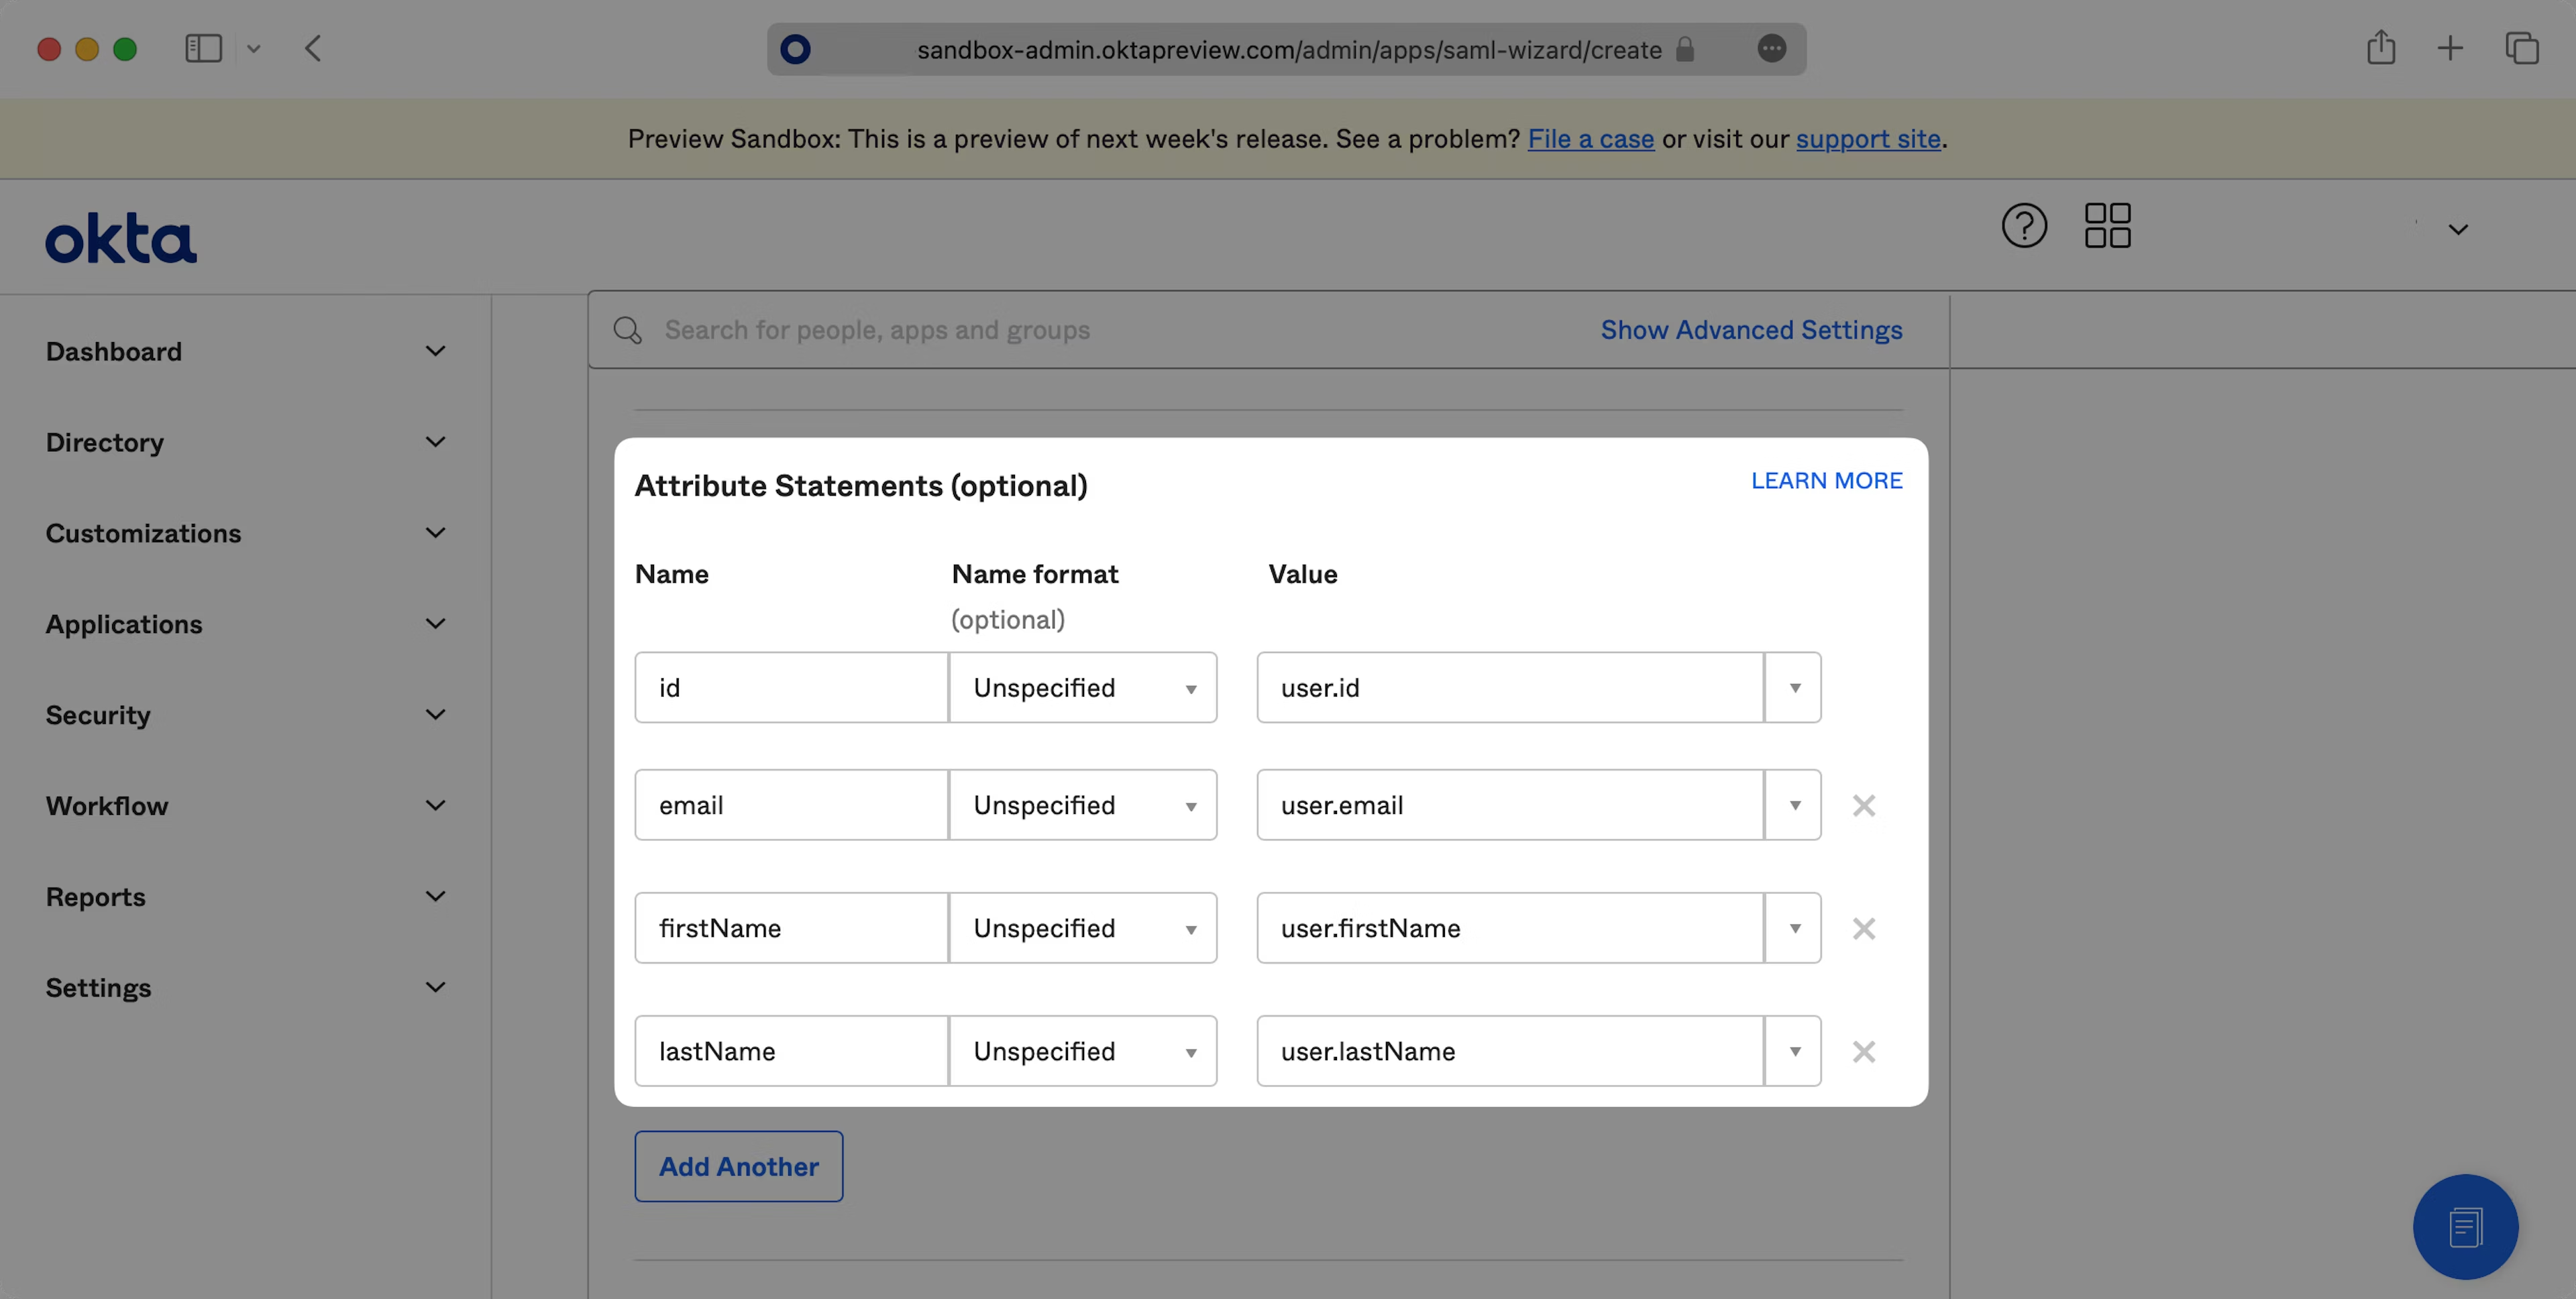
Fill in the Attribute Statements as seen above and click “Next”.
Step 3: Submit Application Feedback
Select “I’m an Okta customer adding an internal app” from the options menu.
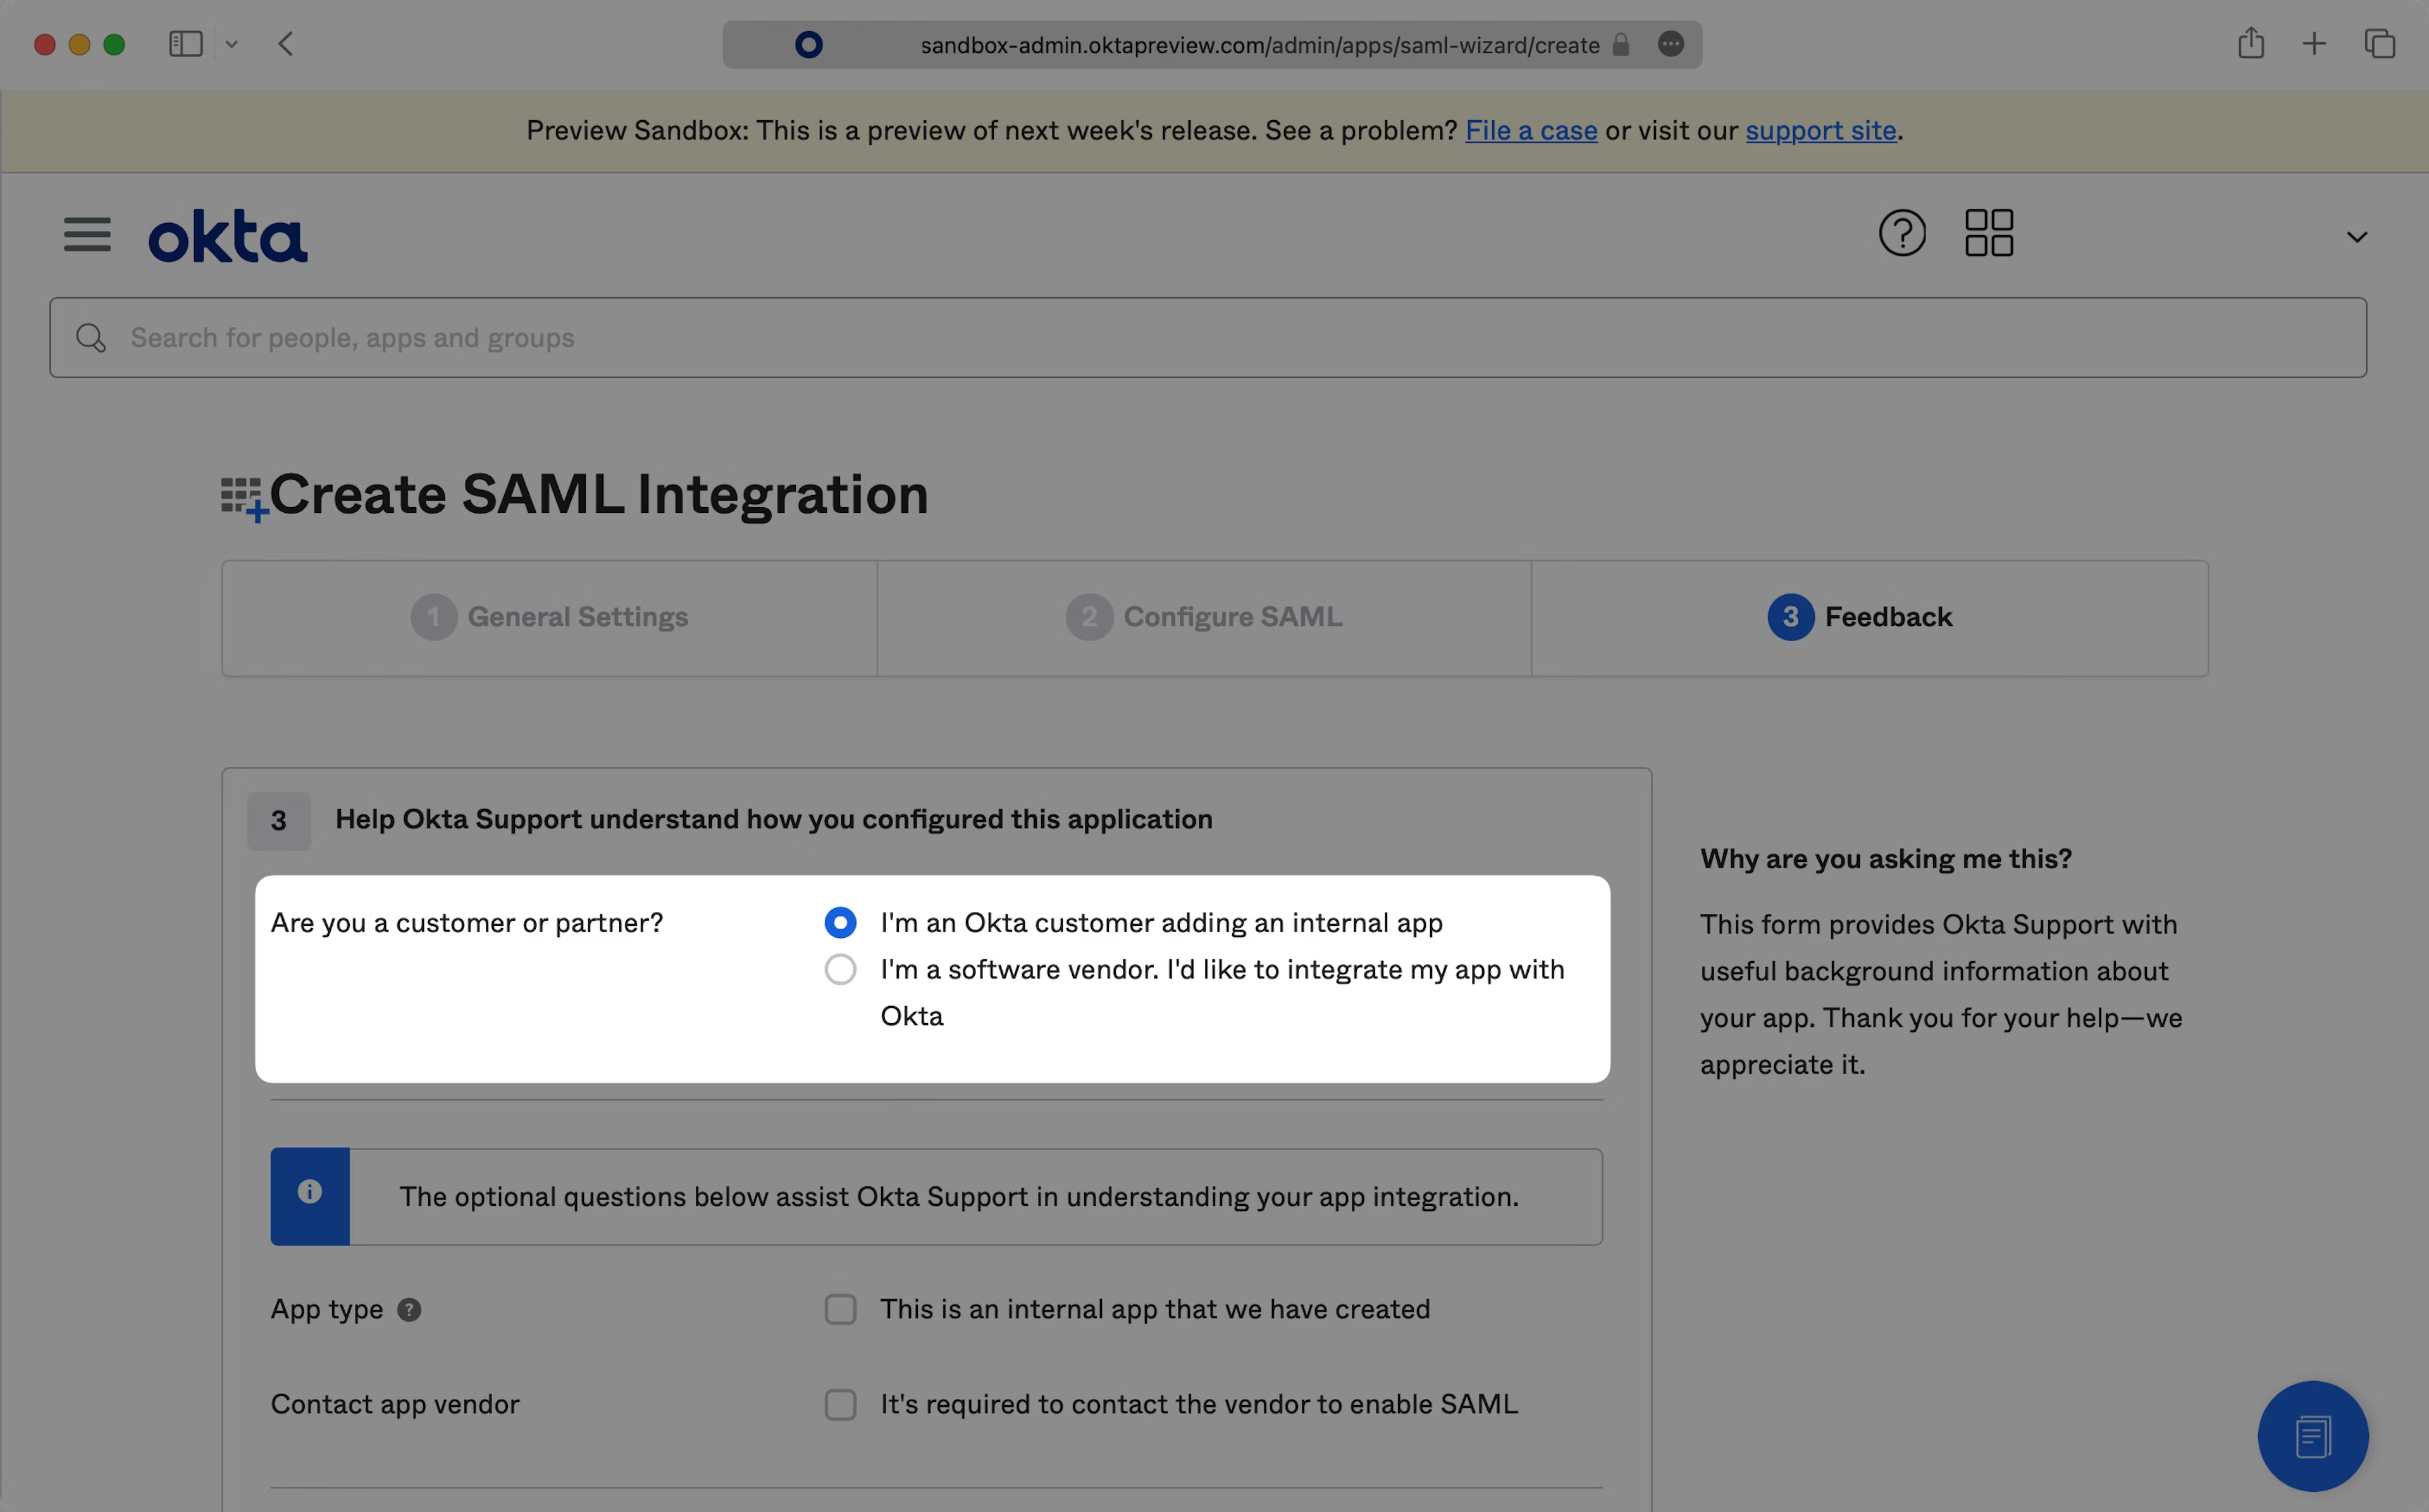
Complete the form with any comments and select “Finish”.
Step 4: Add Users to SAML App
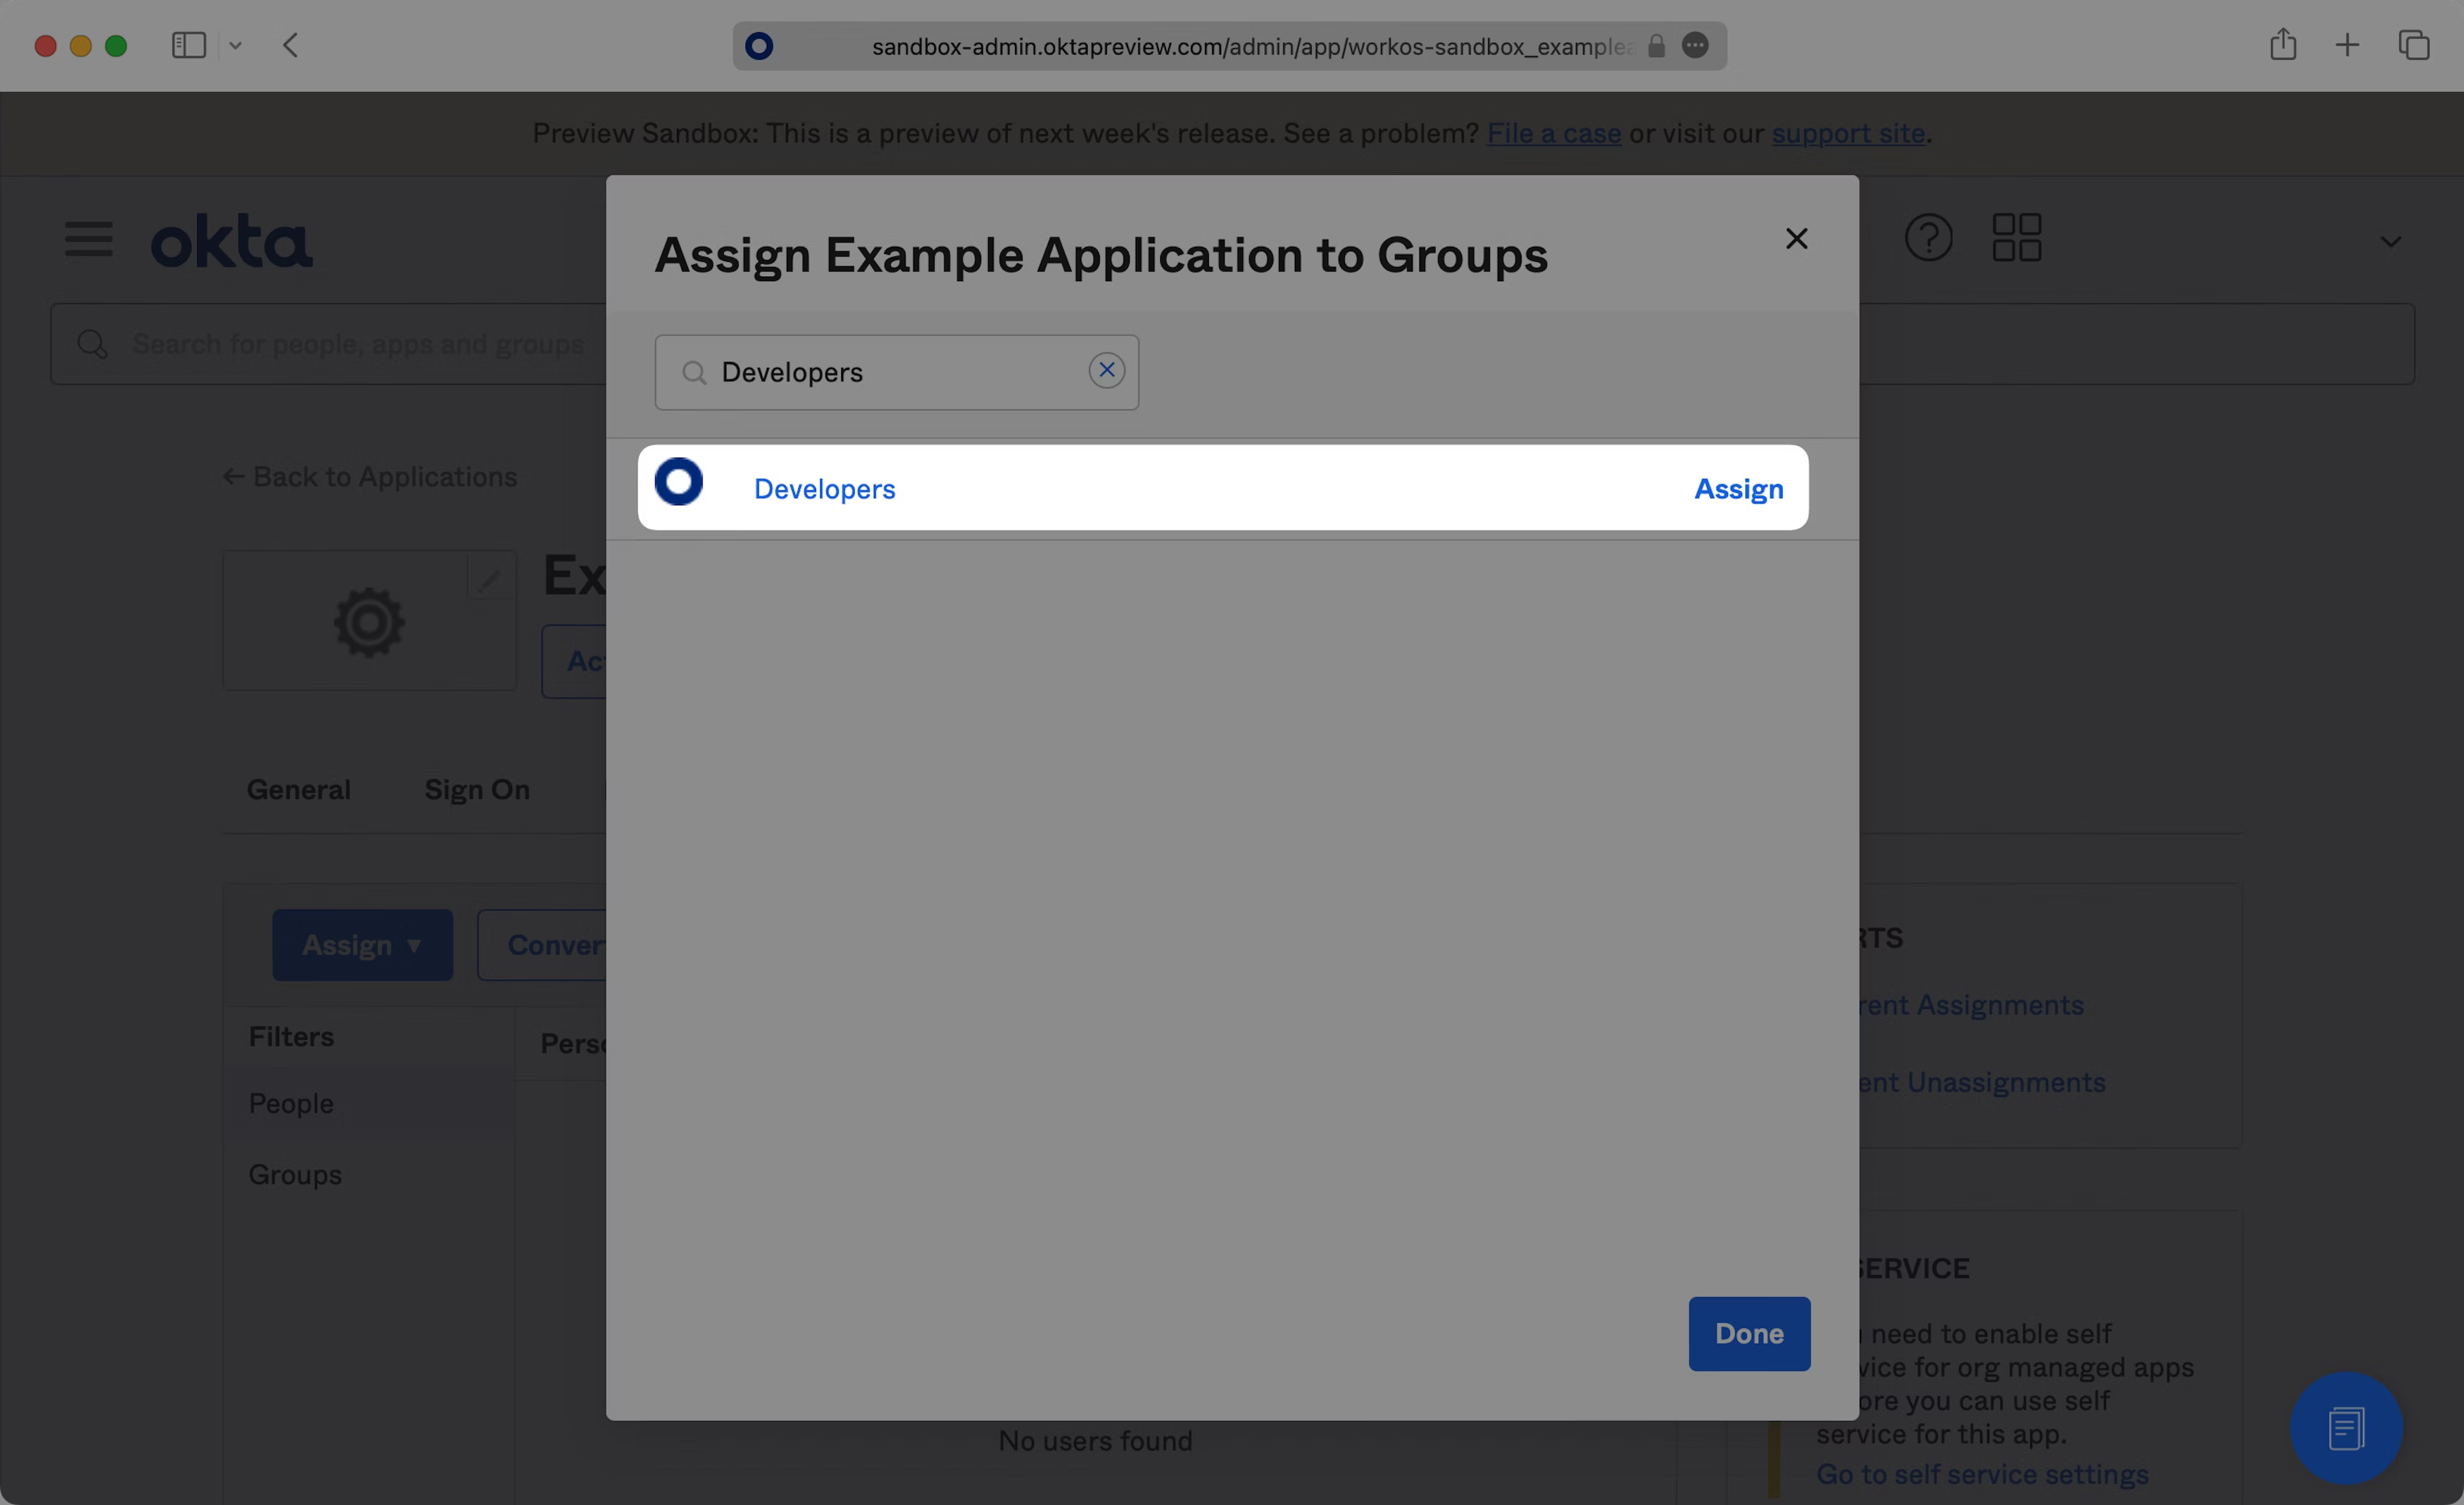
In order to test out SSO authentication, you will first need to assign your Okta SAML app to Groups.
Click on the “Assignments” tab of the app and then select “Assign to Groups”.
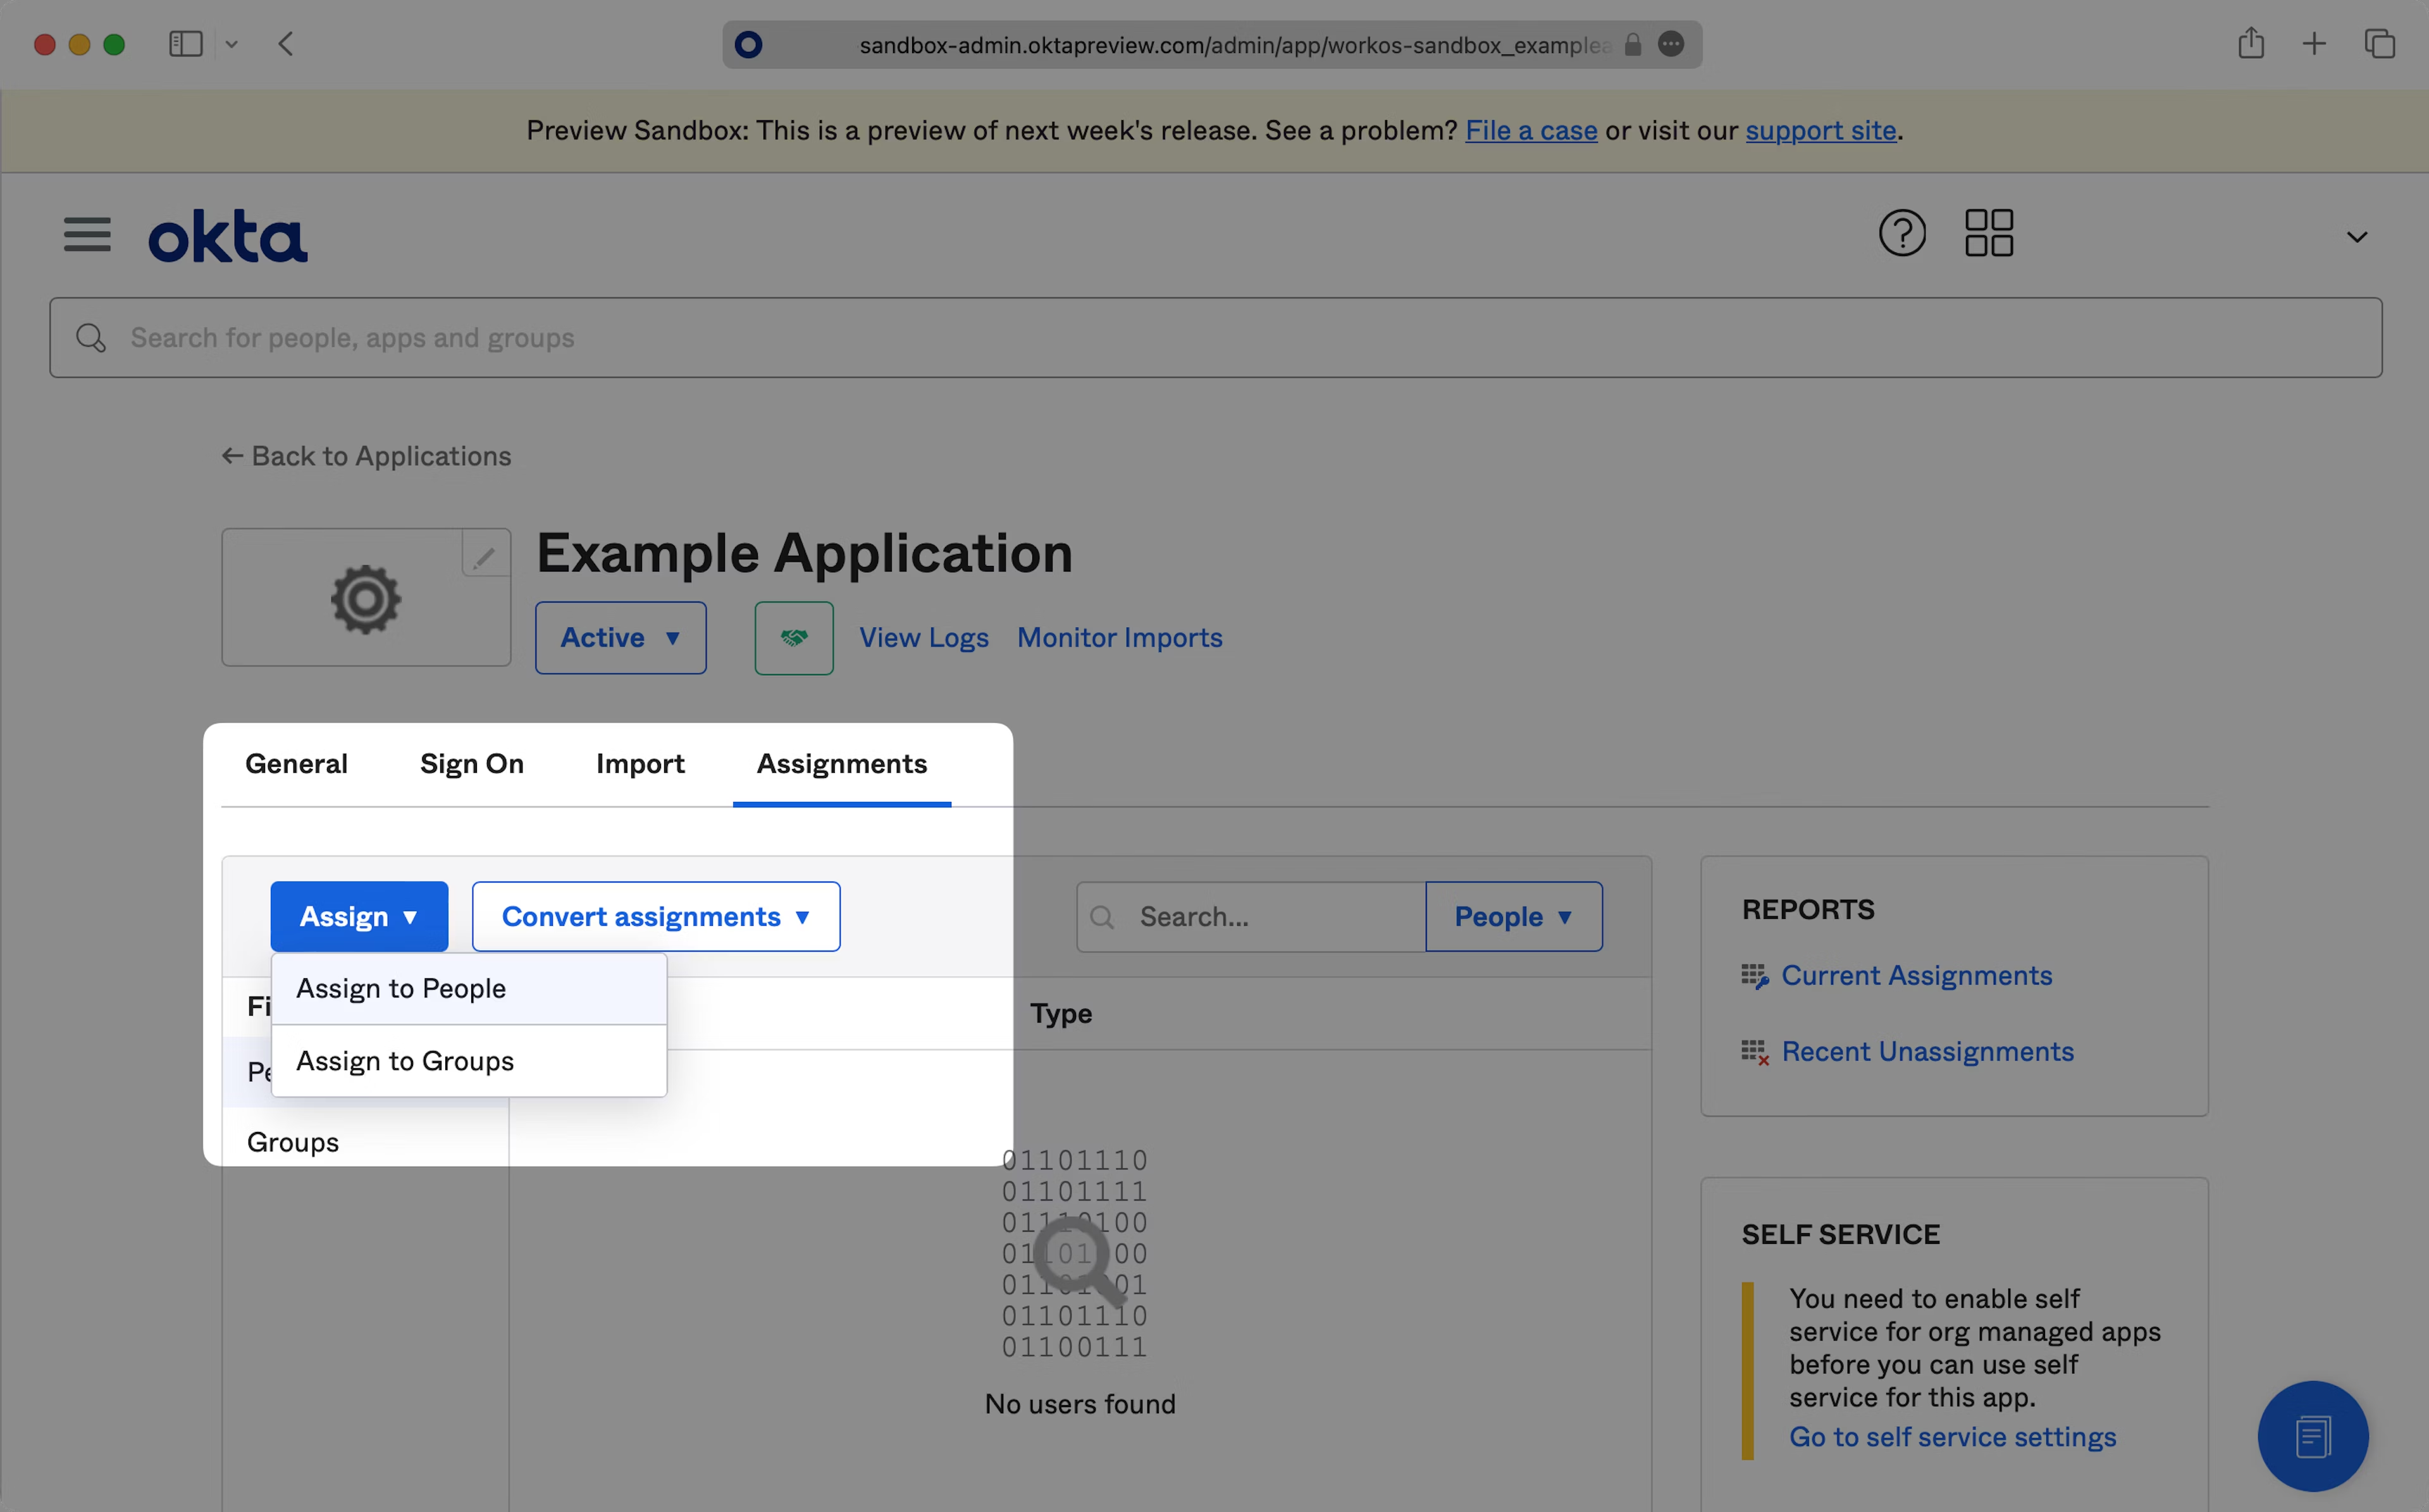
Find the Group(s) that you would like to assign to the app and click “Assign” next to it. Click “Done” when you’re finished.
Step 5: Upload Identity Provider Metadata
Click on the “Sign On” tab of the SAML app you just created and locate the “Metadata URL” under the “Metadata details”.
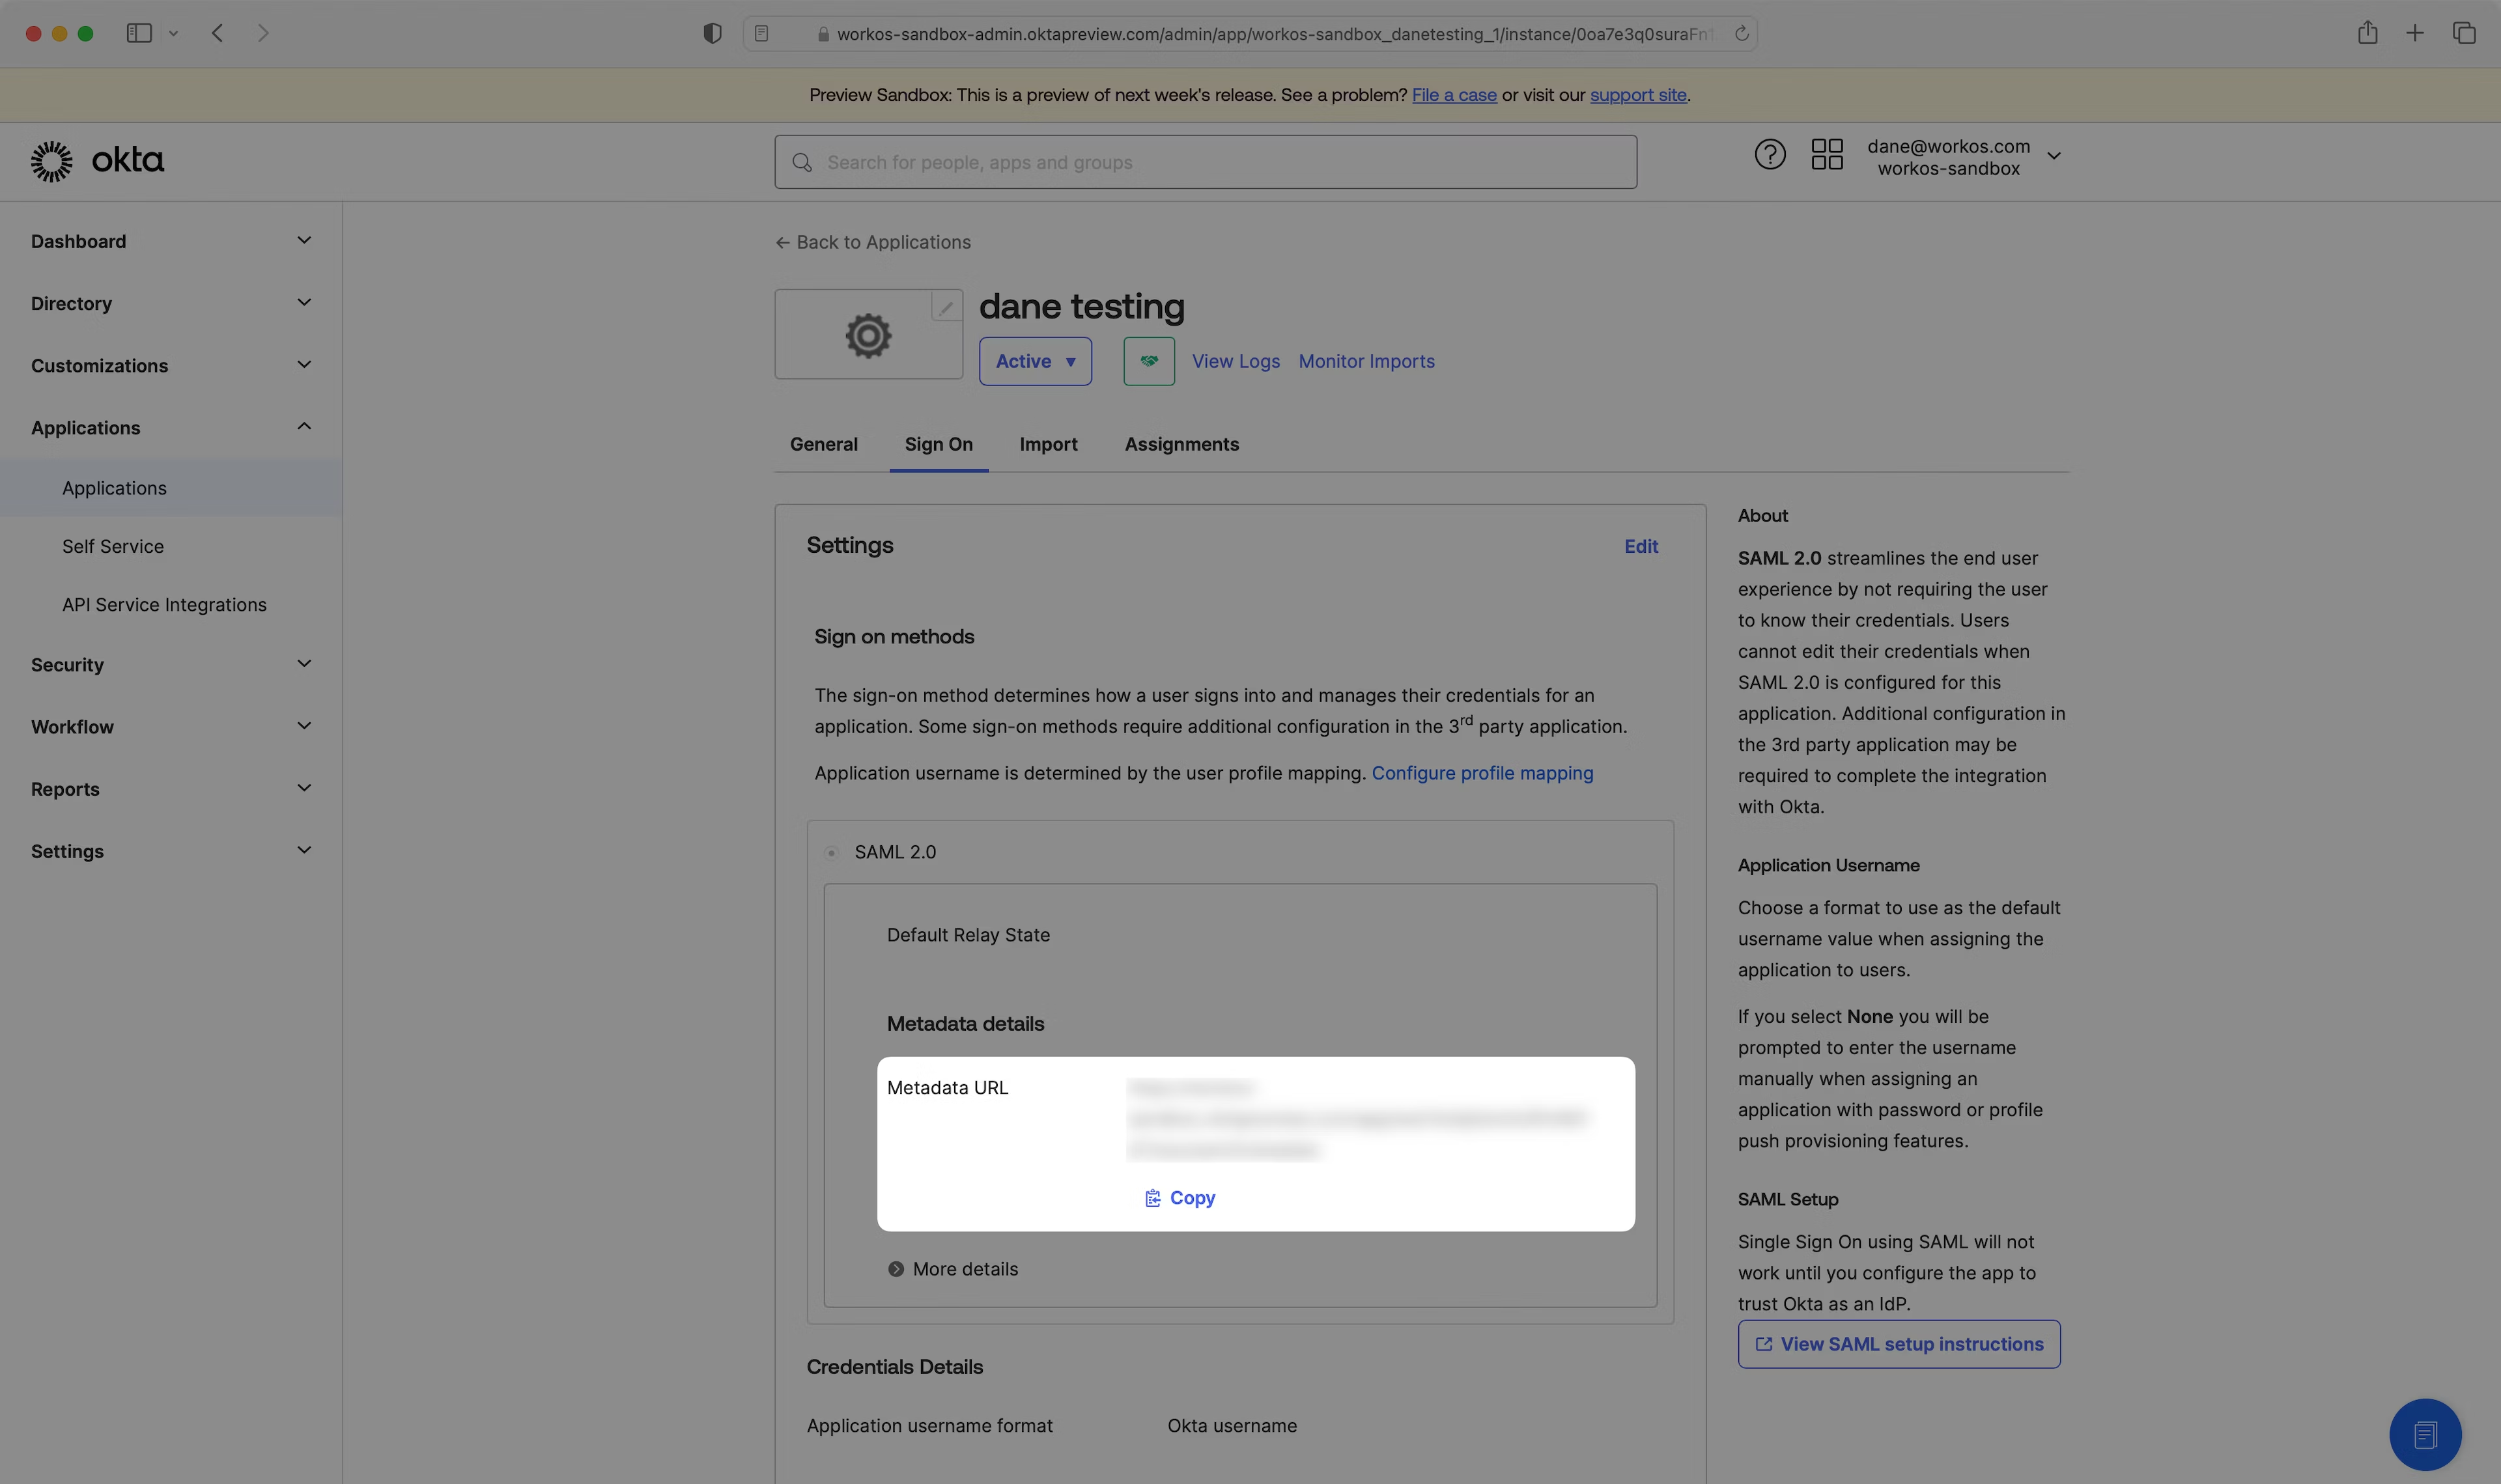
Select “Copy” to copy the link, then paste it into the “Identity Provider Metadata URL” field in Teaminal’s SSO settings page and save it
Step 6: Save and Test
Click “Save” at the bottom of the page to save your settings. To test the connection, navigate to the applications page in Okta and try to log in to Teaminal.
If you have any issues, please reach out to [email protected] for support..